Create a rollout
Open Rollouts from the left navigation and click the + icon in the header.
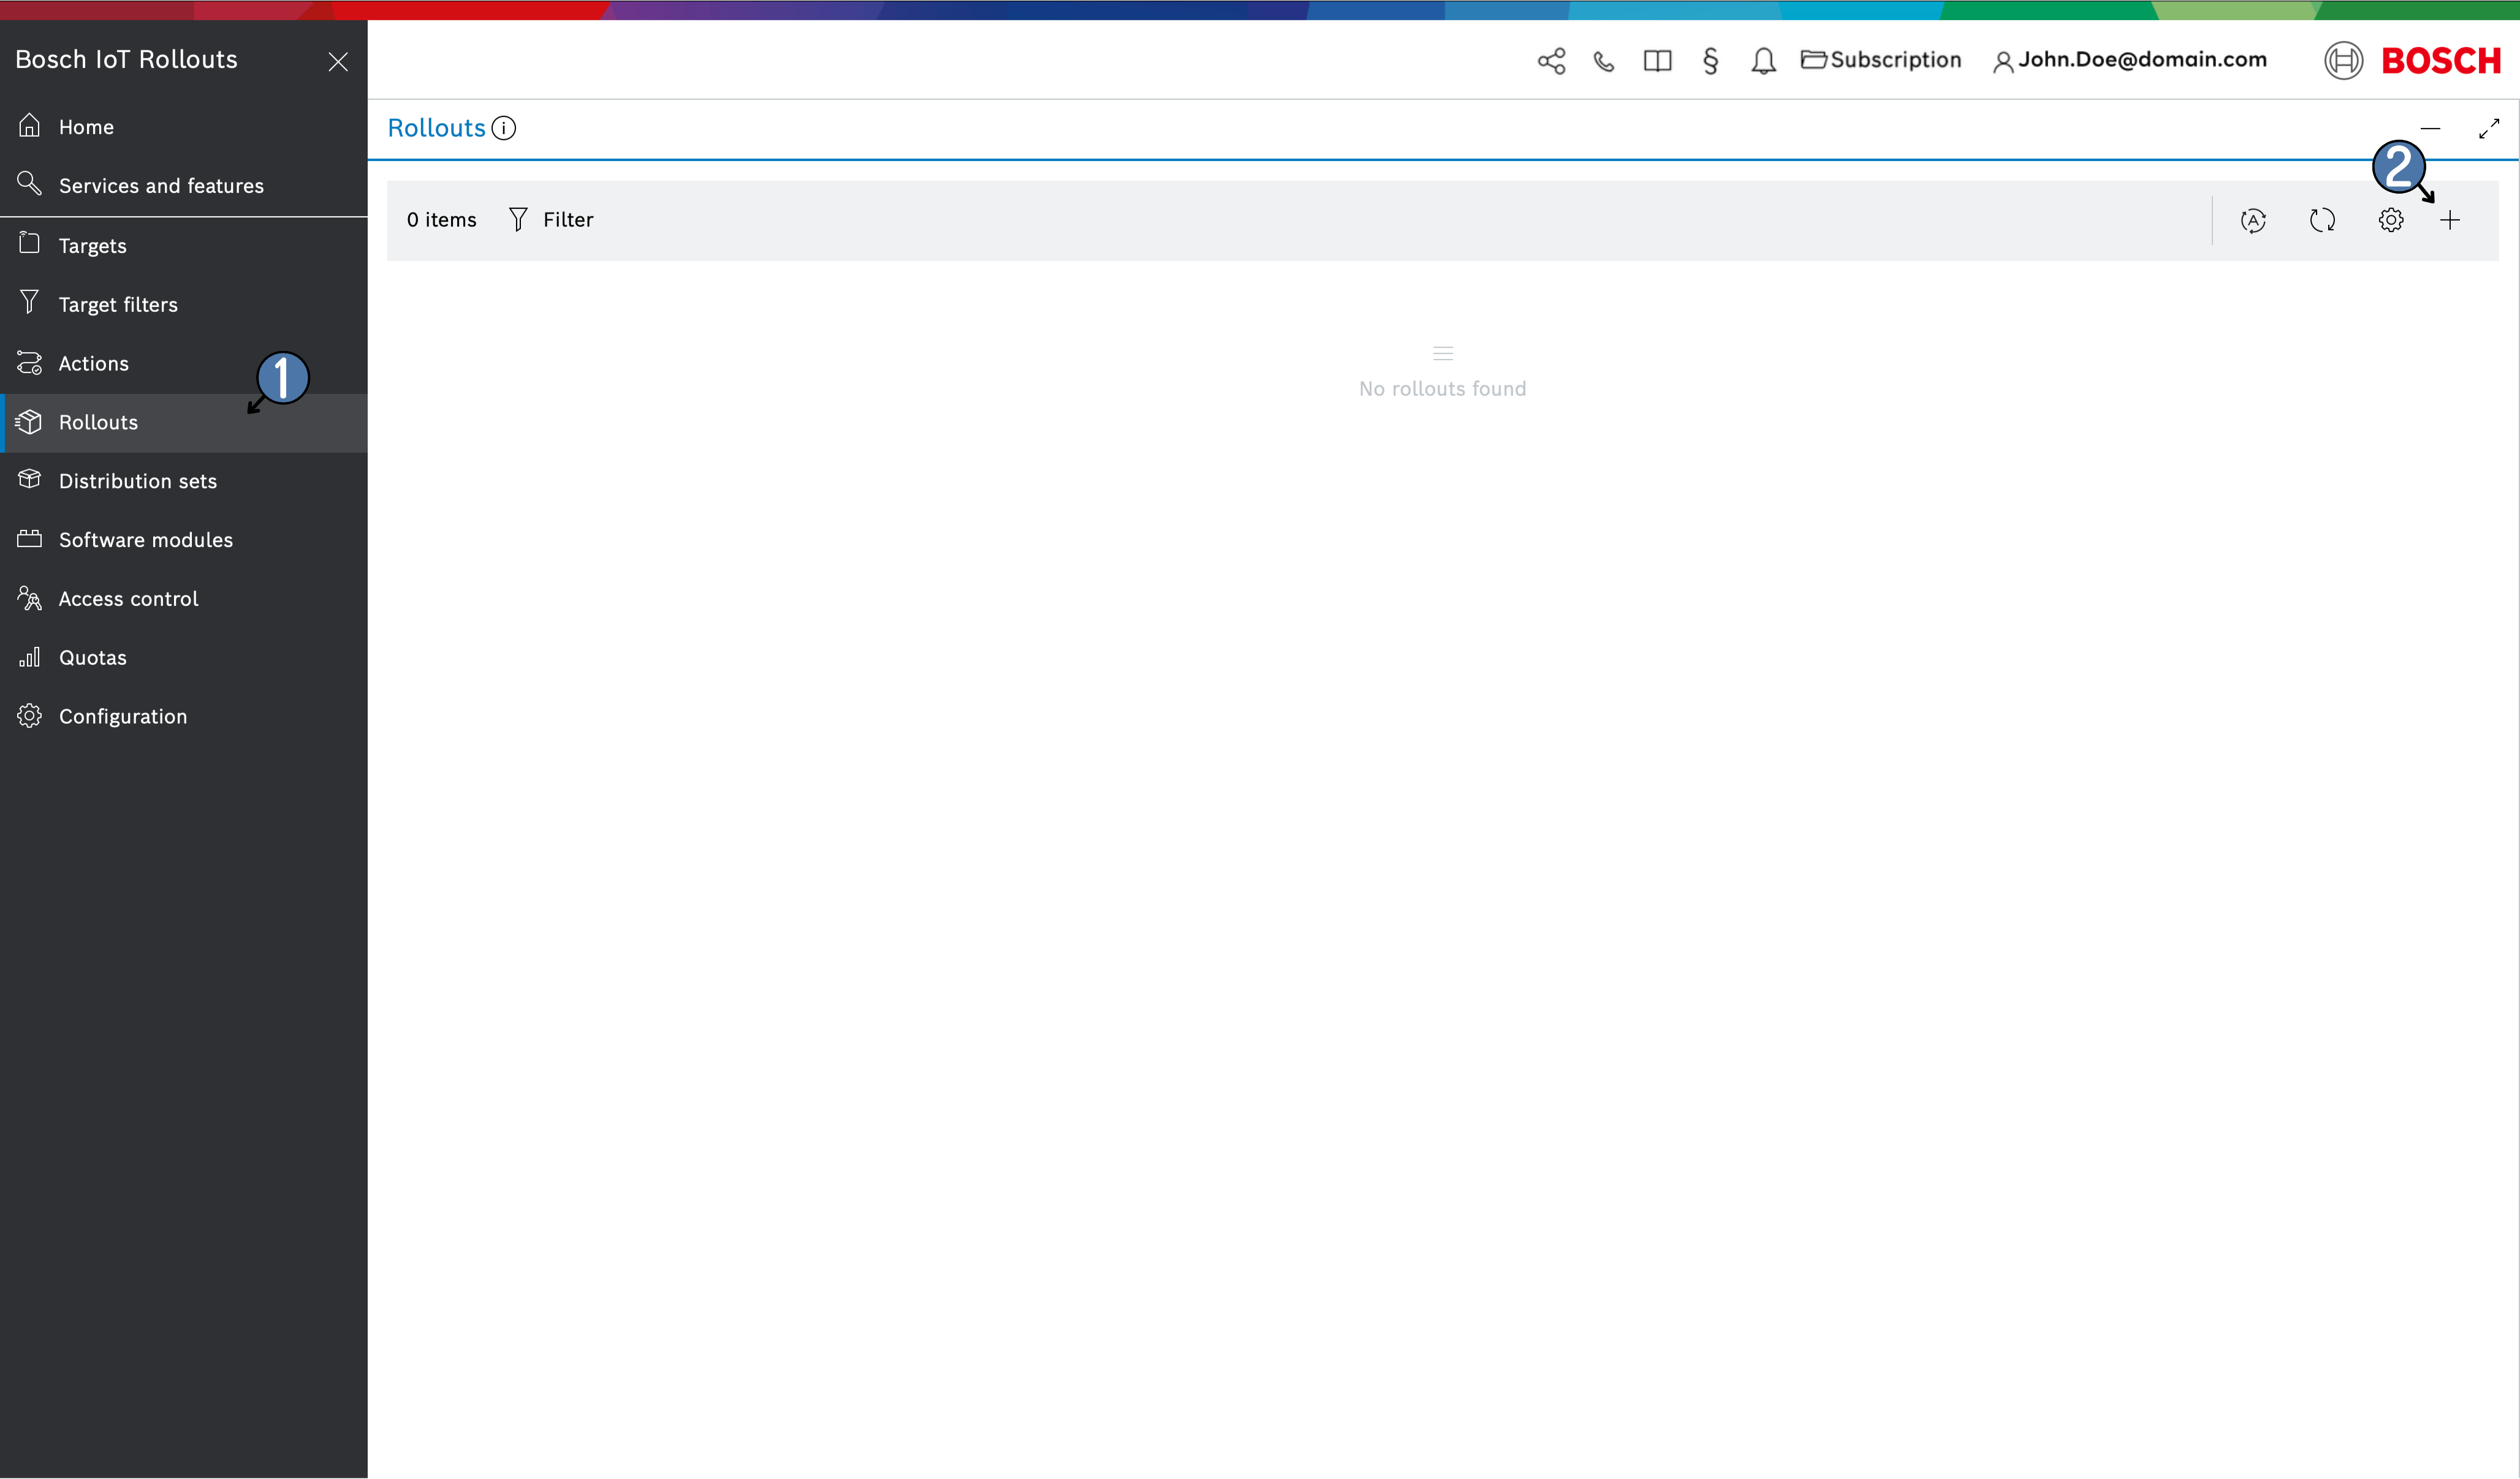
This opens the Create rollout wizard with the following steps:
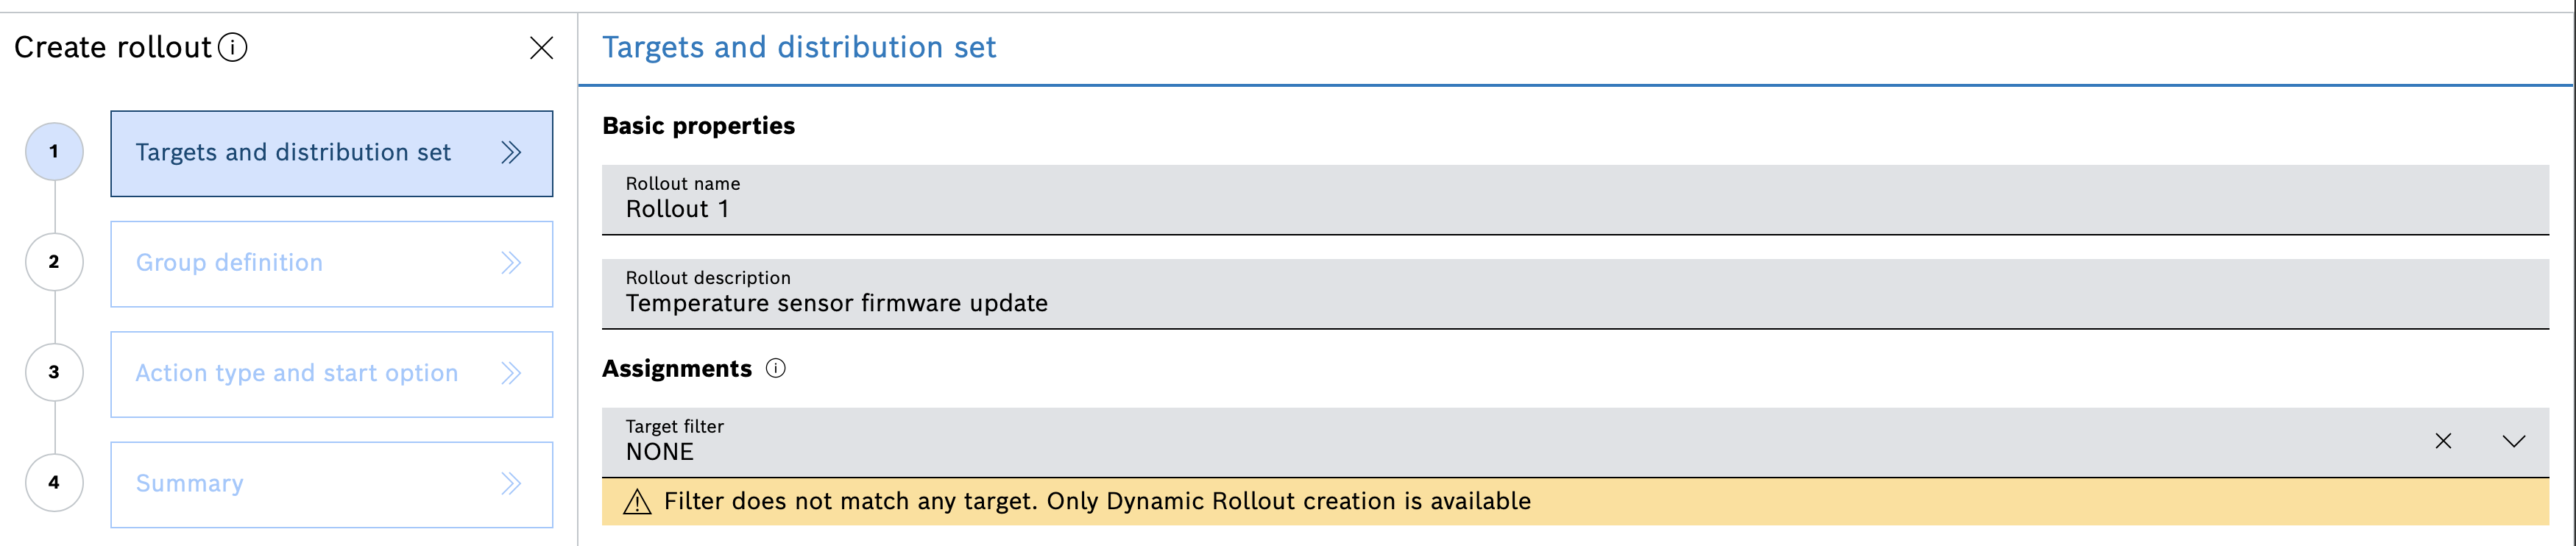
Targets and distribution set
On the first wizard dialog, specify the:
Basic properties
Rollout name - enter a name for the rollout which is unique in the context of your tenant
Rollout description - enter an optional description of the rollout campaign
Assignments
Target filter - select one of the existing target filters from the drop-down or start typing in the field to execute a search
Prior to this step you should have created at least one target filter to be able to continue the rollout creation process.
An exception is when you have selected the targets manually. In that cases, this field will be filled in automatically with Filter for selected targets.
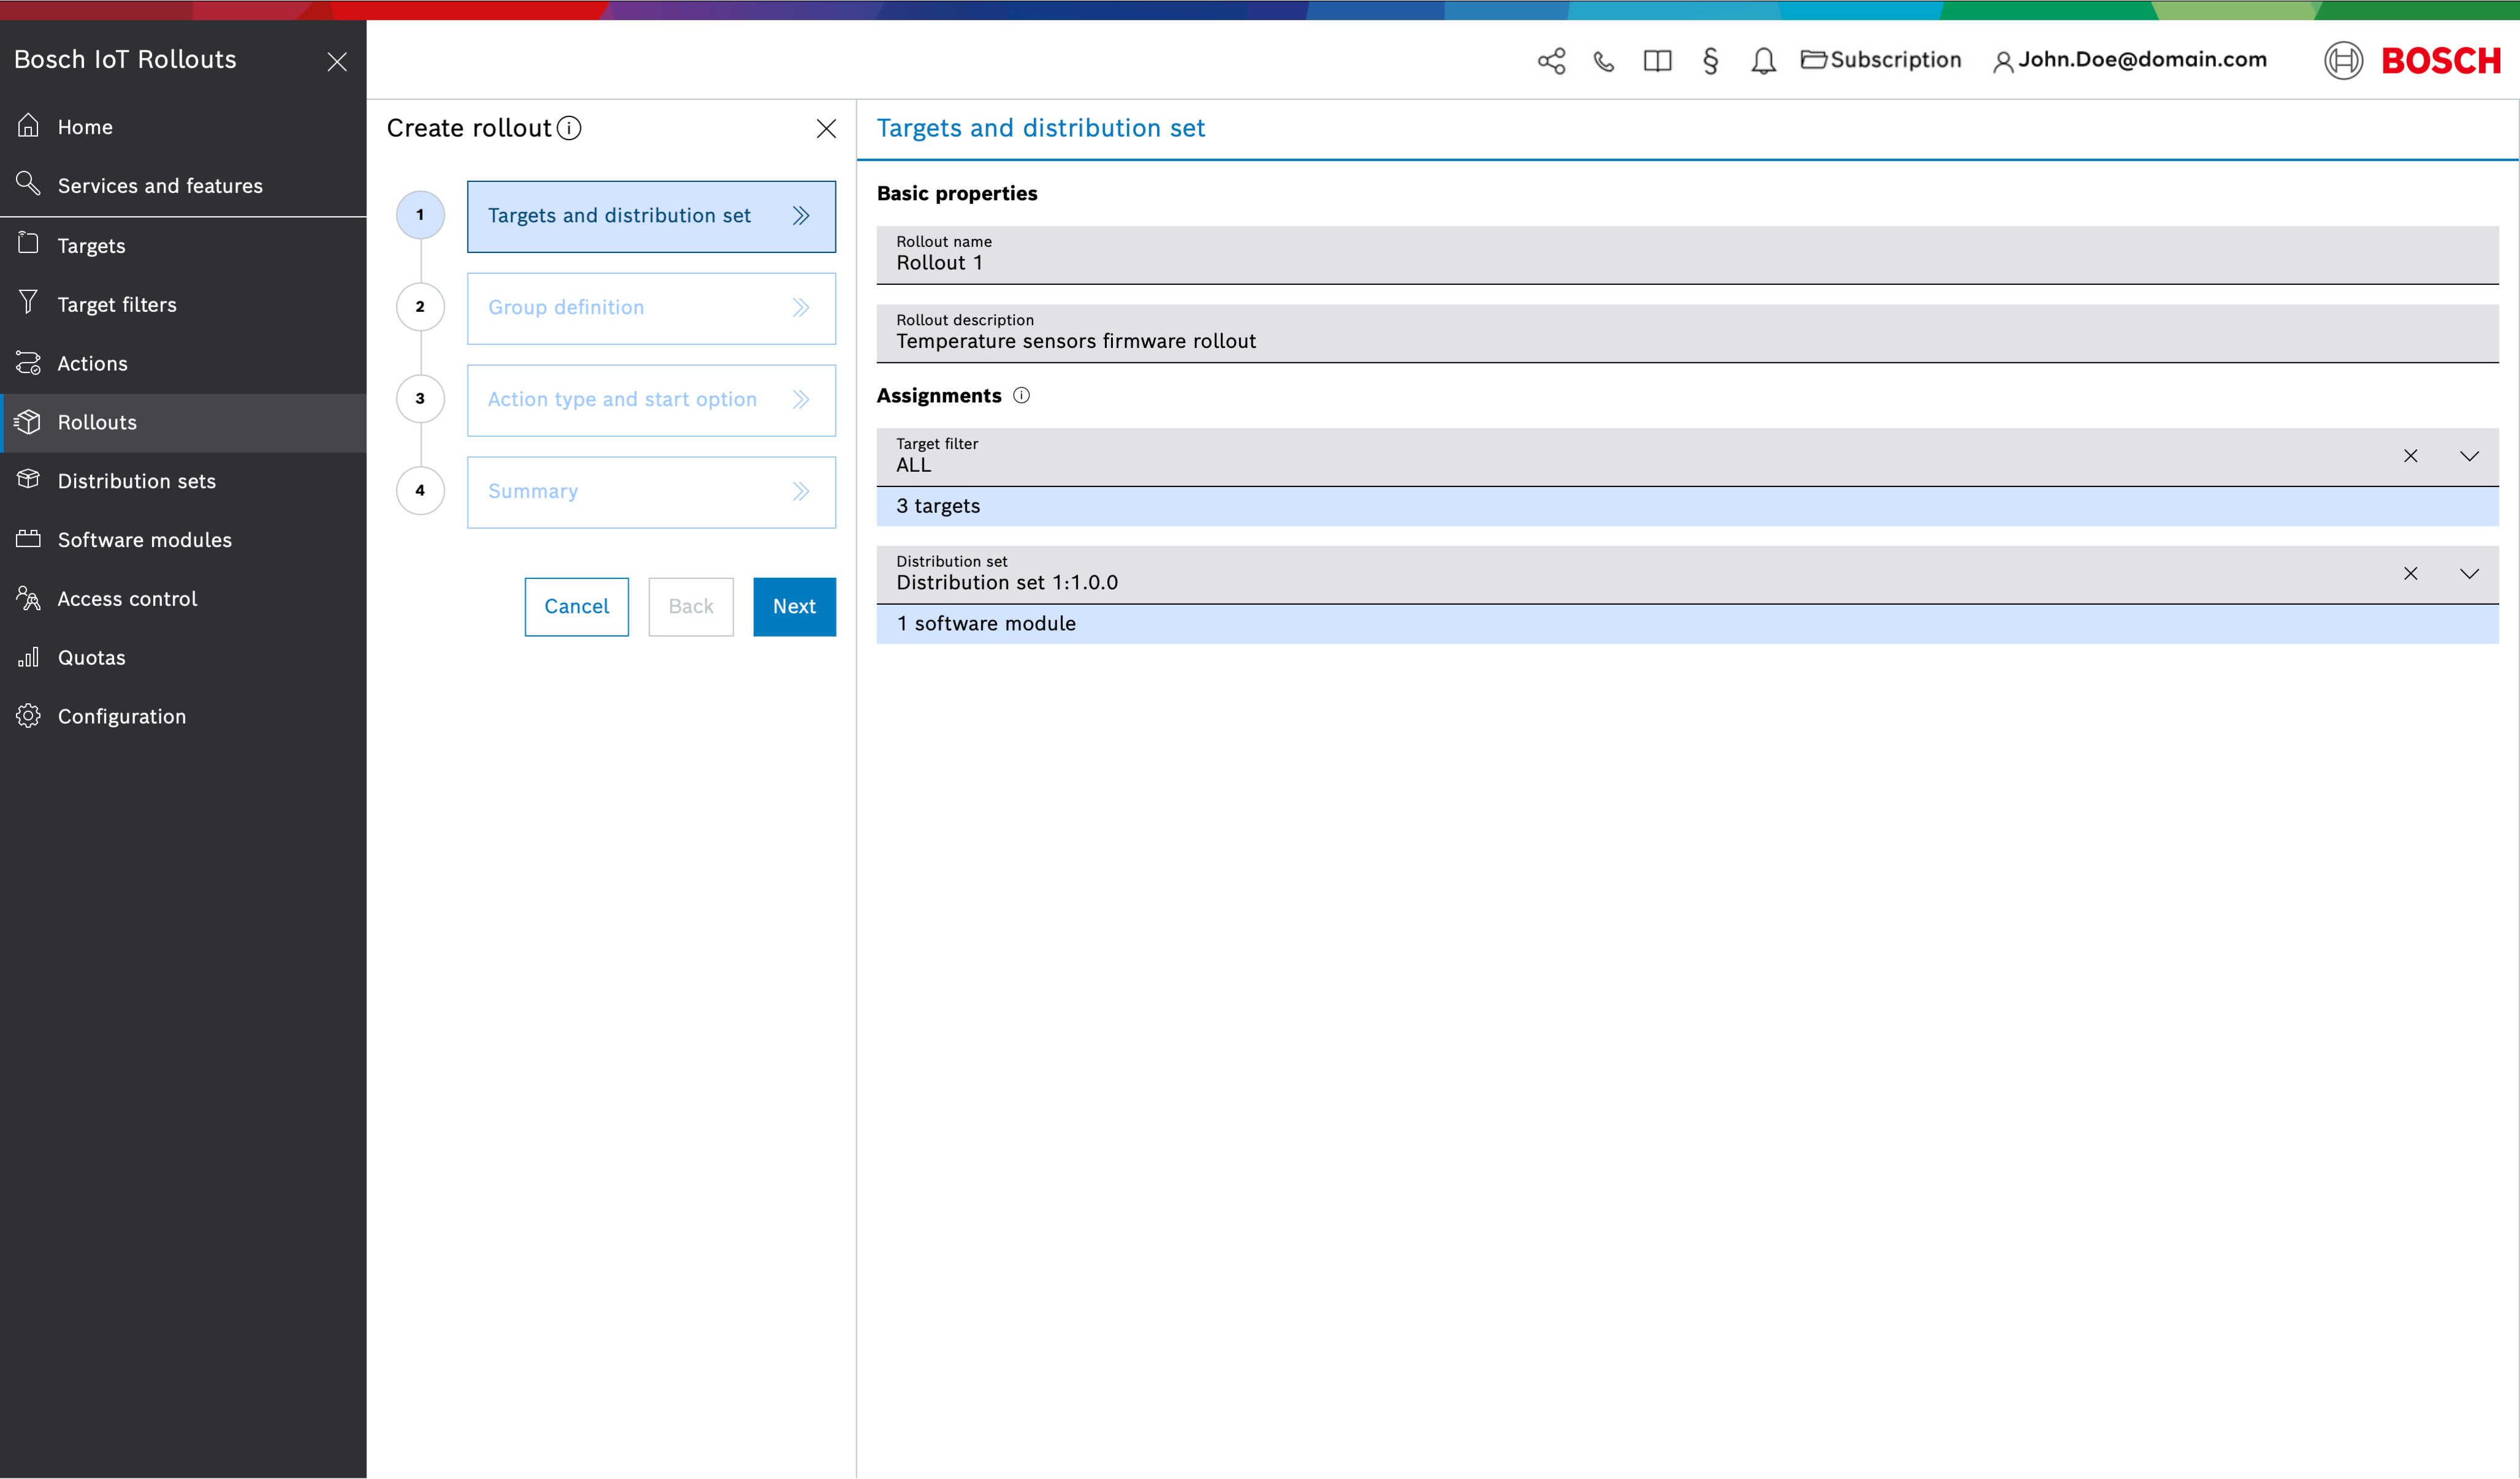
The number of targets matching the selected filter will be automatically displayed under the field.
If there are not matching targets to the filter, a warning will be displayed and only Dynamic Rollout creation will be available !
Distribution set - select one of the existing distribution sets from the drop-down or start typing in the field to execute a search
You can select only complete distribution sets, i.e. such with assigned software modules of all required types.
For example if the distribution set type is OS with app(s), it should contain a software module of type OS and a software module of type app.
The number of software modules assigned to the selected distribution set will be automatically displayed under the field.
Continue with Next.
Group definition
On the second wizard dialog, perform the Group definition through one of the available options - Static groups or Dynamic groups.
If the target filter in the previous step has any matching targets, Static groups is selected by default. Otherwise, only the Dynamic groups option is available.
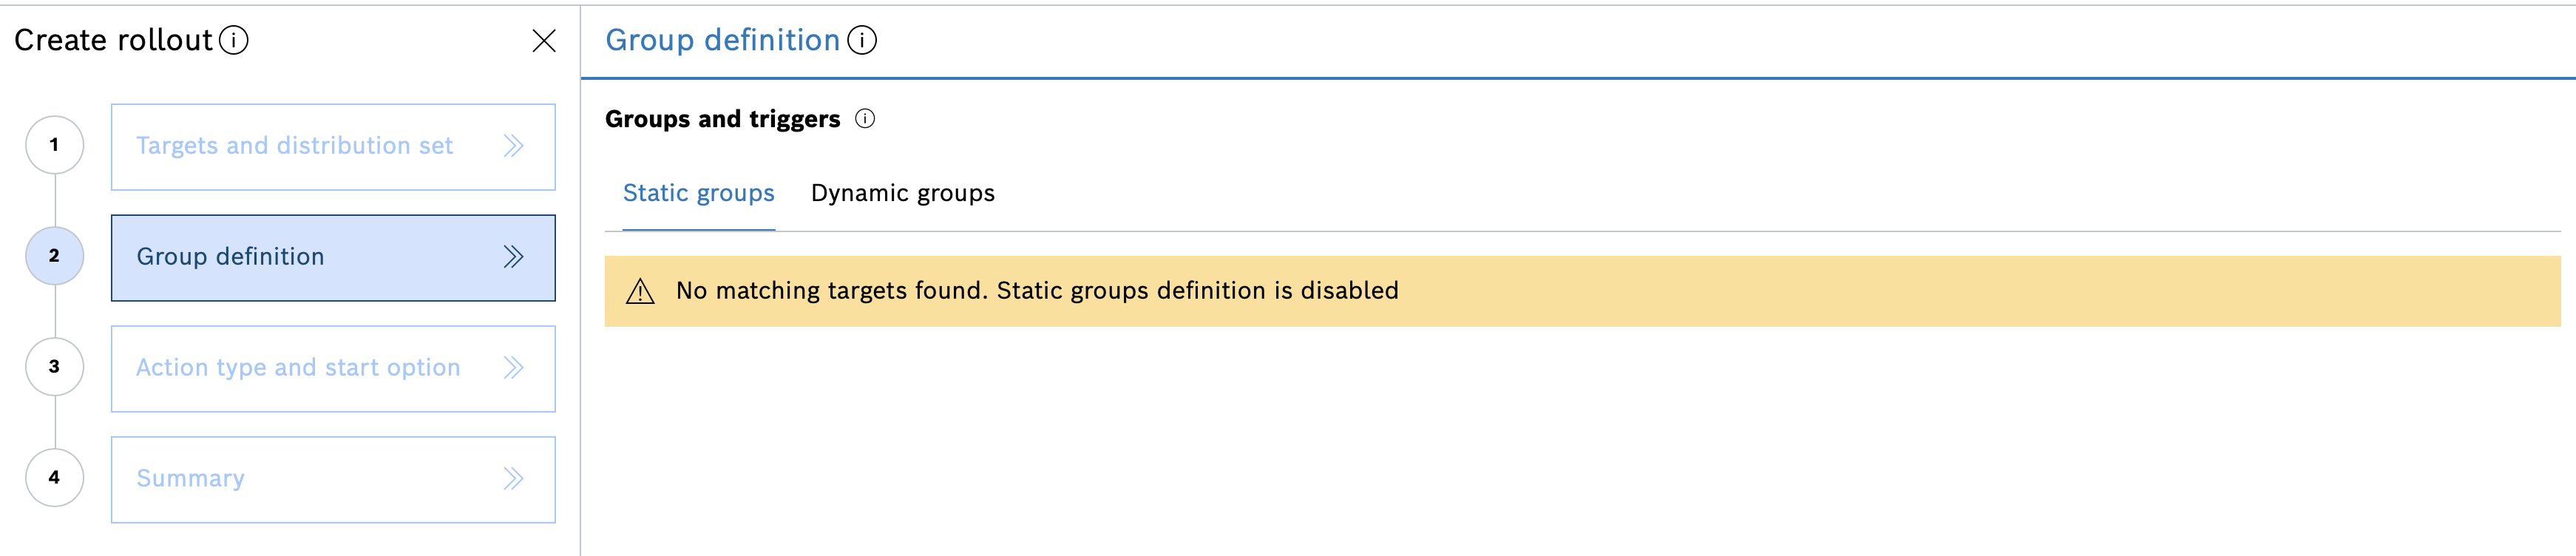
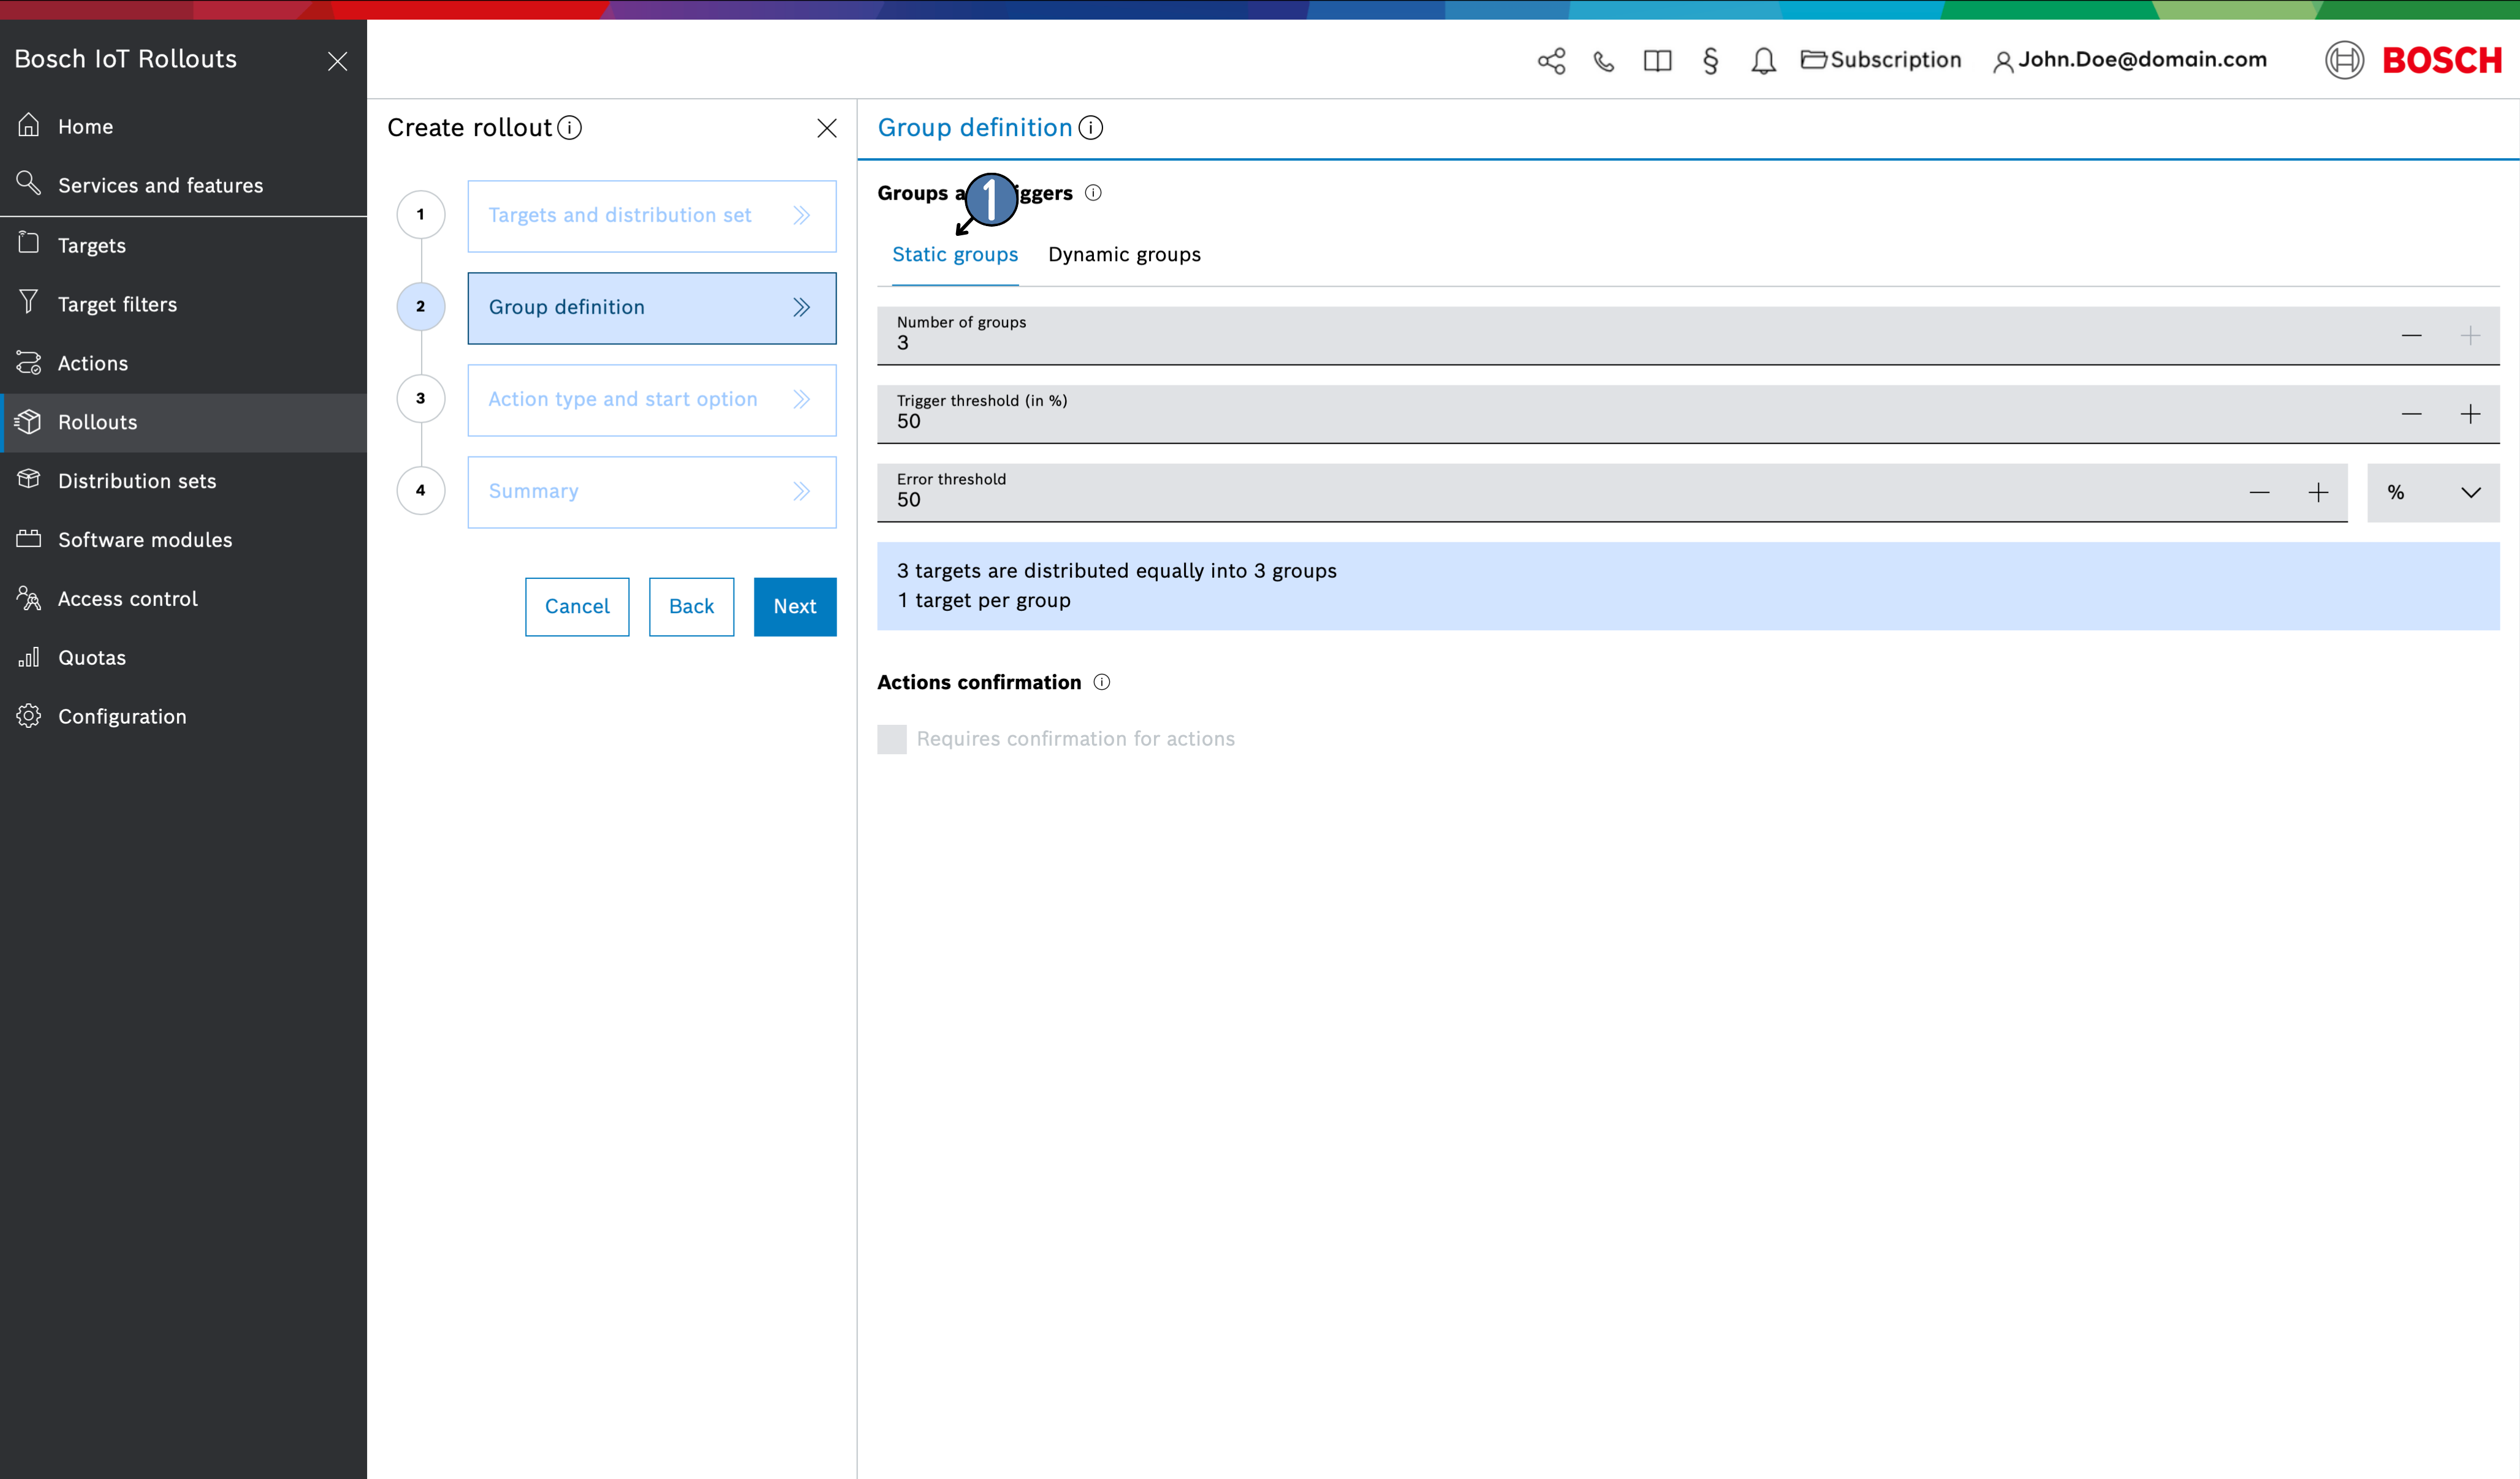
Static groups
To create a static rollout, existing targets that meet the filtering criteria at create time are distributed into a specified number of static groups. Once the rollout is created, no more targets can be added.
You will find the following fields:
Number of groups - specify the number of deployment groups in which the targets should be automatically distributed
Trigger threshold - configure the percentage of targets in a group that must be successfully updated before the execution for the next group is started
Error threshold - configure the error tolerance as a percentage or number of targets within a group before an emergency shutdown of the rollout
Action Confirmation - check the box if the end user of a device needs to be asked for consent before the update can be installed
For details, see User consent flow.
How the targets are distributed in the configured number of groups is indicated automatically in the blue area below.
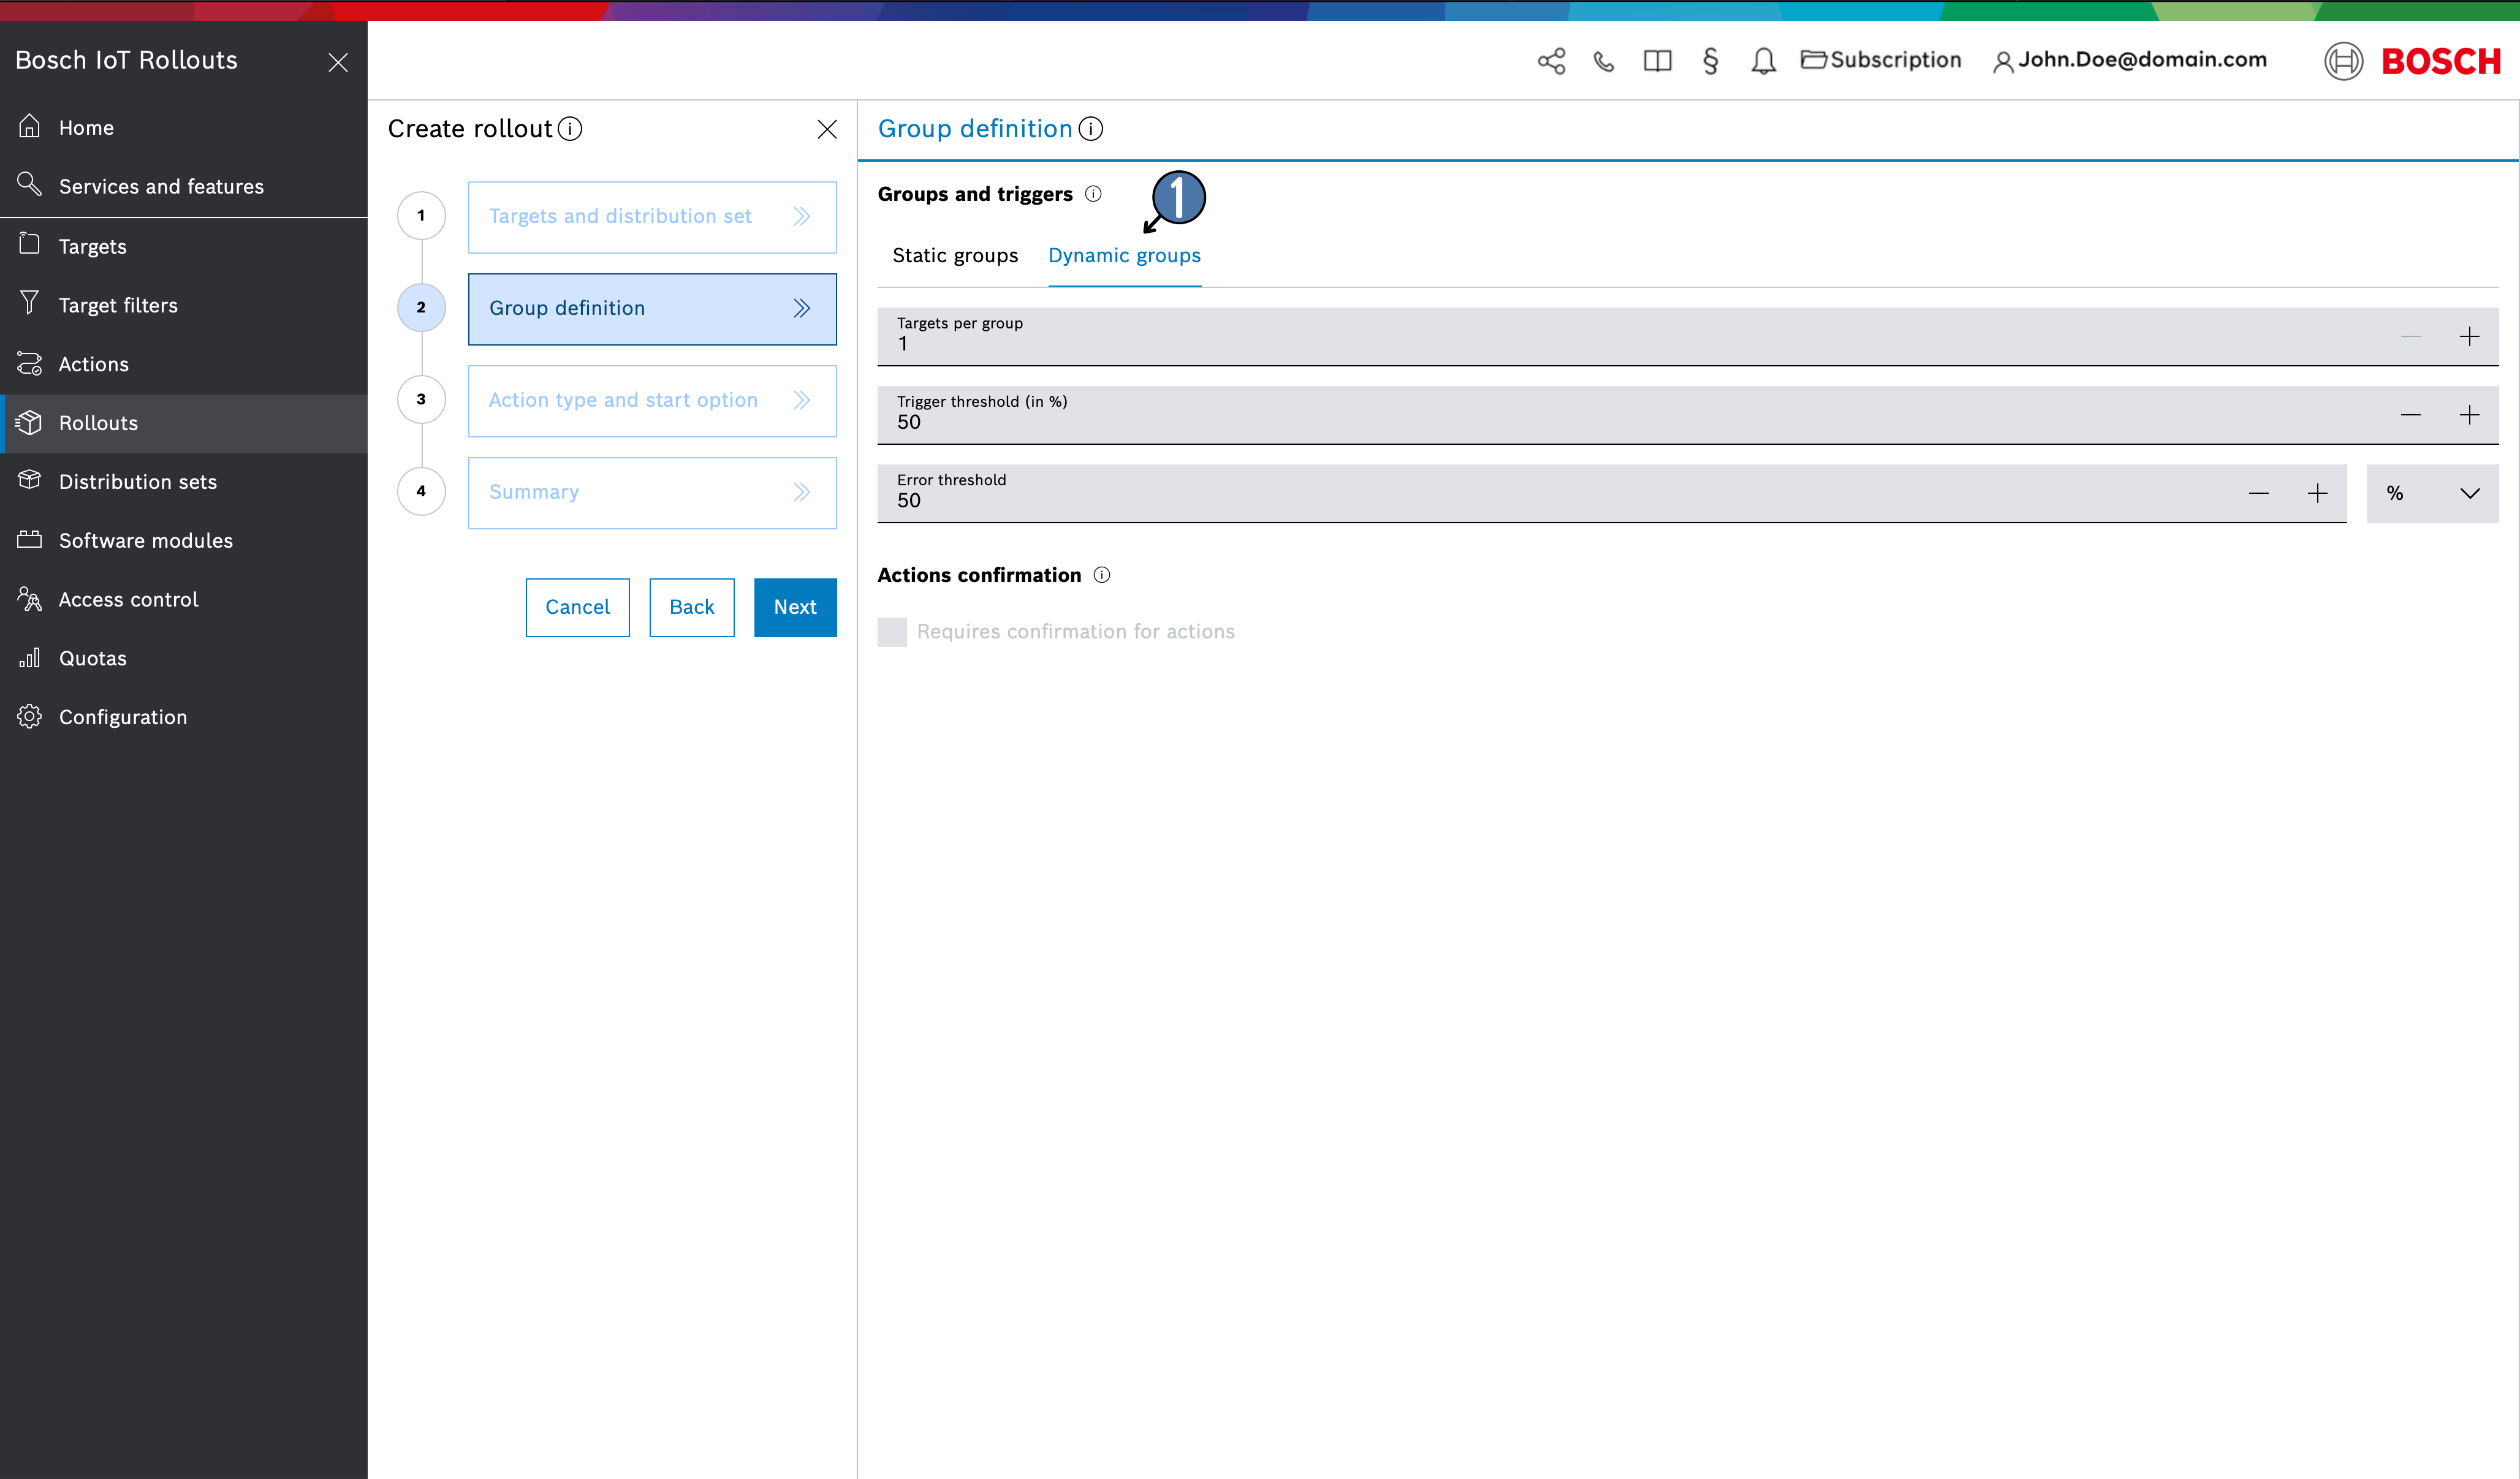
Dynamic groups [Dynamic Rollout]
Clicking on Dynamic Groups allows you to create a Dynamic Rollout that automatically includes both existing and future targets that meet the specified filter criteria. Each dynamic group consists of a set number of targets, and new groups are generated as necessary when the existing groups reach their threshold or capacity.
If a Dynamic Rollout is created, it must be started to begin populating the groups with targets.
You will find the following fields:
Targets per group - specify the number of targets in each dynamic group
Trigger threshold - configure the percentage of targets in a group that must be successfully updated before the execution for the next group is started
Error threshold - configure the error tolerance as a percentage or number of targets within a group before an emergency shutdown of the rollout
Action Confirmation - check the box if the end user of a device needs to be asked for consent before the update can be installed
For details, see User consent flow.
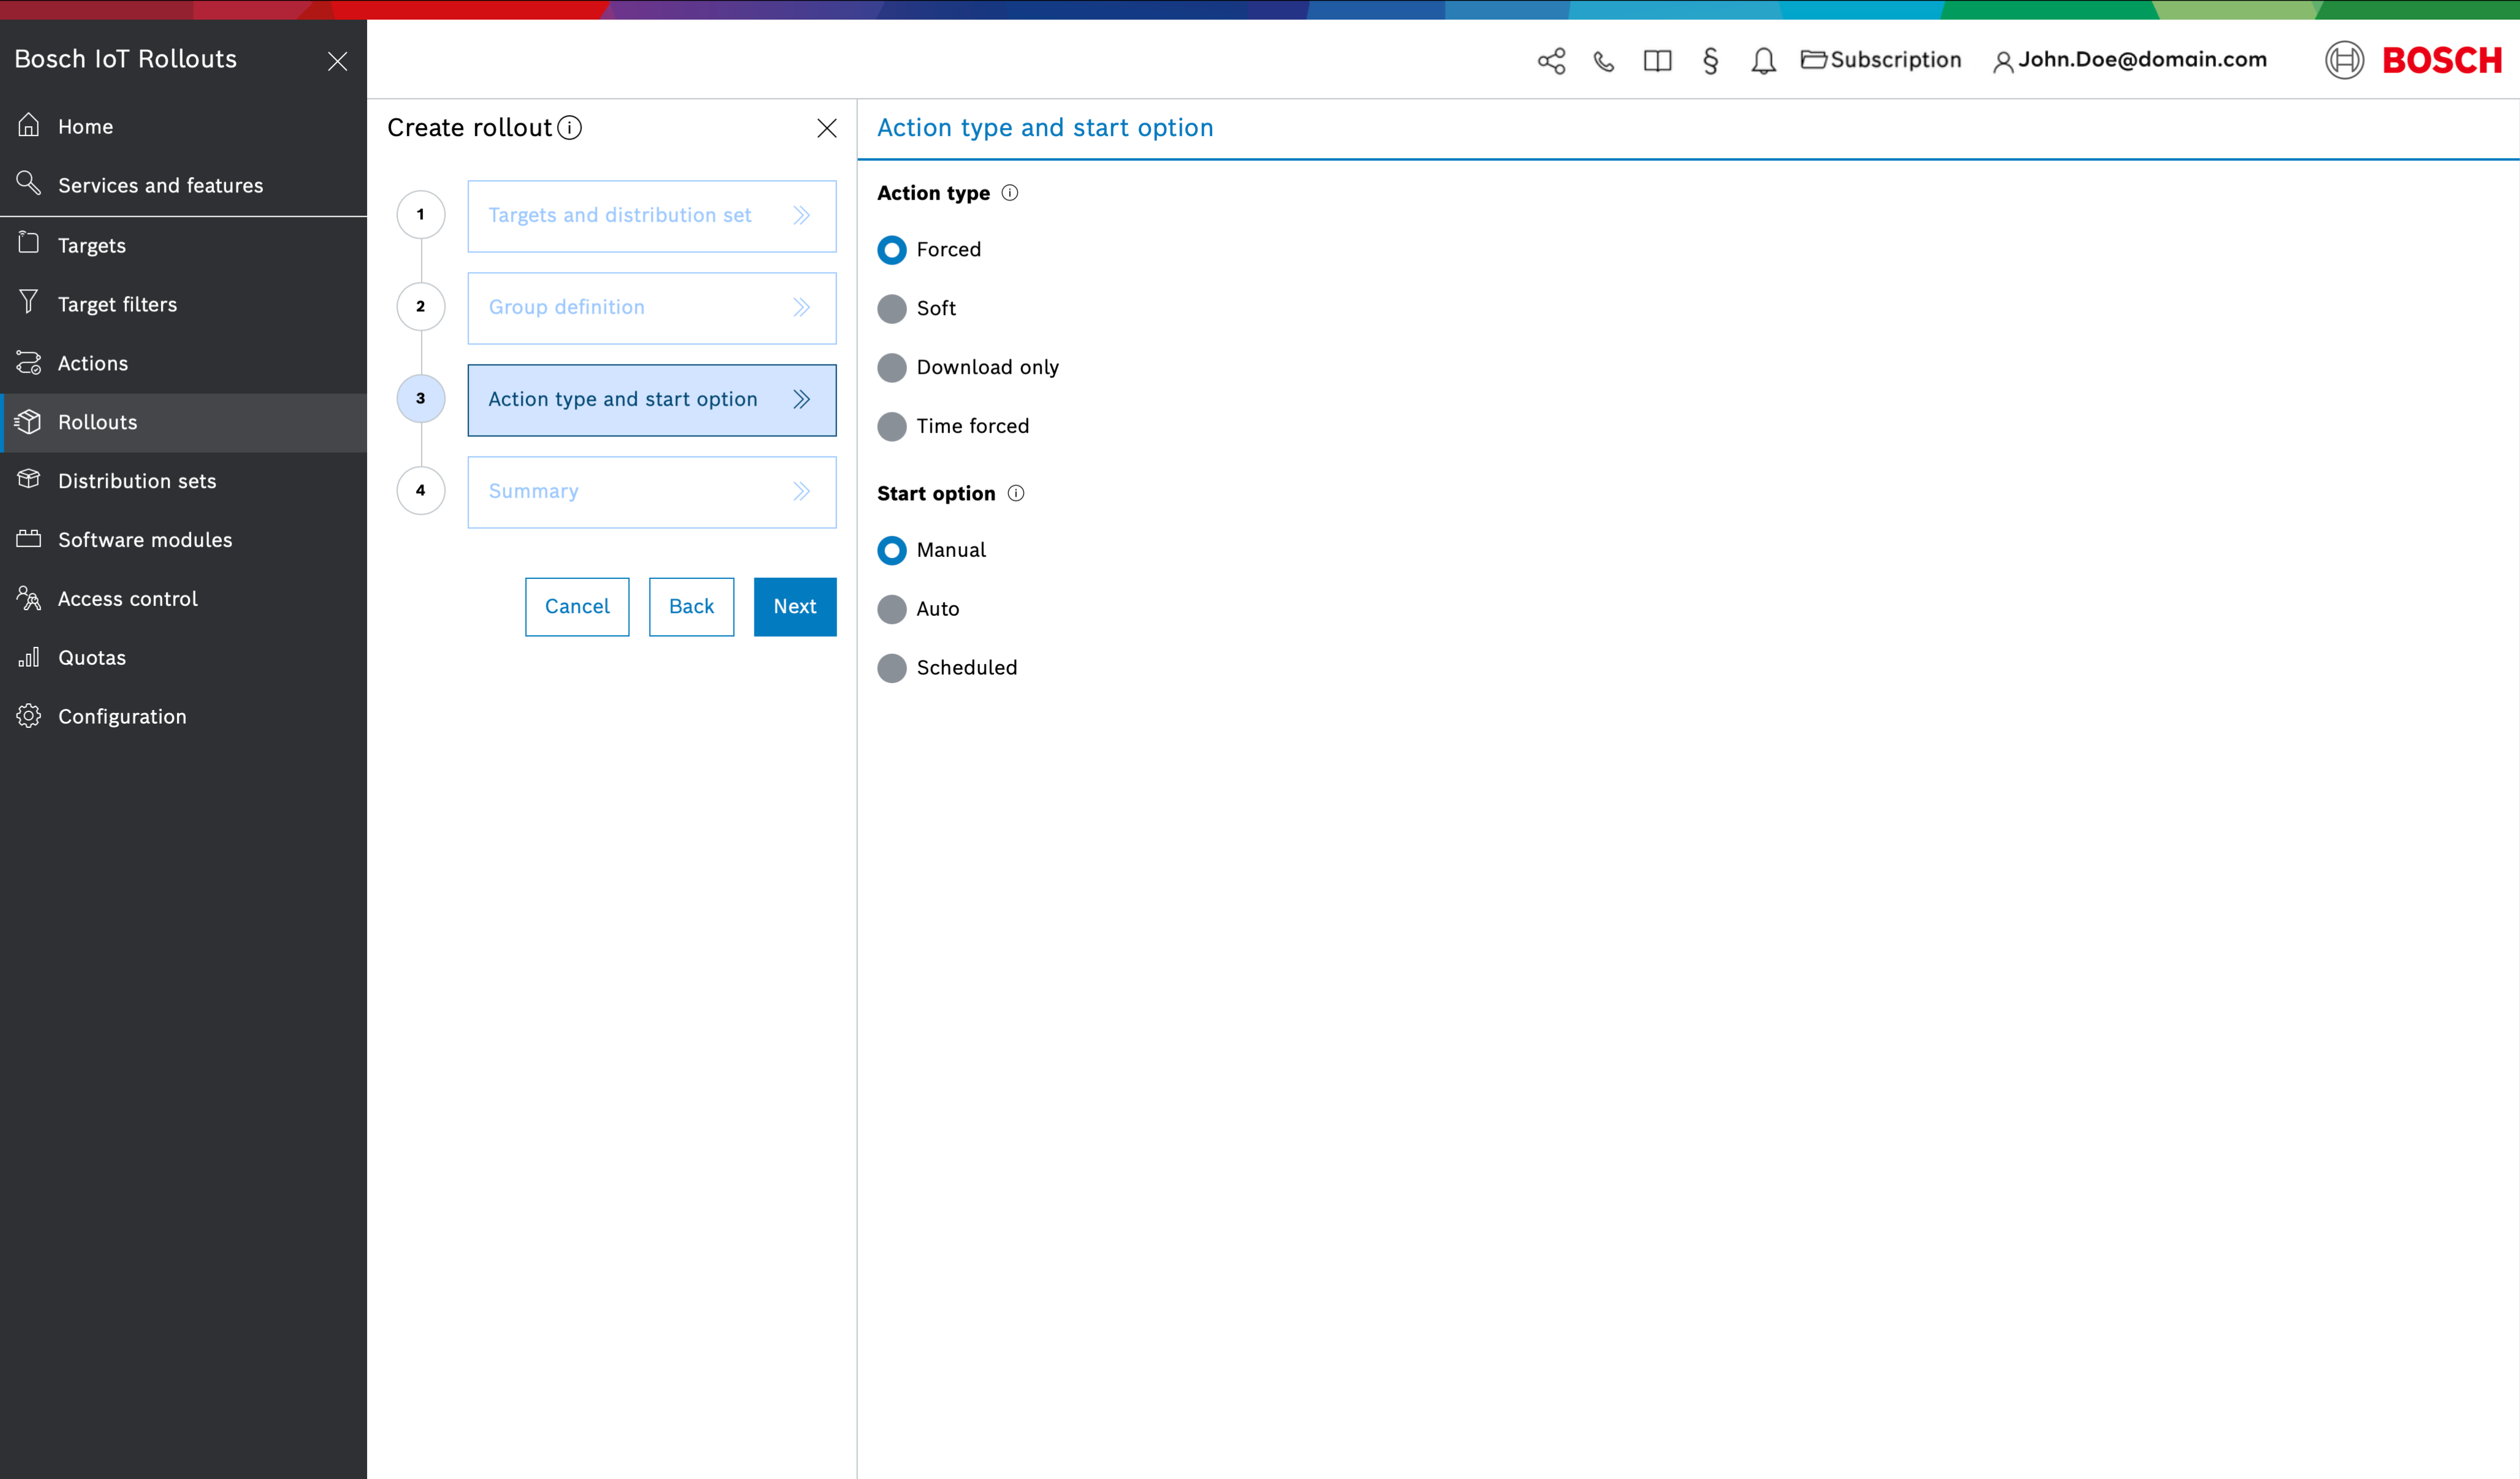
Action type and start option
On the third step of the wizard, choose the Action type and Start option.
The Action type influences the state transitions of an action. Different action types produce different behavior.
Forced - the device is advised that the update has to be executed immediately
Soft - the device is advised that the update can be executed at any time, e.g. with user approval or according to its regular update time plan
Download only - the device is advised that the update has to be only downloaded and not installed
Time forced - configures a point in time where the rollout type switches from Soft to Forced
The Start option defines when the rollout execution will start.
Manual - the rollout is started manually by the user
Auto - the rollout is started automatically by the system as soon as it is created
Scheduled - the rollout is started automatically as soon as it is ready and the scheduled time has been reached
Summary
Finally, review the details of your new rollout and click Create if everything is fine, or Back to change something.

With that, the newly created rollout appears on the list of rollouts.
If a Dynamic Rollout is created, it must be started to begin populating the groups with targets.
In case you chose the manual start option, the software update (or download only) process will not start automatically.
How to start it is described at Manage rollouts.
When you have created one or more rollouts, you can base your future rollouts on their structure through the copy rollout functionality, as described in Copy a rollout.