To efficiently manage and filter the targets provisioned for your current subscription, follow these steps:
Navigate to Targets UI:
- Open the Targets UI feature from the left-hand navigation menu.
Access the List View:
- By default, the interface will display the List blade within the sub-navigation panel.
- You can toggle the sub-navigation panel open or closed according to your preference.
If no targets have been provisioned yet, you can visit the Device Provisioning Guide page to learn the steps necessary for provisioning targets.
List targets
By default, the rightmost view, known as Targets, displays a comprehensive list of all provisioned targets. This list includes key details such as the target's Name, Description, and more.
To access and display additional details for each target, please refer to View target details.
In the Targets blade, each target is assigned a status that is visually represented by a color-coded icon. These statuses help you quickly identify the state of each target:
In Sync - Green Icon
- Target Status: IN_SYNC
- The assigned DistributionSet is installed (or downloaded in case of Download Only assignments).
Pending - Yellow Icon
- Target Status: PENDING
- The installation of the assigned DistributionSet is not yet confirmed.
Error - Red Icon
- Target Status: ERROR
- The installation of the assigned DistributionSet has failed.
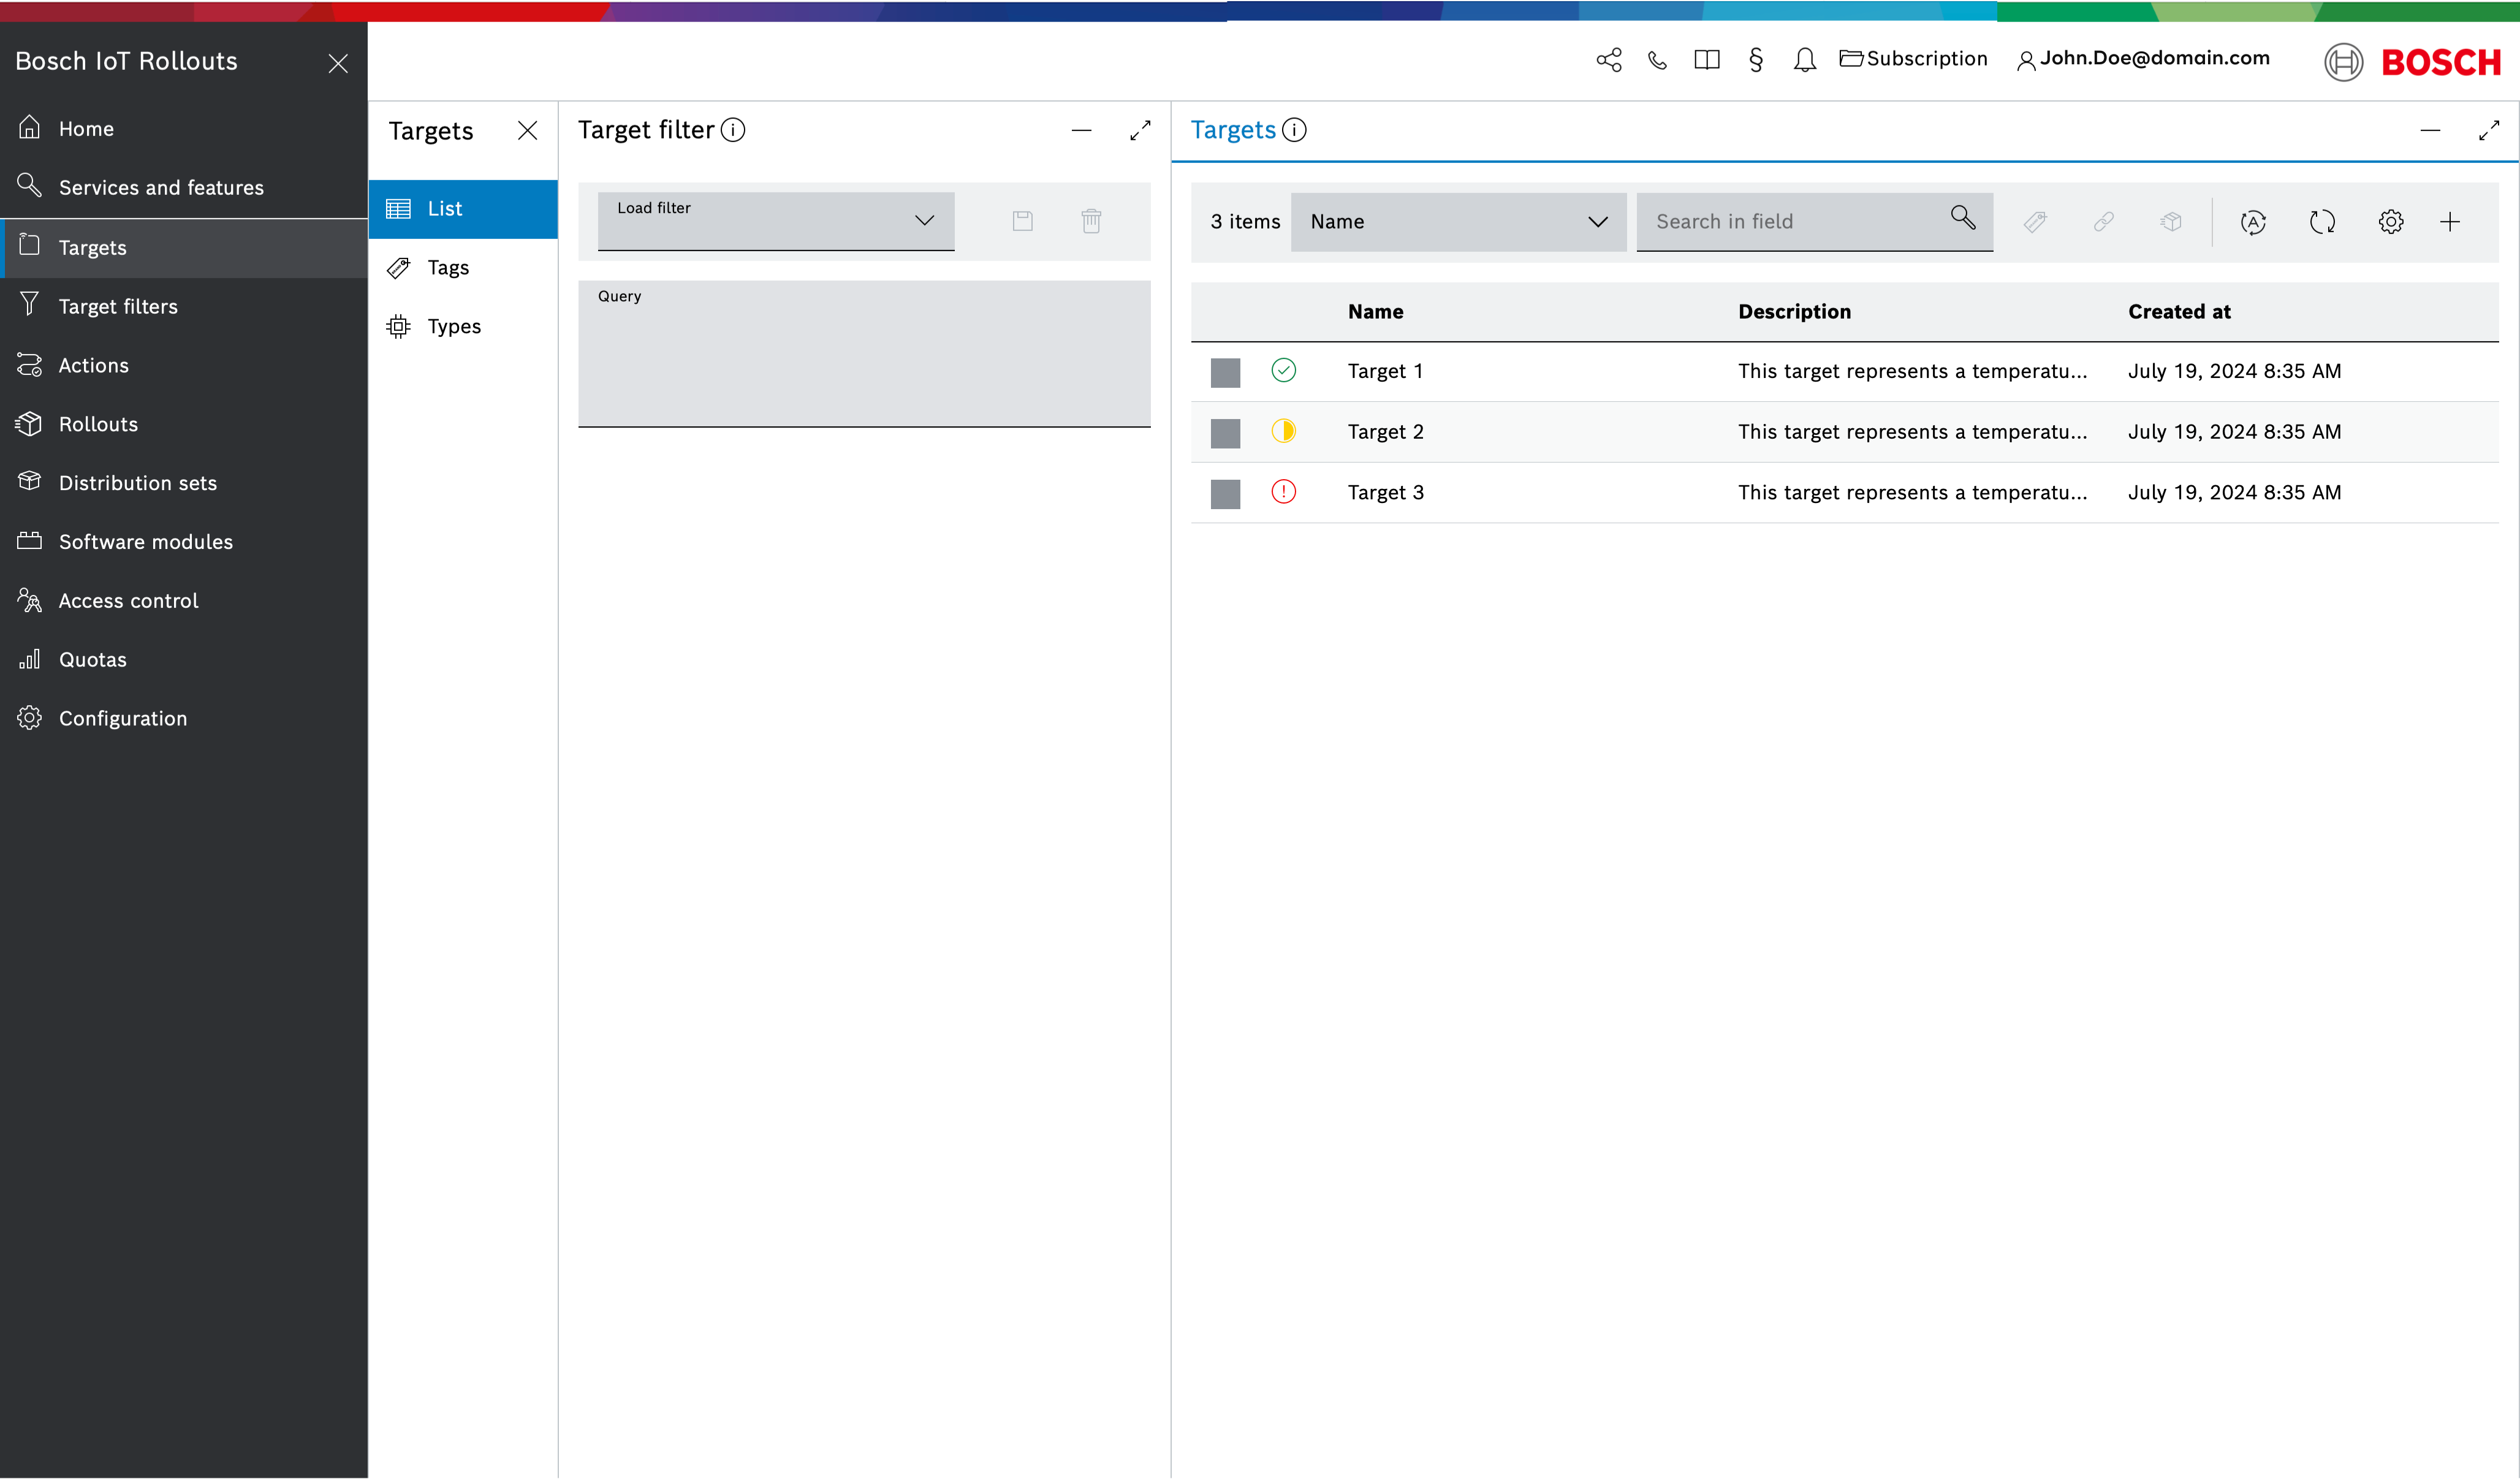
Example:
In the provided screenshot:
- Target 1 has a green icon, indicating it is in sync.
- Target 2 has a yellow icon, indicating it is pending.
- Target 3 has a red icon, indicating an error.
Quick Search and Filtering
Accessing the Quick Search:
- Navigate to the Targets blade from the left-hand navigation menu.
- At the top of the list view within the Targets blade, you will find the Quick Search field.
Using the Quick Search Field:
- Click on the drop-down menu next to the quick search field to choose the field you want to search by. The available fields are:
- Name
- Description
- Controller Id
- Tag
- Assigned distribution name
- Installed distribution name
- Enter your search query in the quick search field.
- Click on the drop-down menu next to the quick search field to choose the field you want to search by. The available fields are:
RSQL Filter Generation:
- As you type, an RSQL filter is automatically built and displayed in the Target filter blade. This feature allows you to see the exact query being used to filter the targets.
Viewing Filtered Results:
- The list of targets will update in real-time to show only those that match your search criteria based on the selected field.
Alternatively, you can directly type an RSQL filter into the Target filter blade. Enter the desired RSQL query to filter the targets based on specific criteria.This method provides more control and flexibility, allowing for complex queries without using the quick search field.
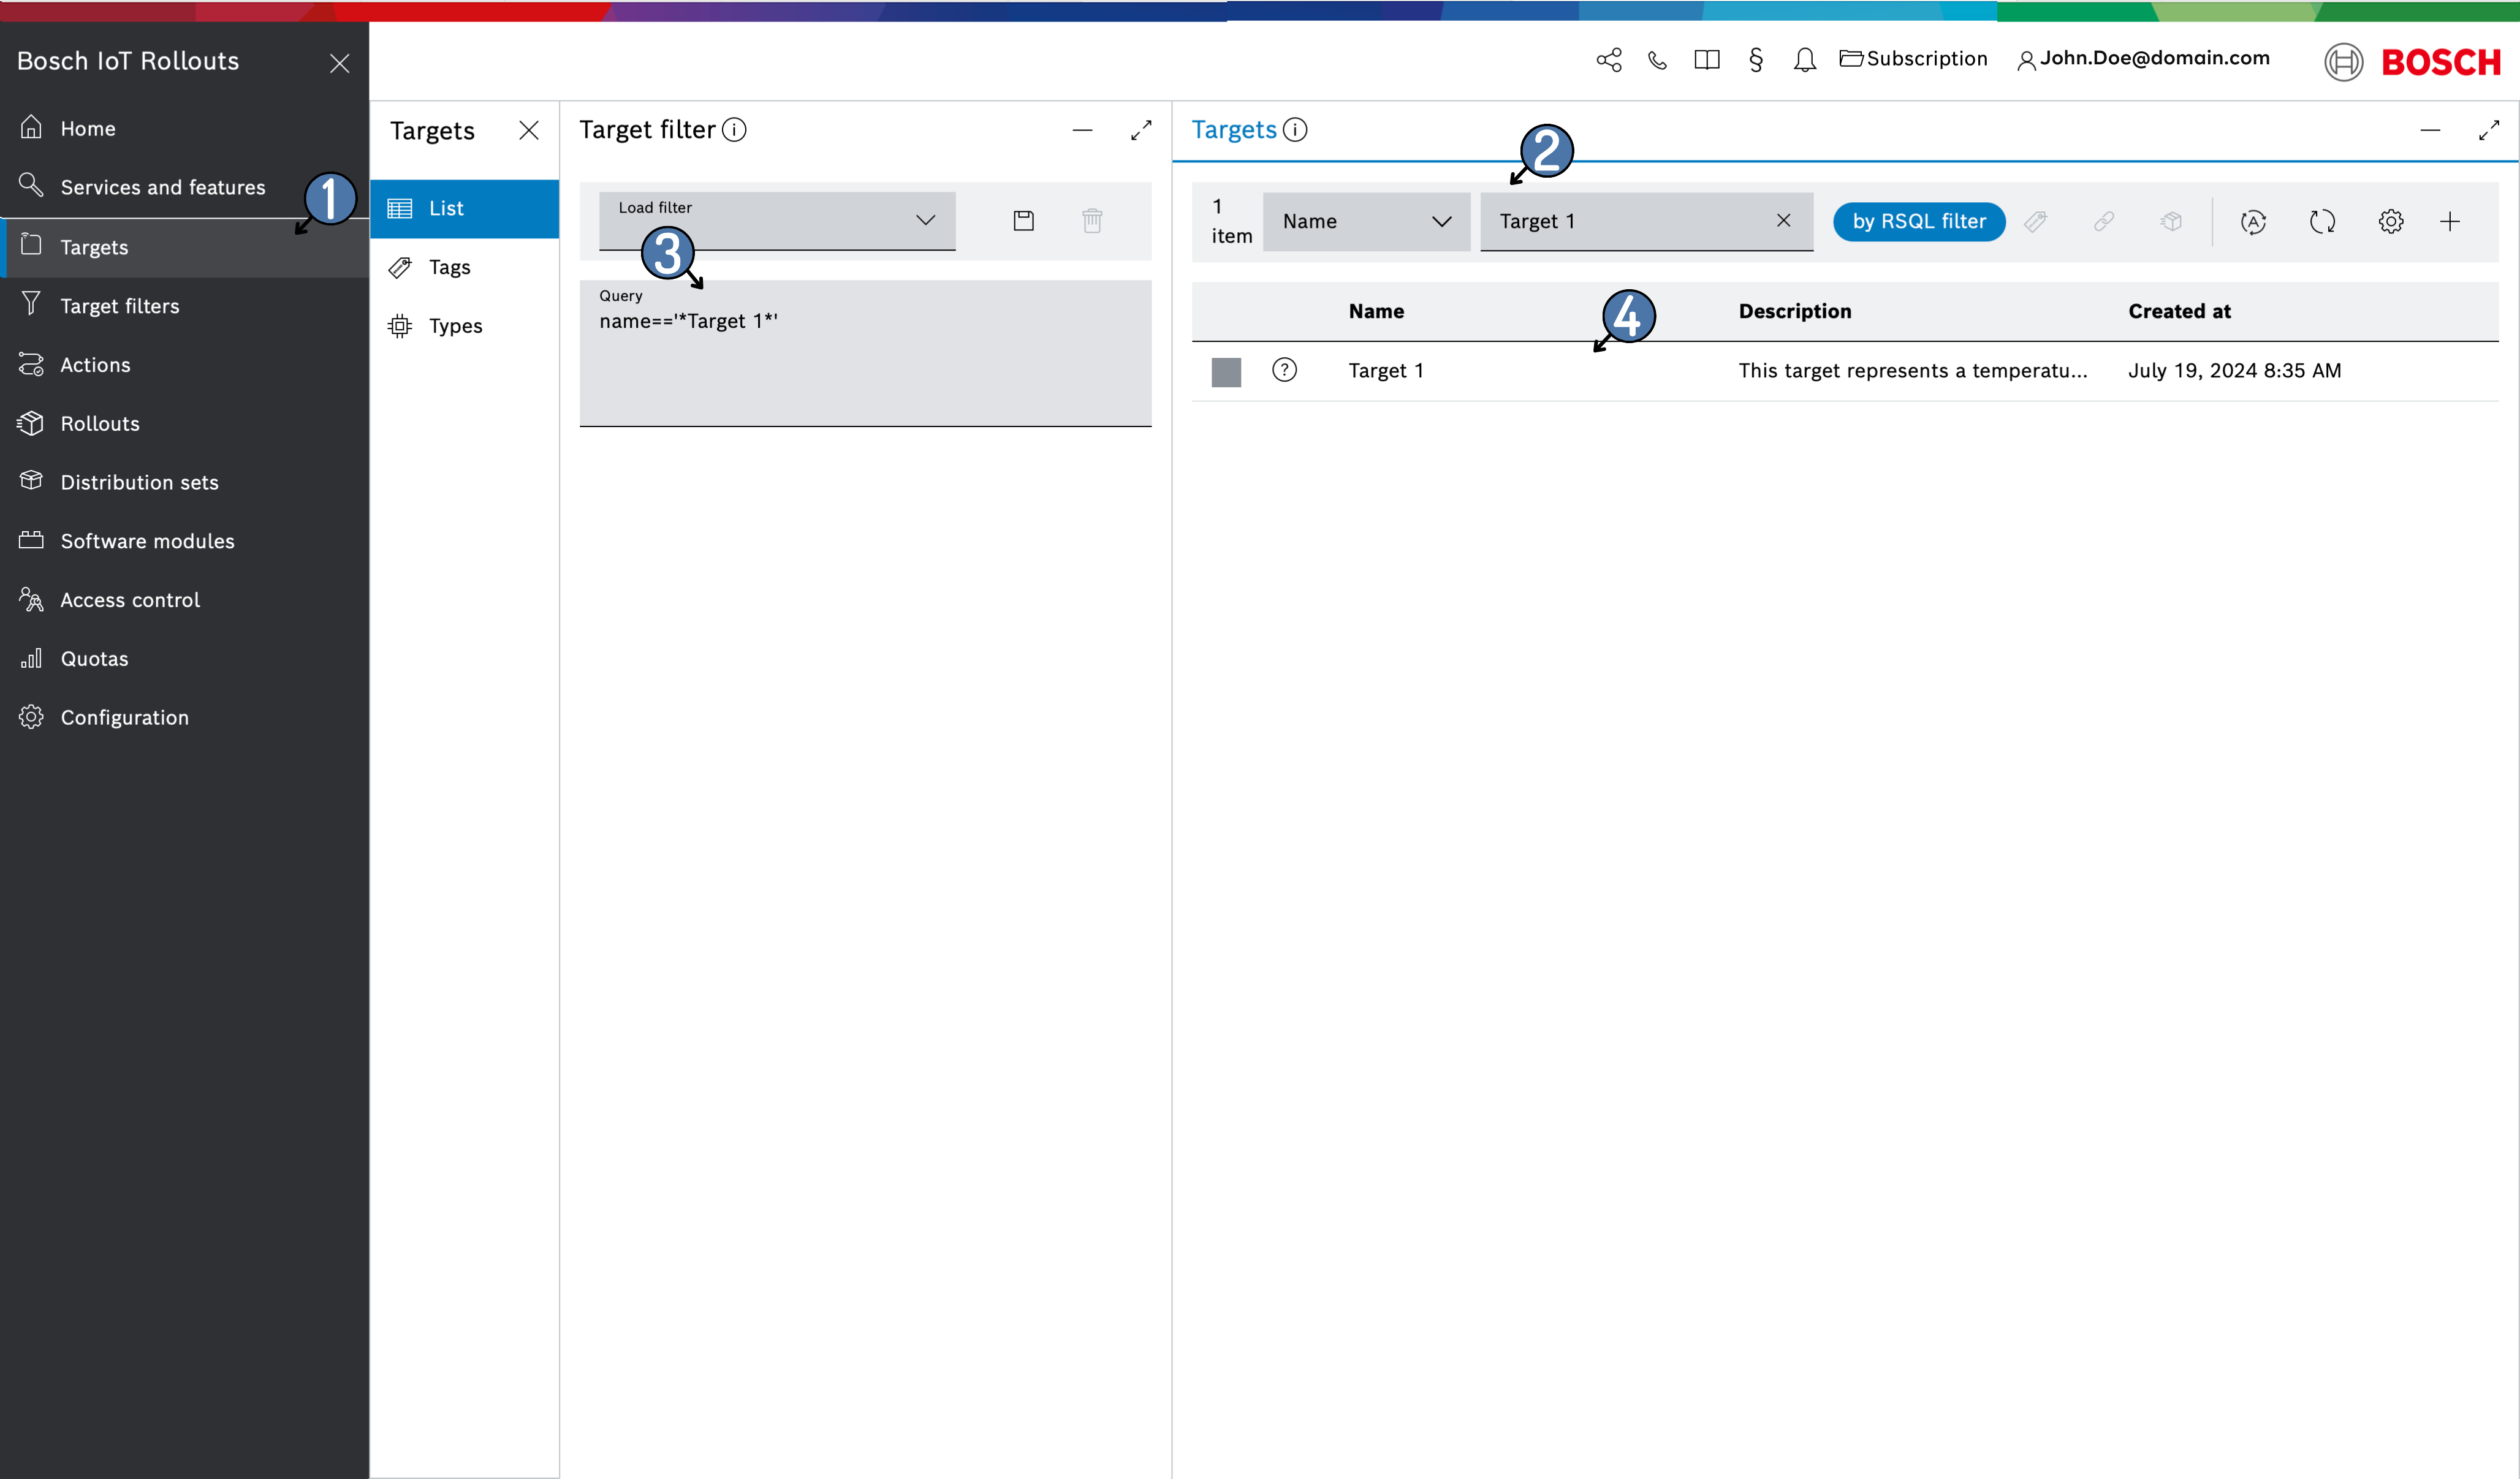
Example:
For instance, if you want to find a target with the name "Target 1":
- Using Quick Search:
- Select Name from the drop-down menu.
- Type "Target 1" in the quick search field.
- The list will immediately filter to show only the targets with the name "Target 1".
- The Target filter blade will display the corresponding RSQL filter, e.g.,
name=="*Target 1*".
- Using RSQL Query Field:
- Directly type
name=="*Target 1*"in the Target filter blade. - The list will update to show the targets matching the RSQL query.
- Directly type
Creating a Target filter
Once you have created a filter using an RSQL query in the Target filter blade, you can save it for future use. Follow these steps to save your filter:
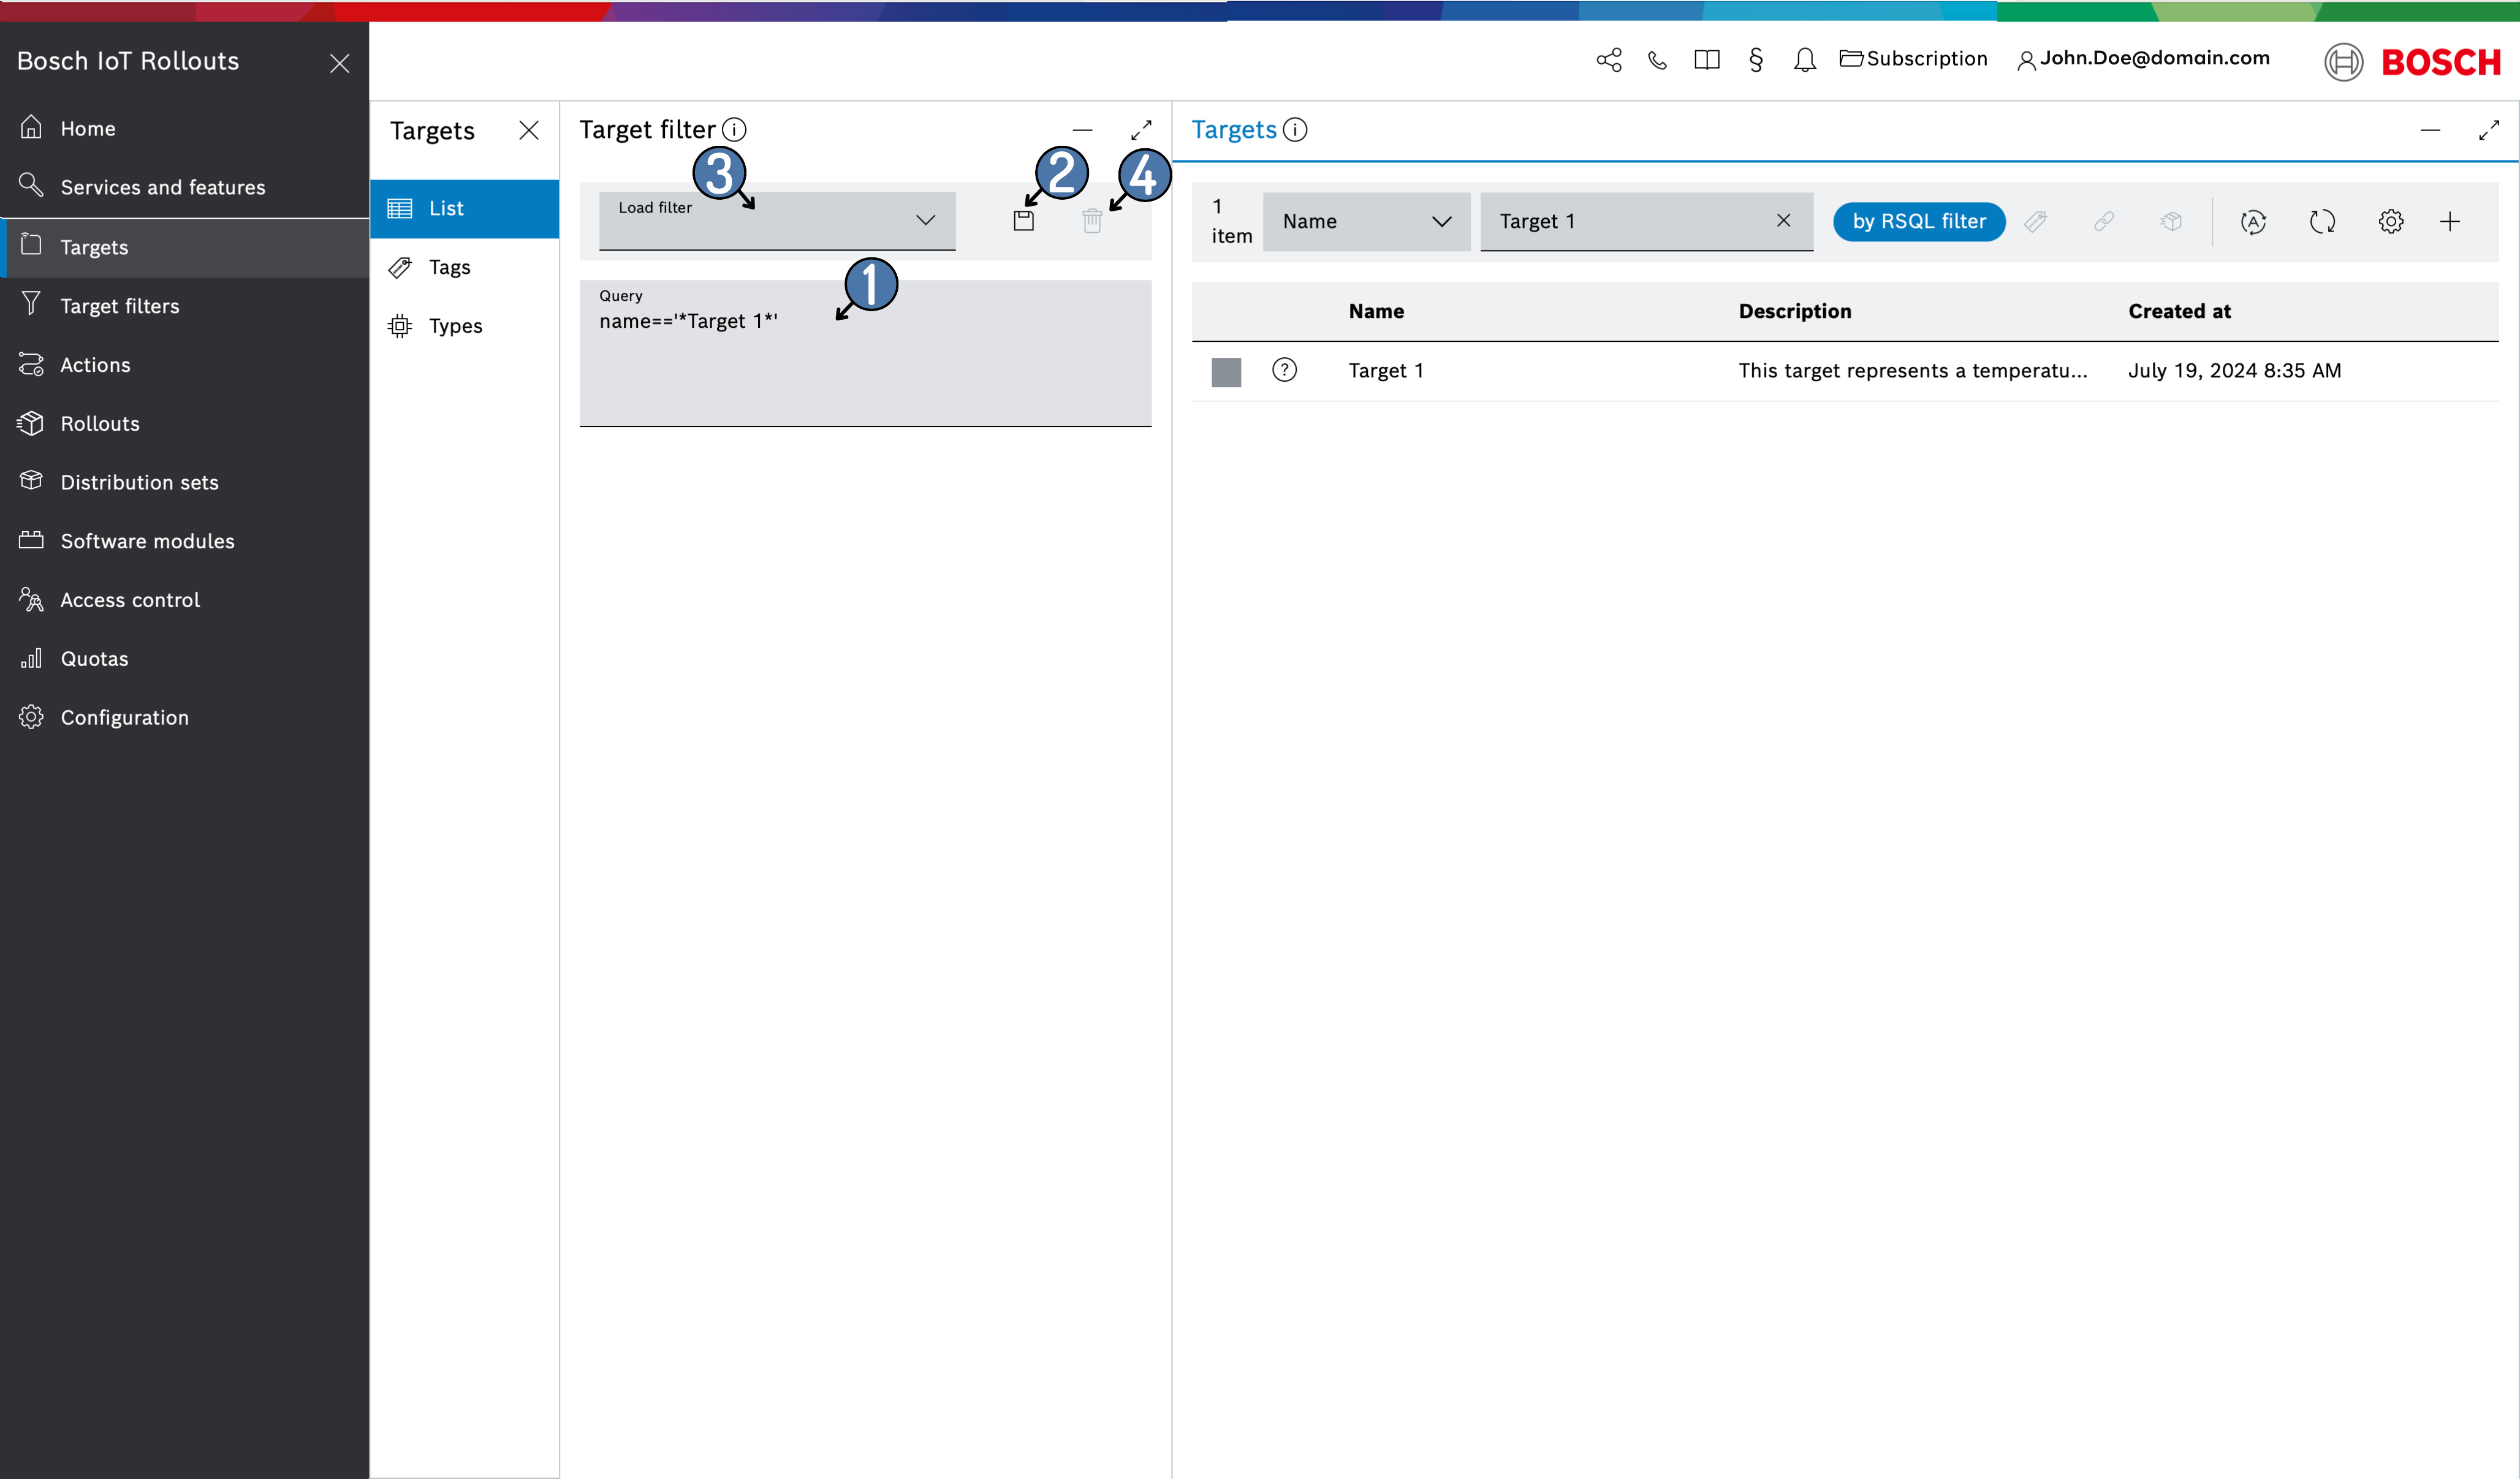
Creating a Filter:
- Type your desired RSQL query in the query field of the Target filter blade to filter the targets based on specific criteria.
Saving the Filter:
- Click the Save button located at the top of the query field.
- A prompt will appear asking you to name your filter.
- Enter a meaningful name for your filter (e.g., "Active Devices Filter") and click Save to store it.
Loading Saved Filters:
- To quickly apply a saved filter, use the Load filter dropdown in the Target filter blade.
- Select your saved filter from the list to automatically apply it to your target list.
- Deleting a selected filter
- You can delete the selected filter via the corresponding delete icon
 . You will be asked to confirm the deletion too.
- You can delete the selected filter via the corresponding delete icon
Example:
Saving a Filter:
- After typing
name=="*Target 1*"in the query field, click the Save button. - Name the filter "Target 1 Filter" and click Save.
- After typing
Loading a Saved Filter:
- Click on the Load filter dropdown.
- Select "Target 1 Filter" from the list to apply it.
You will need your saved target filers when creating rollouts or auto assignments. For example, during the rollout creation process you will use this name to choose the appropriate target filter.