As you already know from the previous sections of this documentation, a target filter allows you to filter the provisioned targets according to a defined custom query.
Among other purposes, the target filter can be used for creating an auto assignment.
An auto assignment allows you to assign automatically a distribution set to a target filter, i.e. to all targets which match a specific target filter. Thus when new targets are provisioned in the future, they will also receive the assignment automatically, as long as they match the target filter.
In this page you will learn how to create and manage auto assignments.
Create auto assignment
To be able to create an auto-assignment on a target filter, you need:
- an existing target filter,
- an existing assignment, in particular:
- a software module with artifacts, and
- a distribution set, to which the software module is assigned.
If you don't have one of the required elements listed above, check the following guides:
Once you have all elements in place, follow these steps:
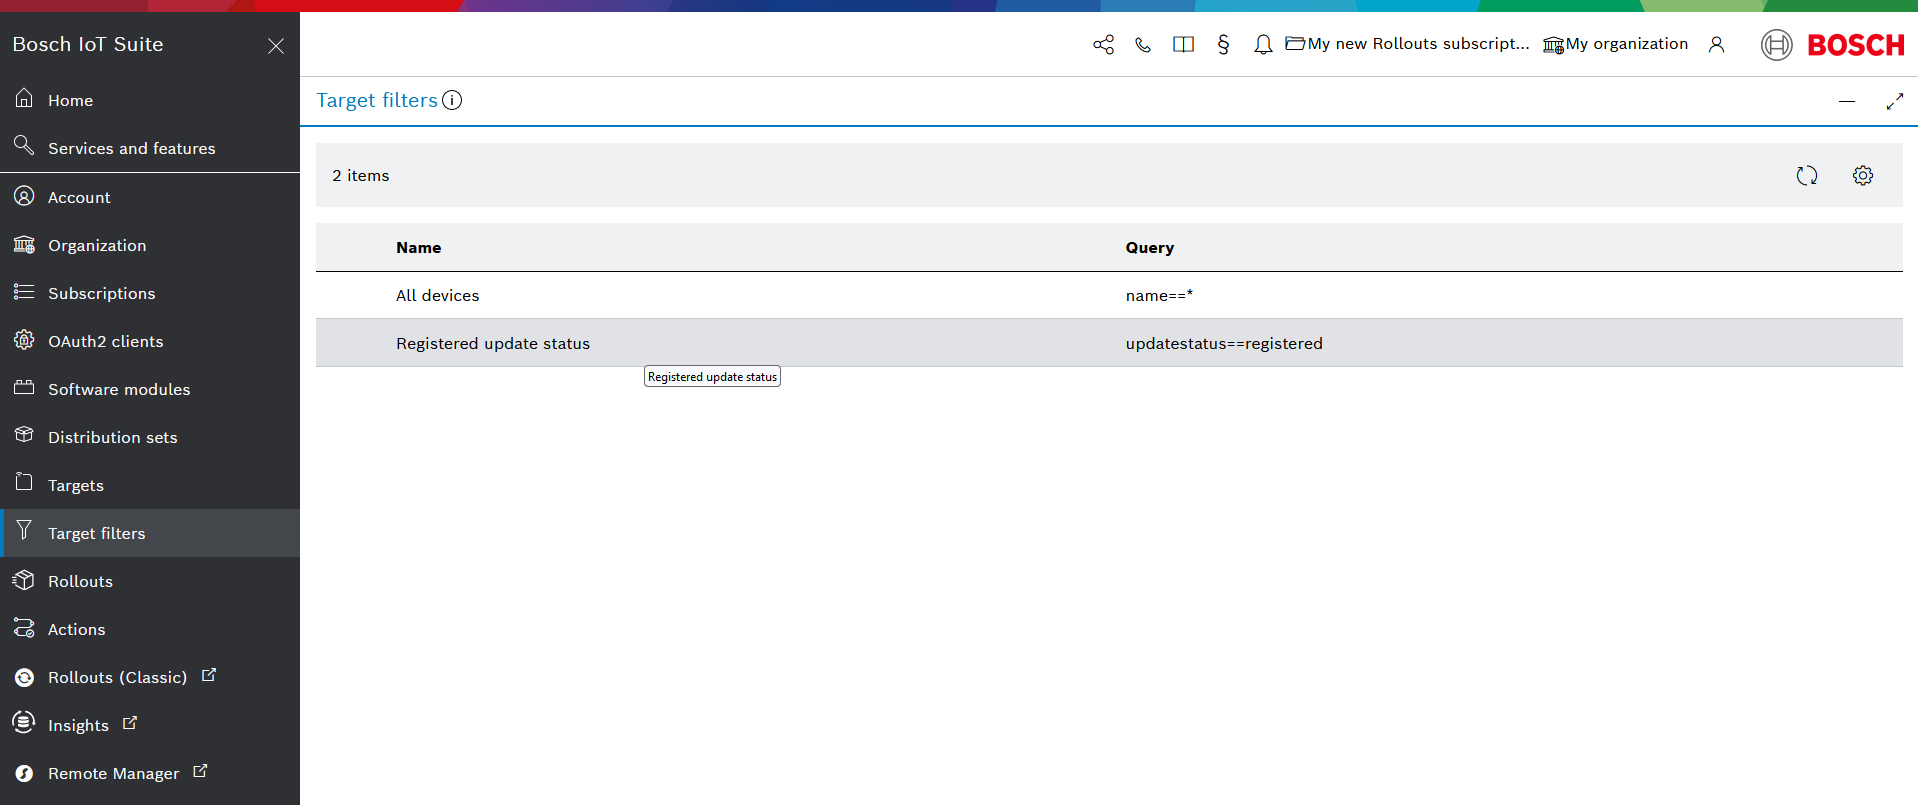
- Navigate to Target filters.
- Select the target filter of your choosing.
- Click the Target filter actions icon on the top right of the view.
- Click Assign distribution.
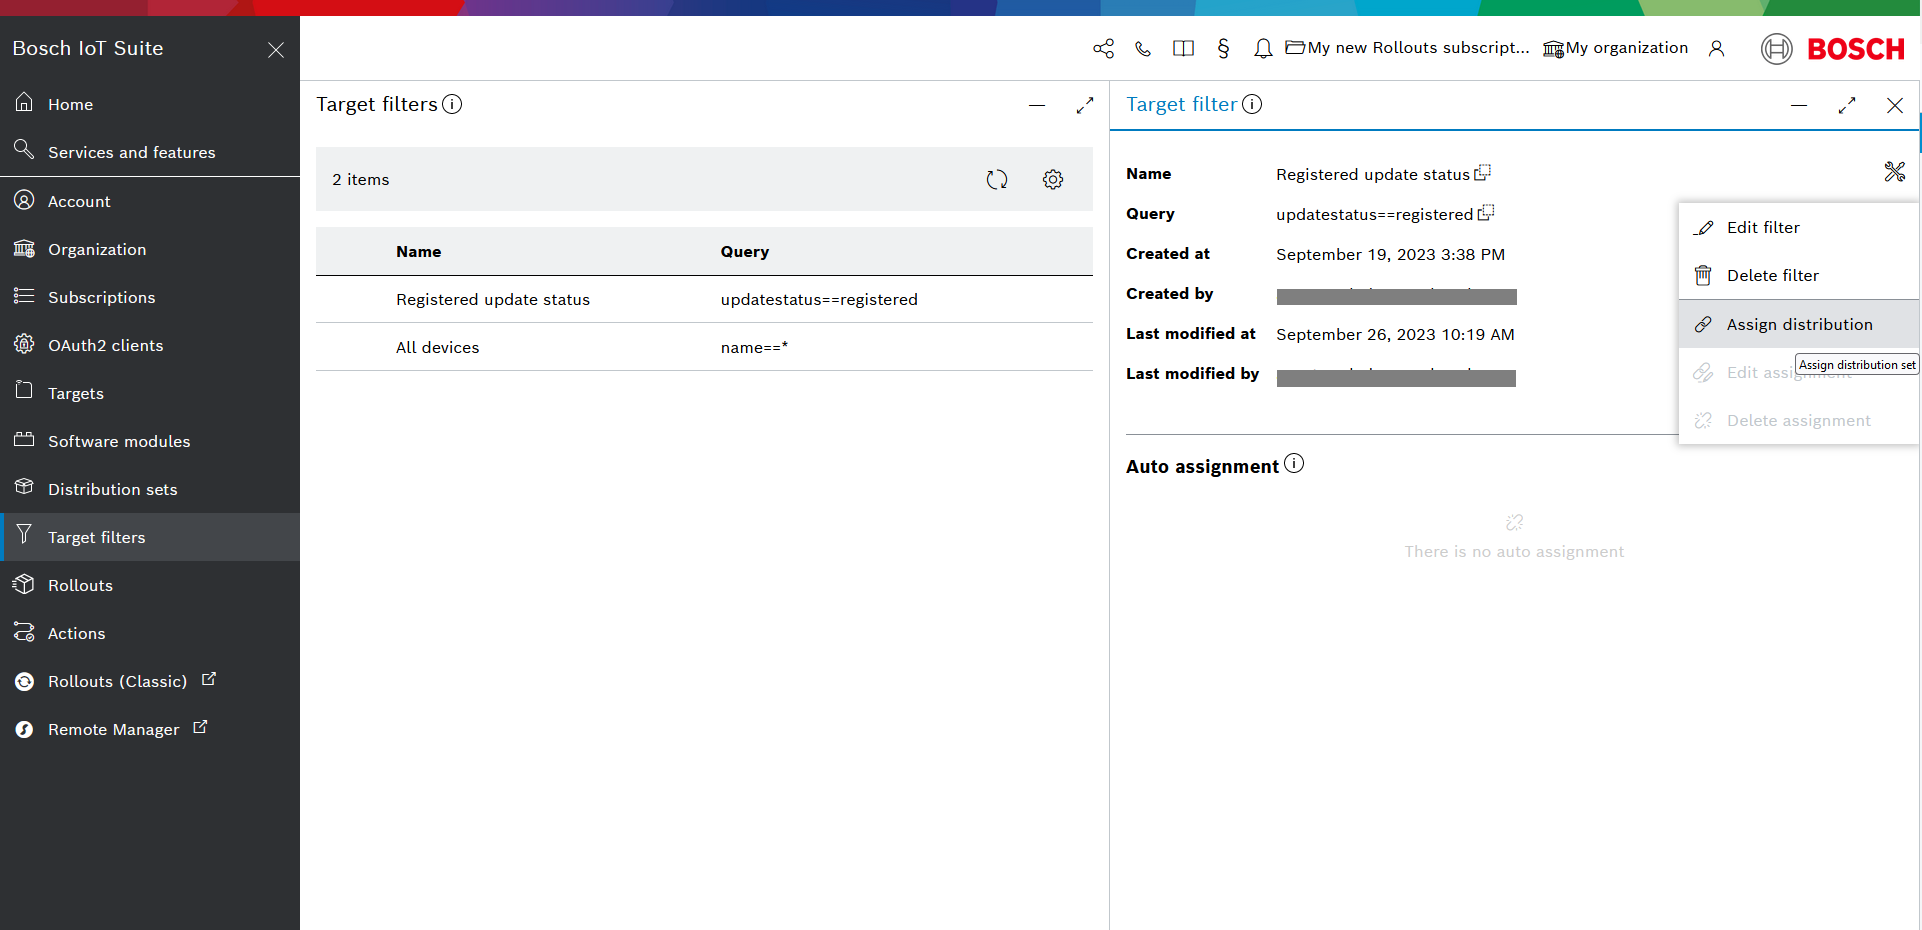
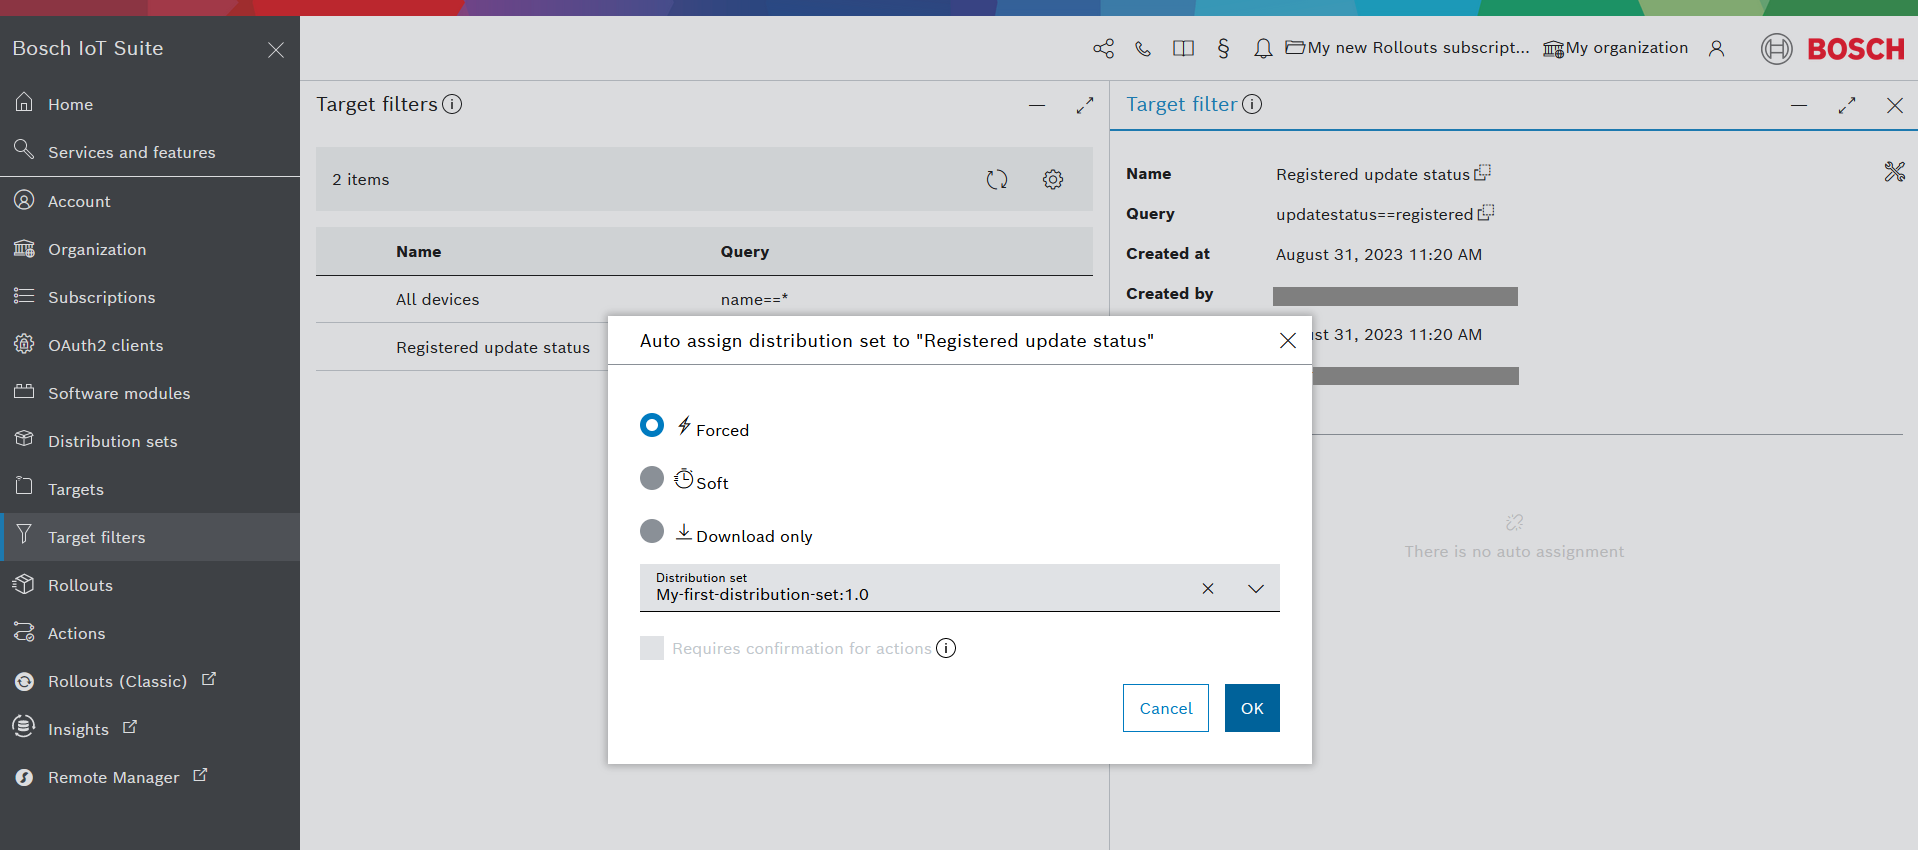
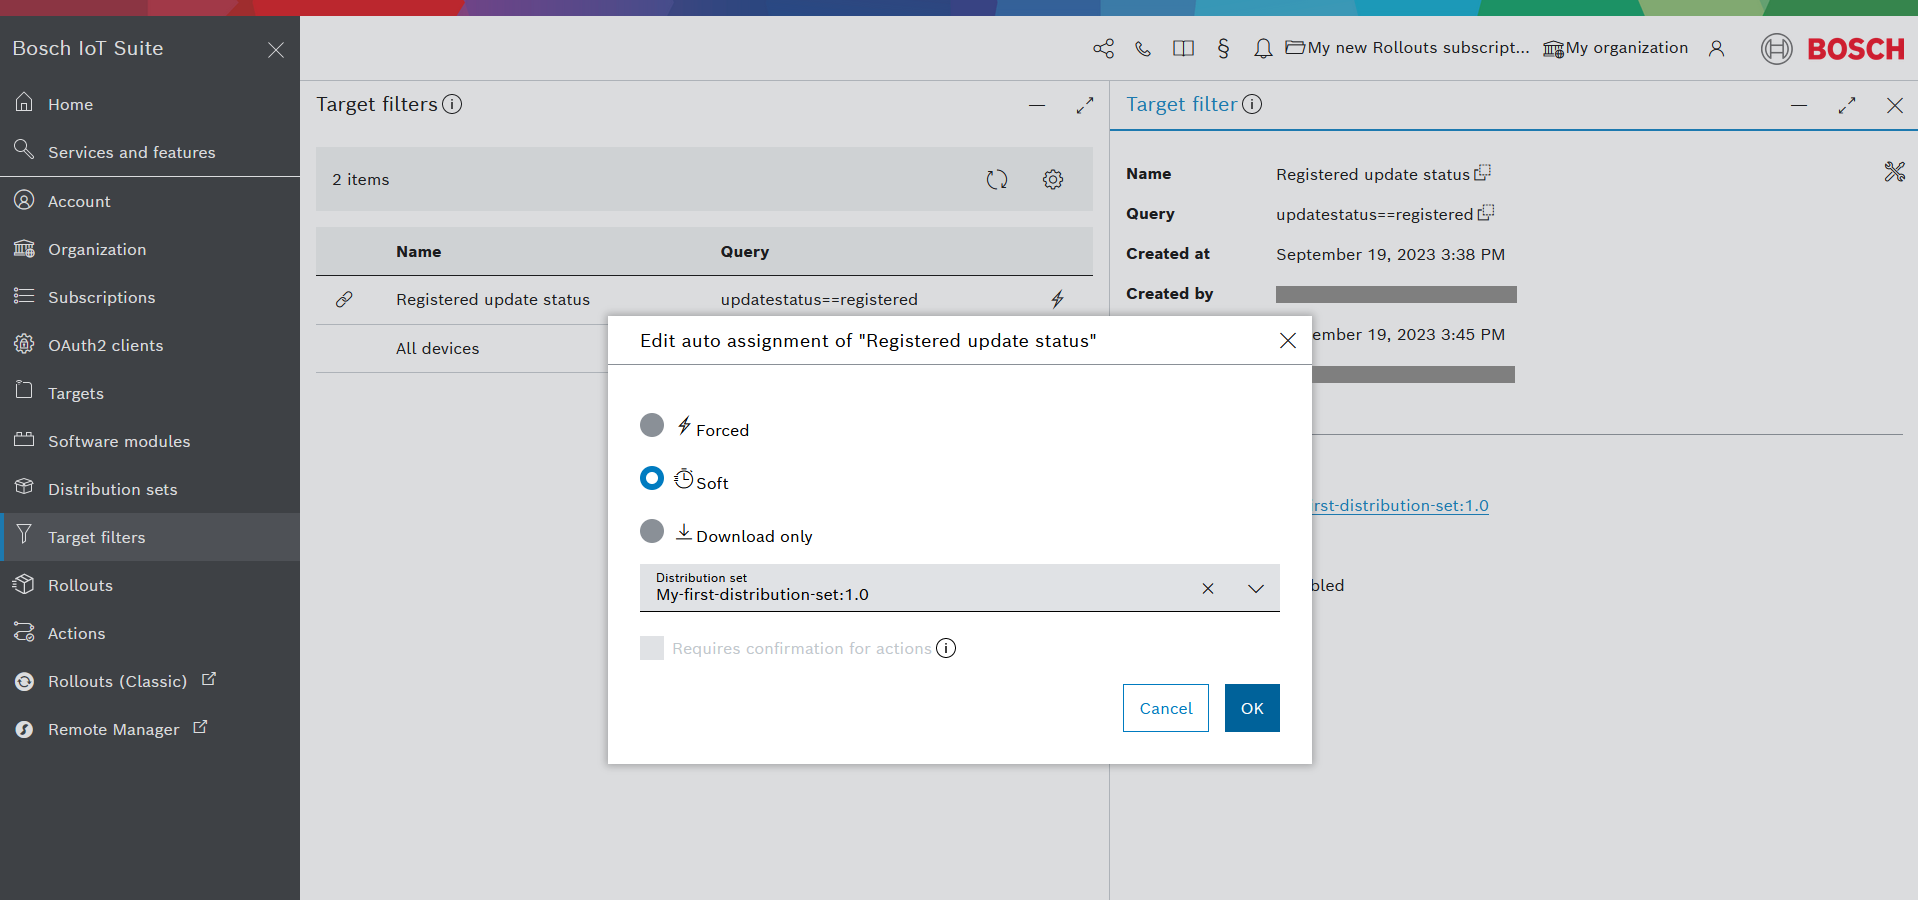
- In the Auto assign distribution set dialog that opens up:
- Select among the options: Forced, Soft and Download only (find details here).
- Select the relevant Distribution set from the dropdown list.
- If you have already enabled user consent flow you can turn on the confirmation requirement by adding a check mark.
- Confirm with OK.
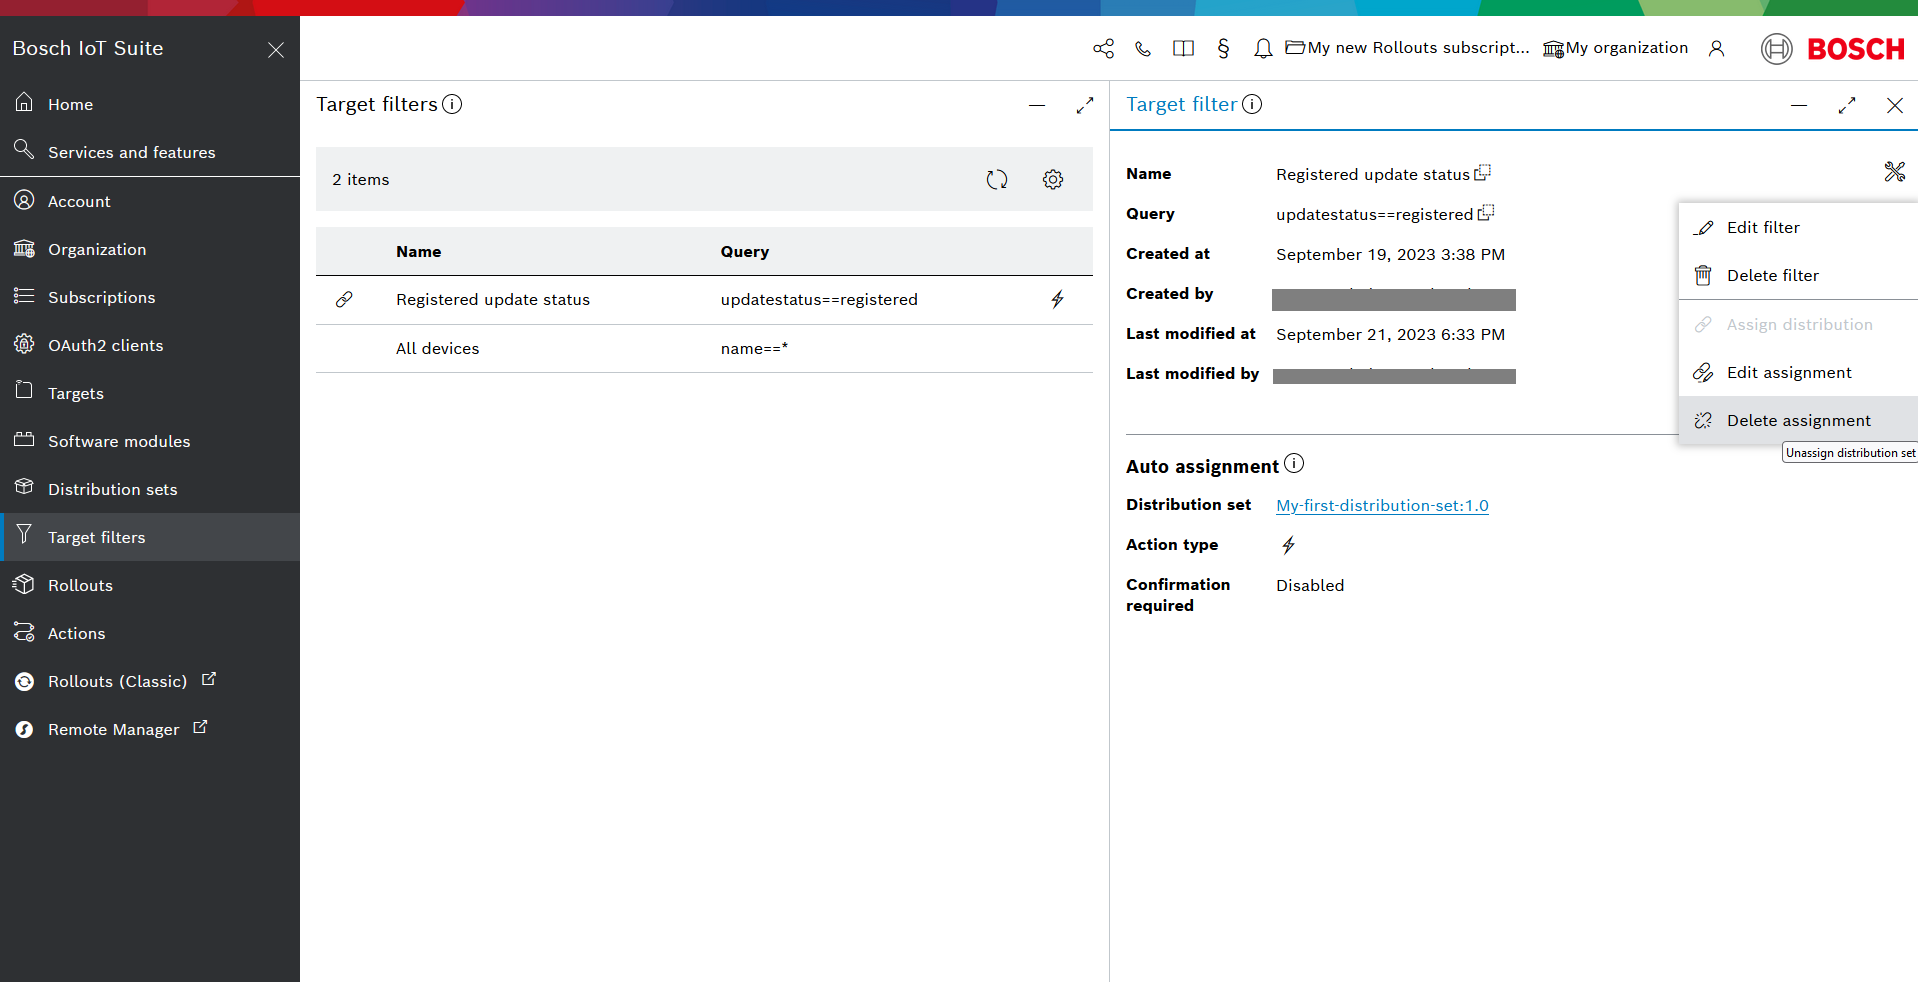
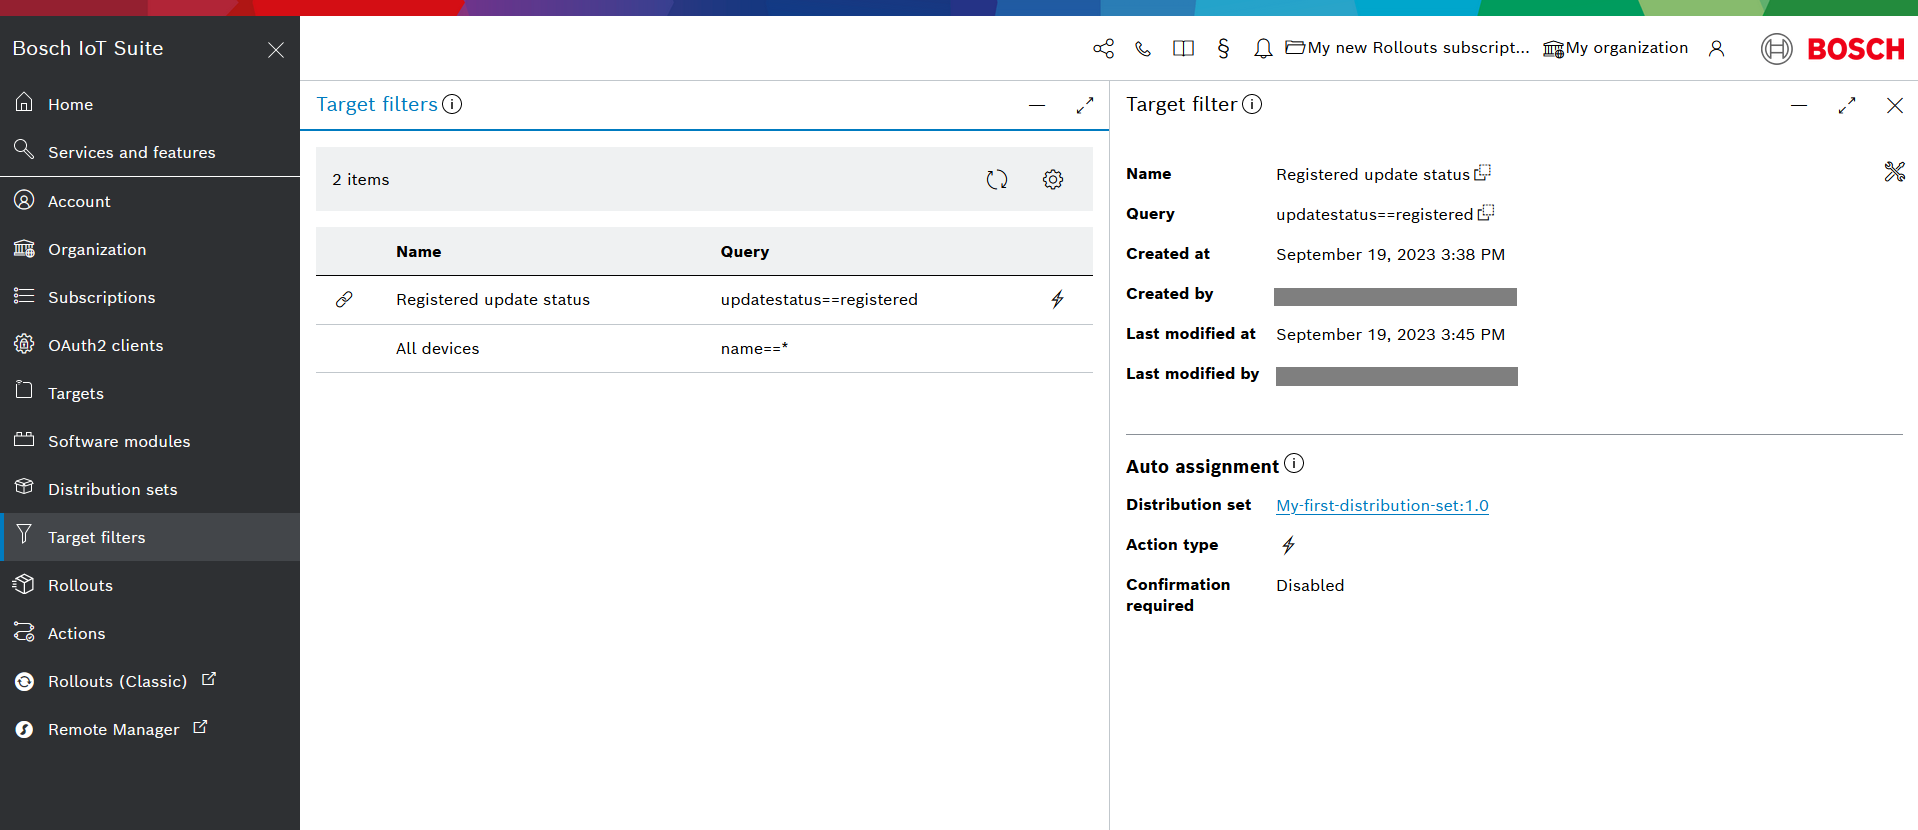
Upon that, the information about the newly created auto assignment will be displayed in the Auto assignment section of the respective Target filter's detailed view.
In particular, this section will show:
- the name of the Distribution set and a link to its details,
- the Action type (Forced in our case),
- whether Confirmation is required.
Edit auto assignment
In case an auto assignment has been created but needs modifications, you can edit it by following these steps:
- Select the respective target filter from the list.
- Click the Target filter actions
 icon.
icon. - Click Edit assignment.
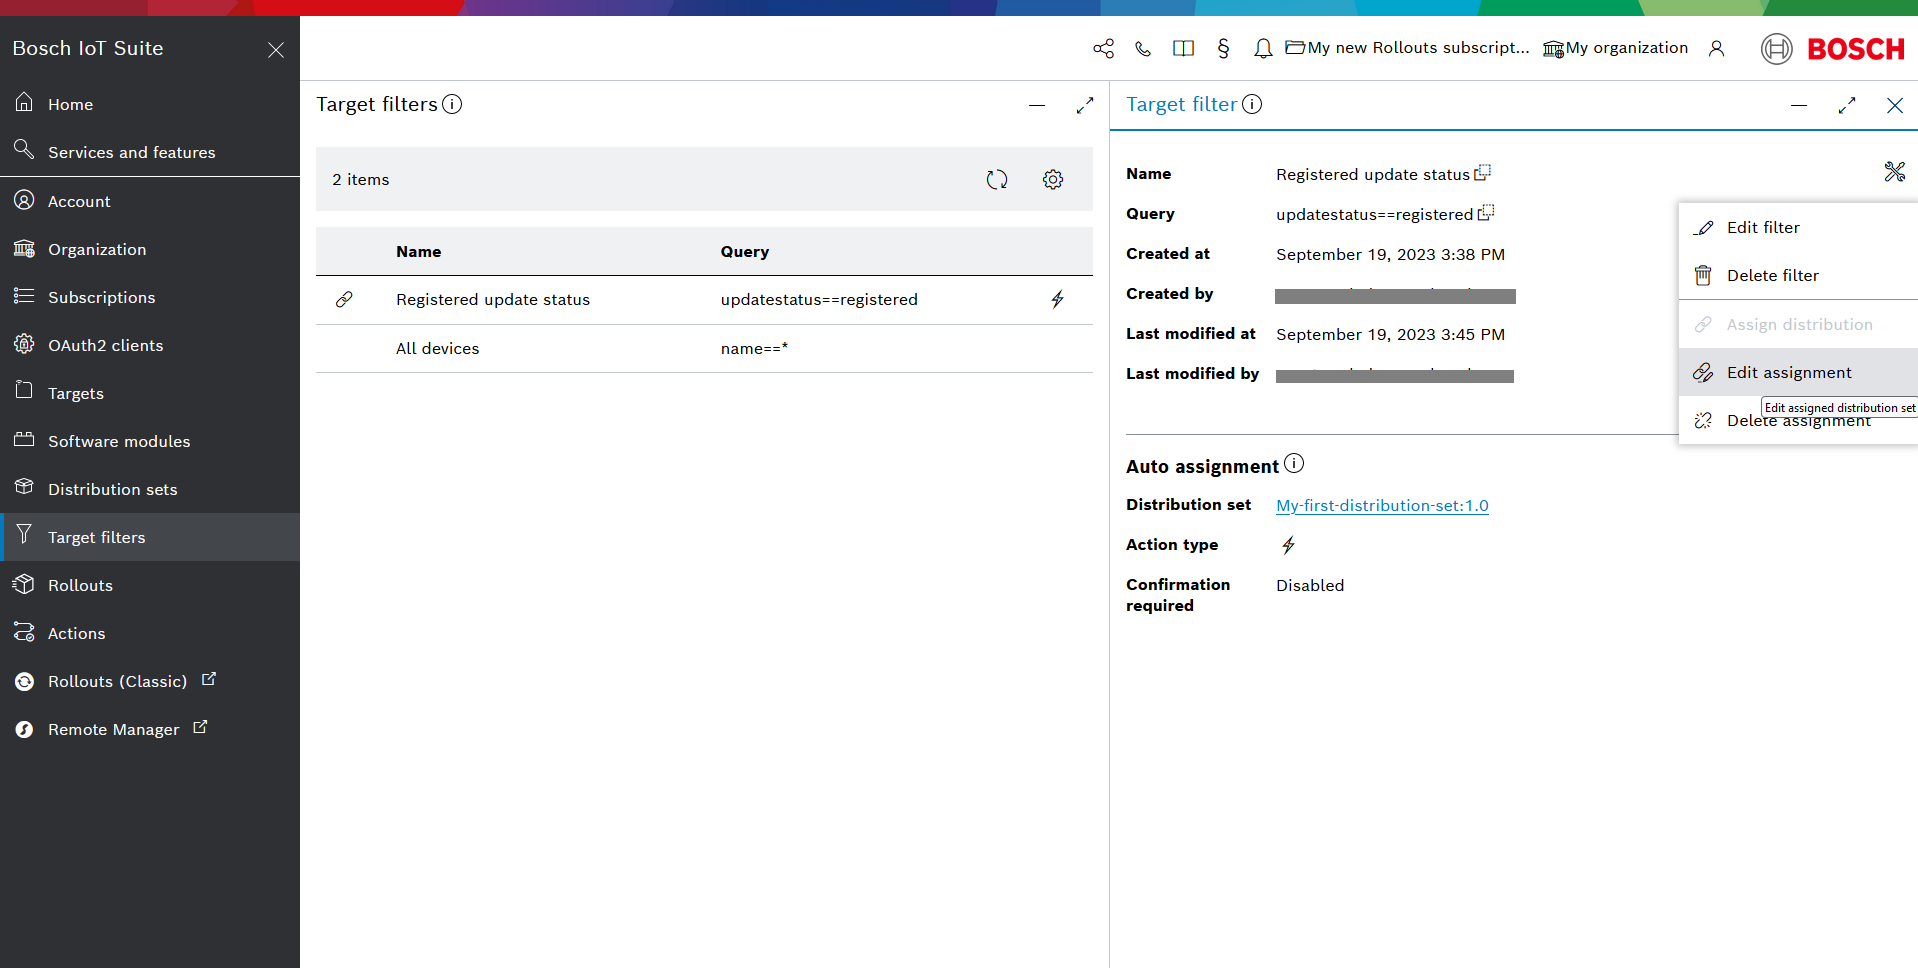
- You can change both the Action type and the Distribution set:
Delete auto assignment
Deleting an auto assignment is possible through the Target filter actions ![]() menu.
menu.
Select the Delete assignment action from the menu and then in the dialog that opens, confirm your choice.