Start, pause, and resume a rollout
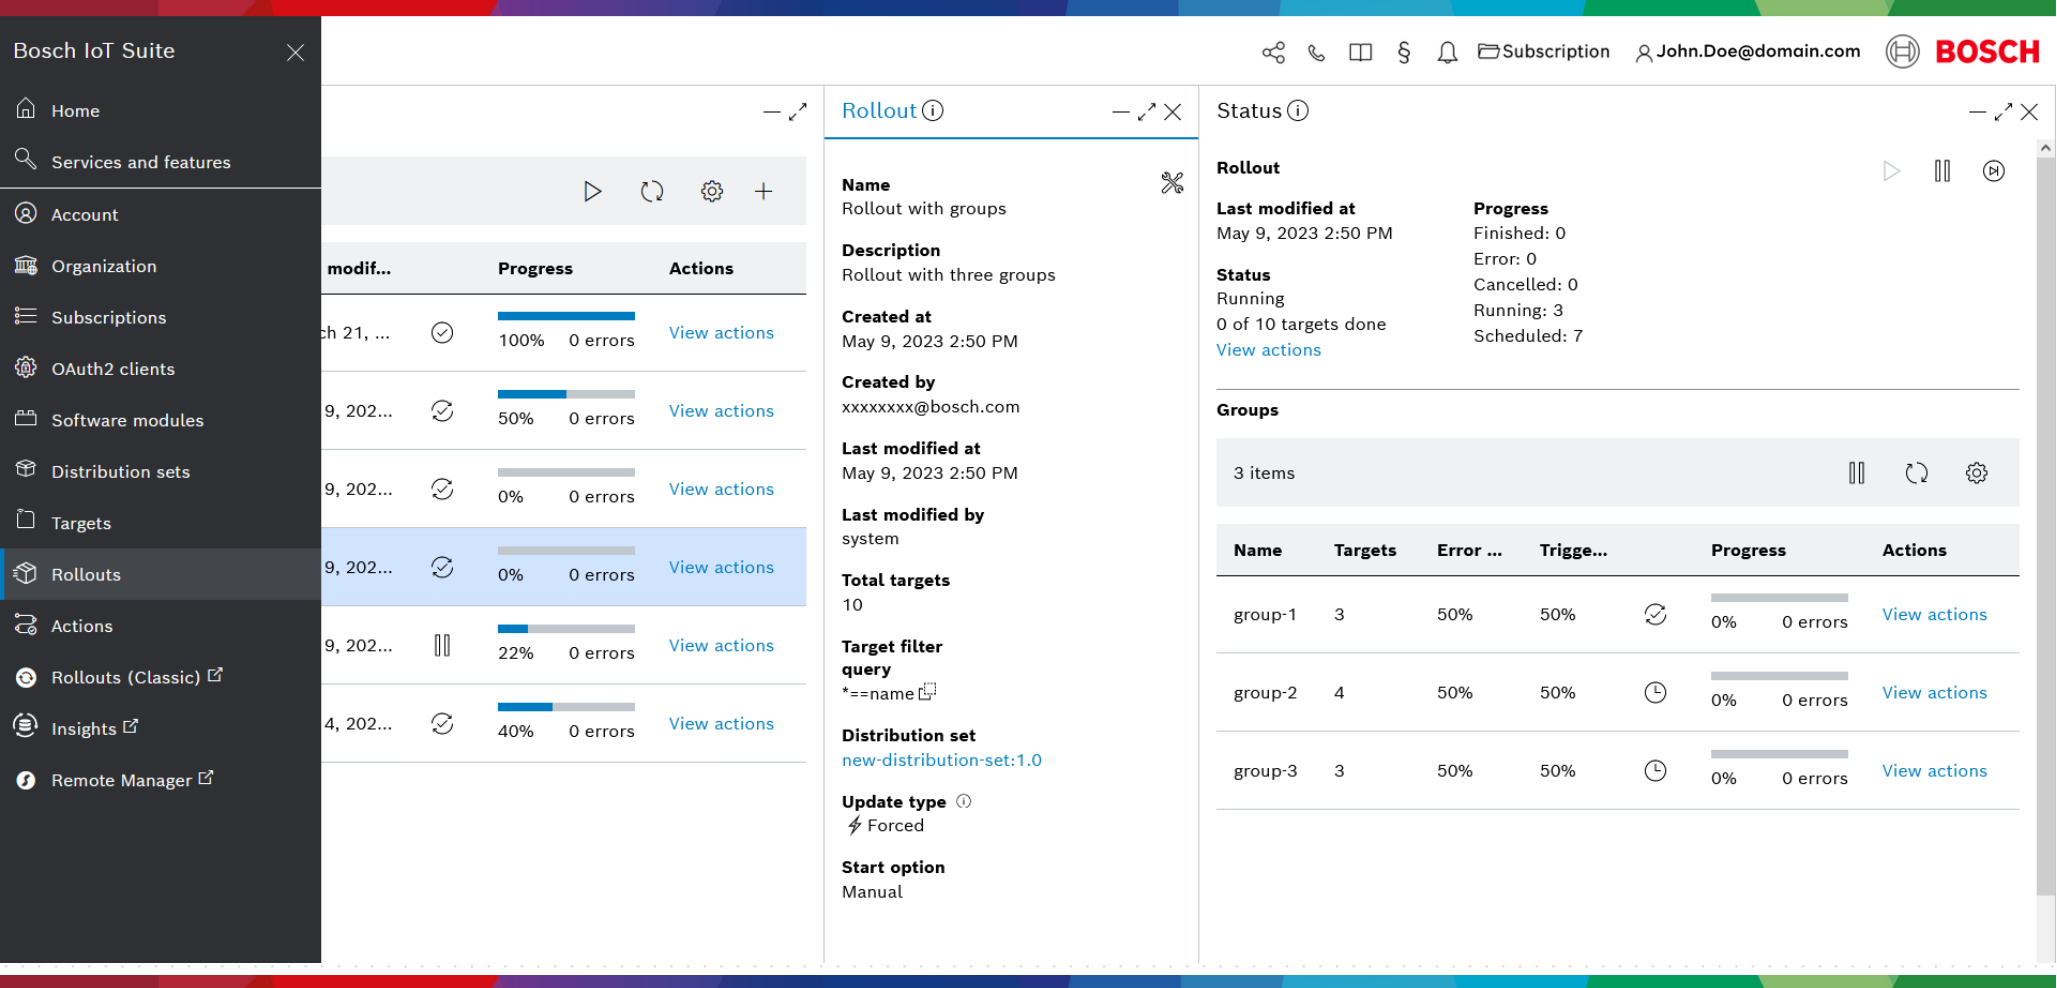
Select the newly created rollout on the list of rollouts. This automatically opens the Rollout details view and the Status view.
In the Status view, click the start icon to start the rollout execution and the pause icon to pause the rollout execution.
To resume the execution of a paused rollout, click the start icon again.
If the start option is manual you have to click the start icon to trigger the rollout execution.
For the other start options, the initial start happens automatically.
Trigger next group
By default, the rollout execution must be finished for one group in order to start for the next group.
However, this is not always efficient. Therefore, the trigger next group icon allows you to manually trigger the rollout execution for the next defined group.
Dynamic Rollout
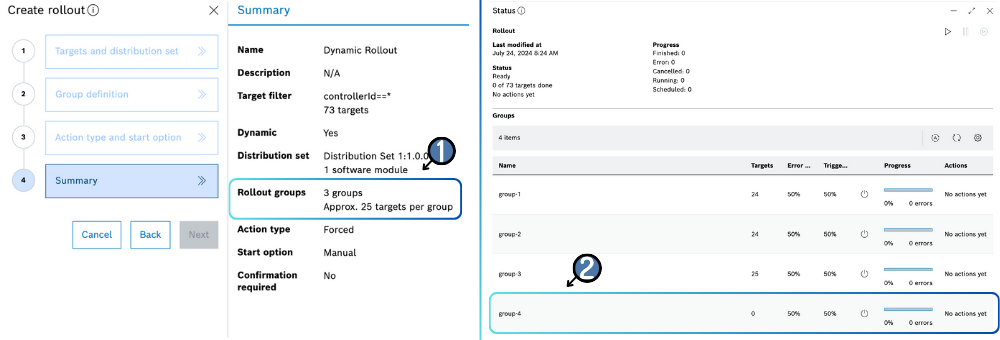
The Dynamic Rollout concept enhances the rollout process by incorporating newly registered targets even after the rollout has been created. This ensures that all eligible targets, including those added post-creation, are involved in the rollout.
Static Groups: During the initial "creation" phase of the rollout, static groups are automatically formed based on the targets that currently meet the established filter criteria.
Dynamic Groups: A dynamic group is initially appended at the end of the group list.
- A new dynamic group is only created after the previous dynamic group has been triggered. This ensures a structured and sequential progression.
- Each group is triggered only once the previous group has successfully engaged all the devices specified in its parameters.
- All dynamic groups share the same operational parameters as the last static group. For instance, if the last static group was configured to engage 10 targets, each of the dynamic groups will also aim to engage 10 targets, maintaining consistency throughout the rollout process
Example: Suppose the configuration specifies the creation of three groups during the initial rollout setup. Despite this initial setup, a new fourth group, which will be dynamic, is automatically added after the rollout is created.
Approve or deny a rollout
When enabled in the System configuration view of the Classic Management UI, the approval workflow demands that an approver must accept or deny a rollout before it can be started.
The approver can be for example the product manager, who should check the created rollout based on its properties and rollout group structure, and decide whether the rollout can be started or needs to be fixed first.
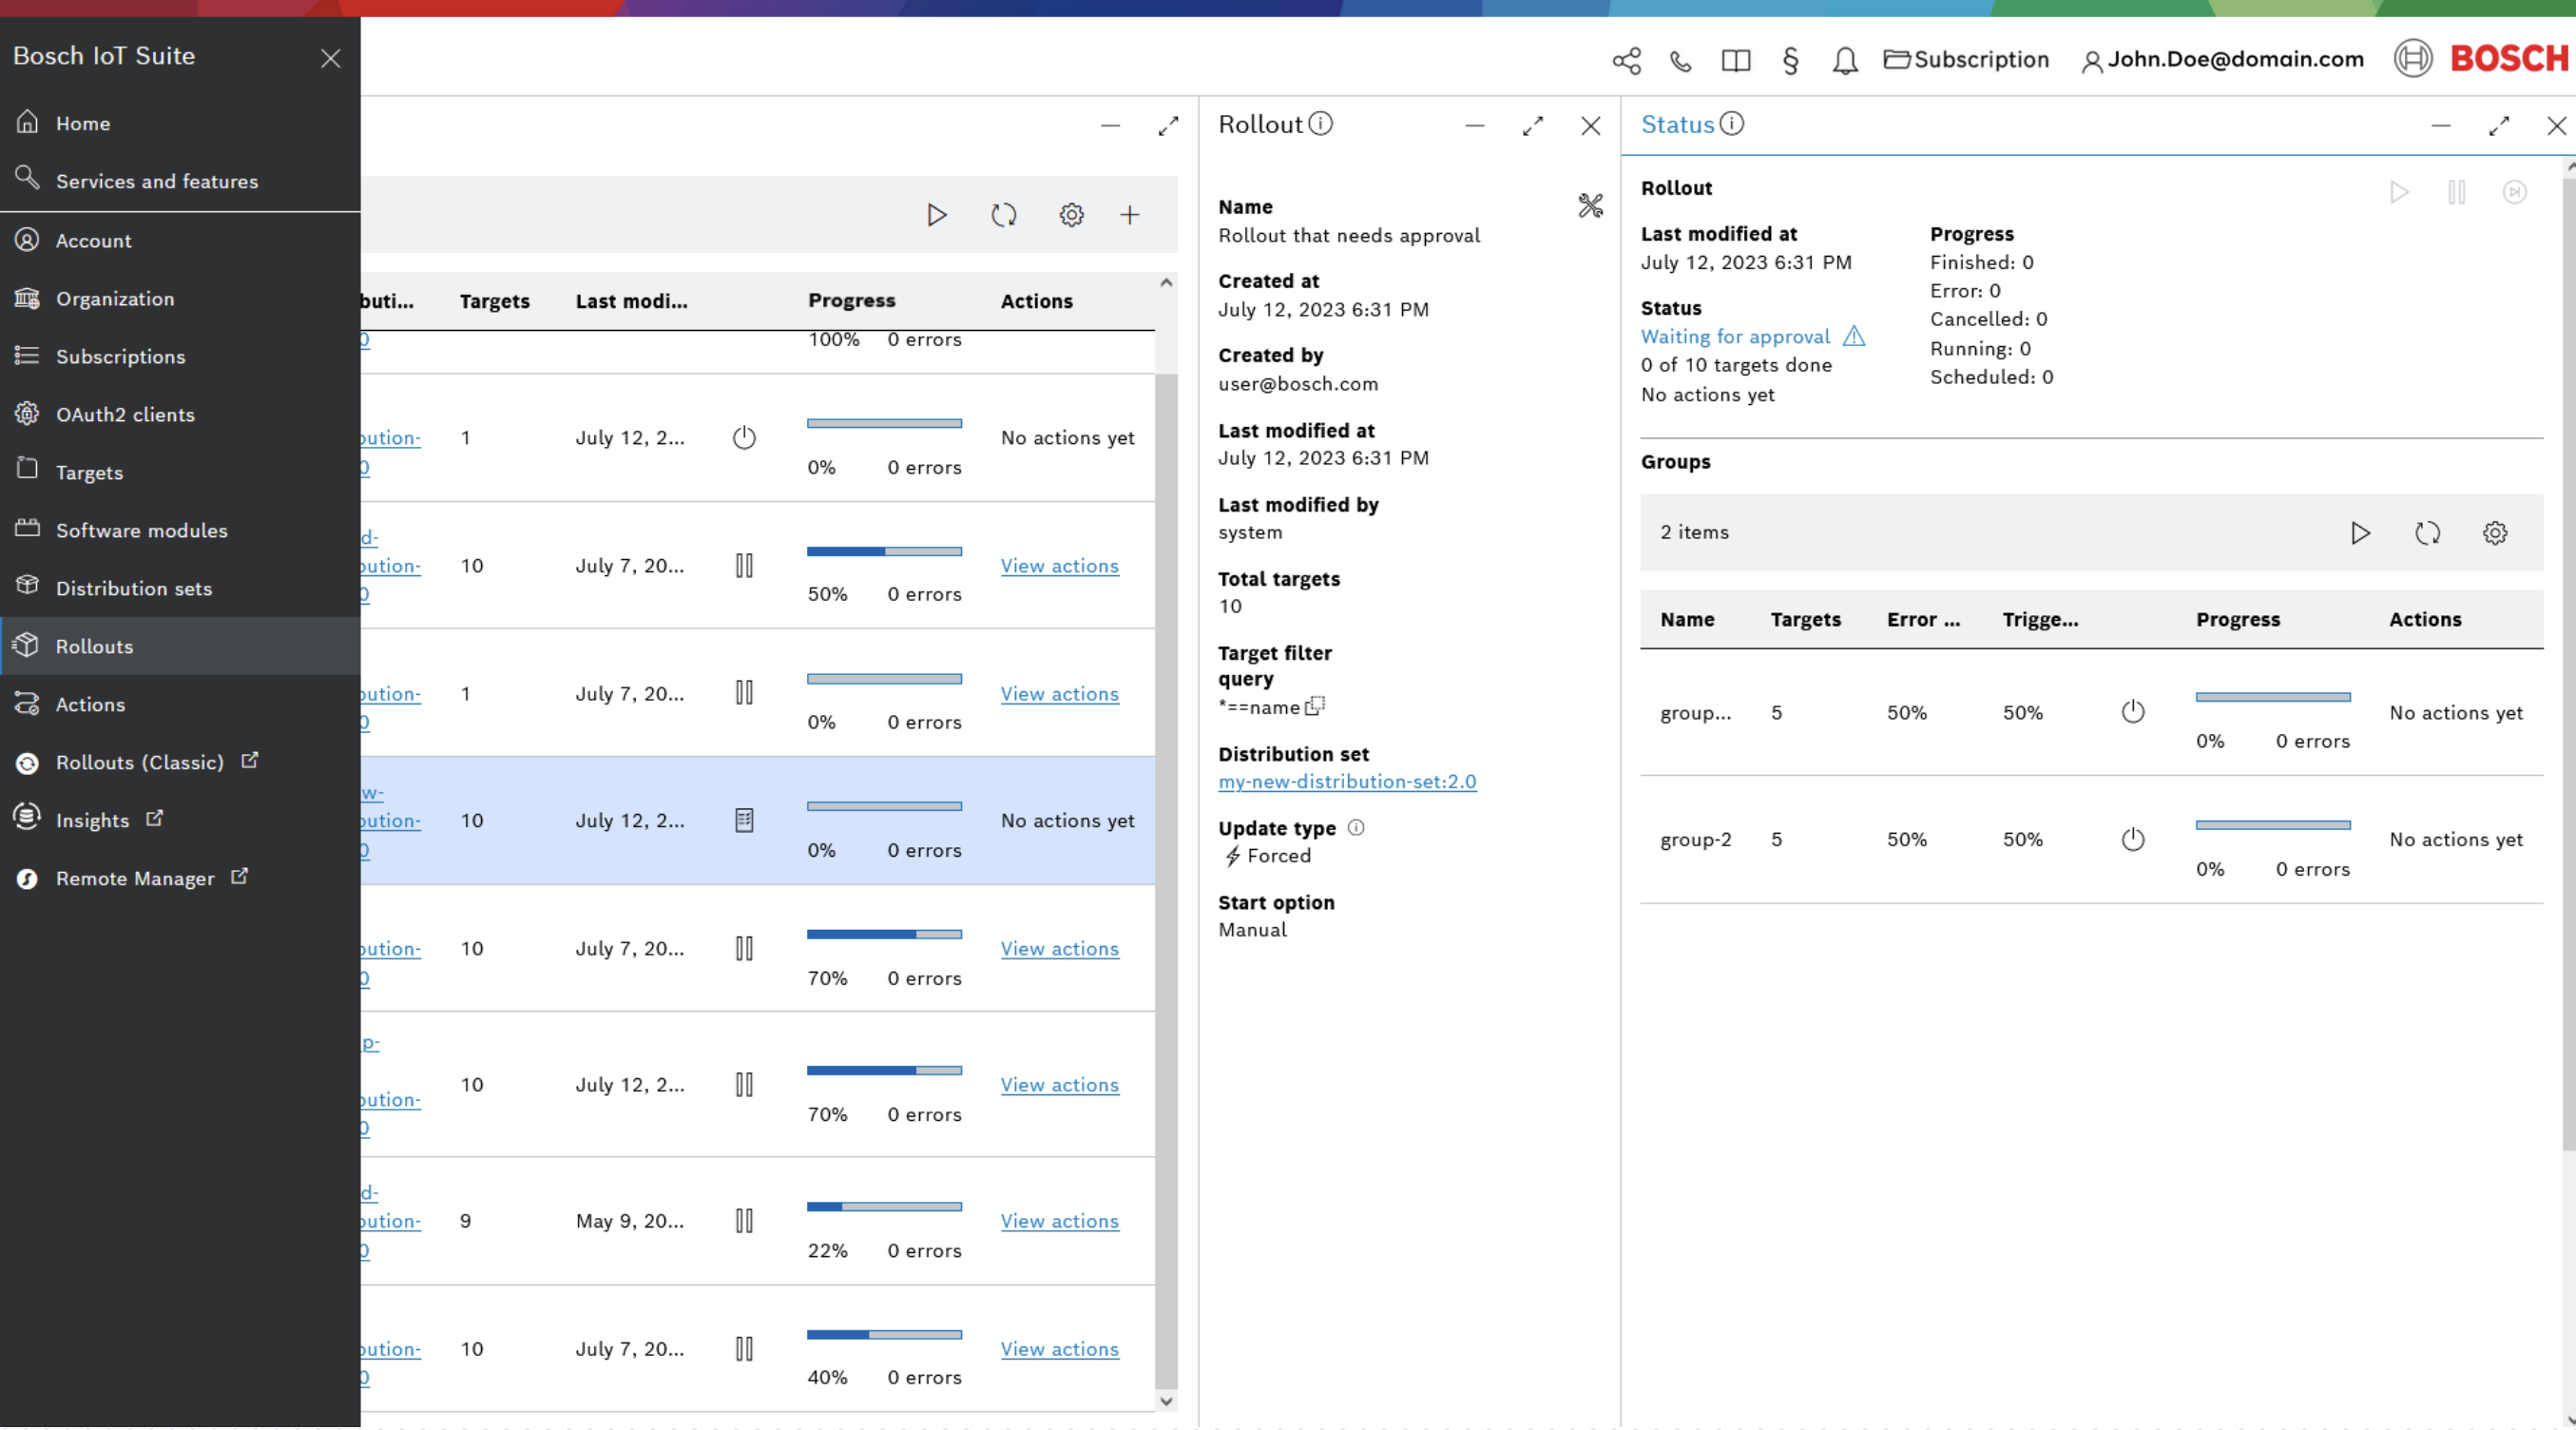
Thus after a rollout is created, as described in Create a Rollout, it is waiting for an approval. This is indicated by the Waiting for approval hyperlink within the Status view.
The relevant user who has the APPROVE_ROLLOUT role can approve or deny the rollout. There are two ways to access the respective dialog:
- either by clicking the Waiting for approval hyperlink mentioned above, or
- by clicking the icon in the Rollout details view and then the Approve/Deny option from the menu.
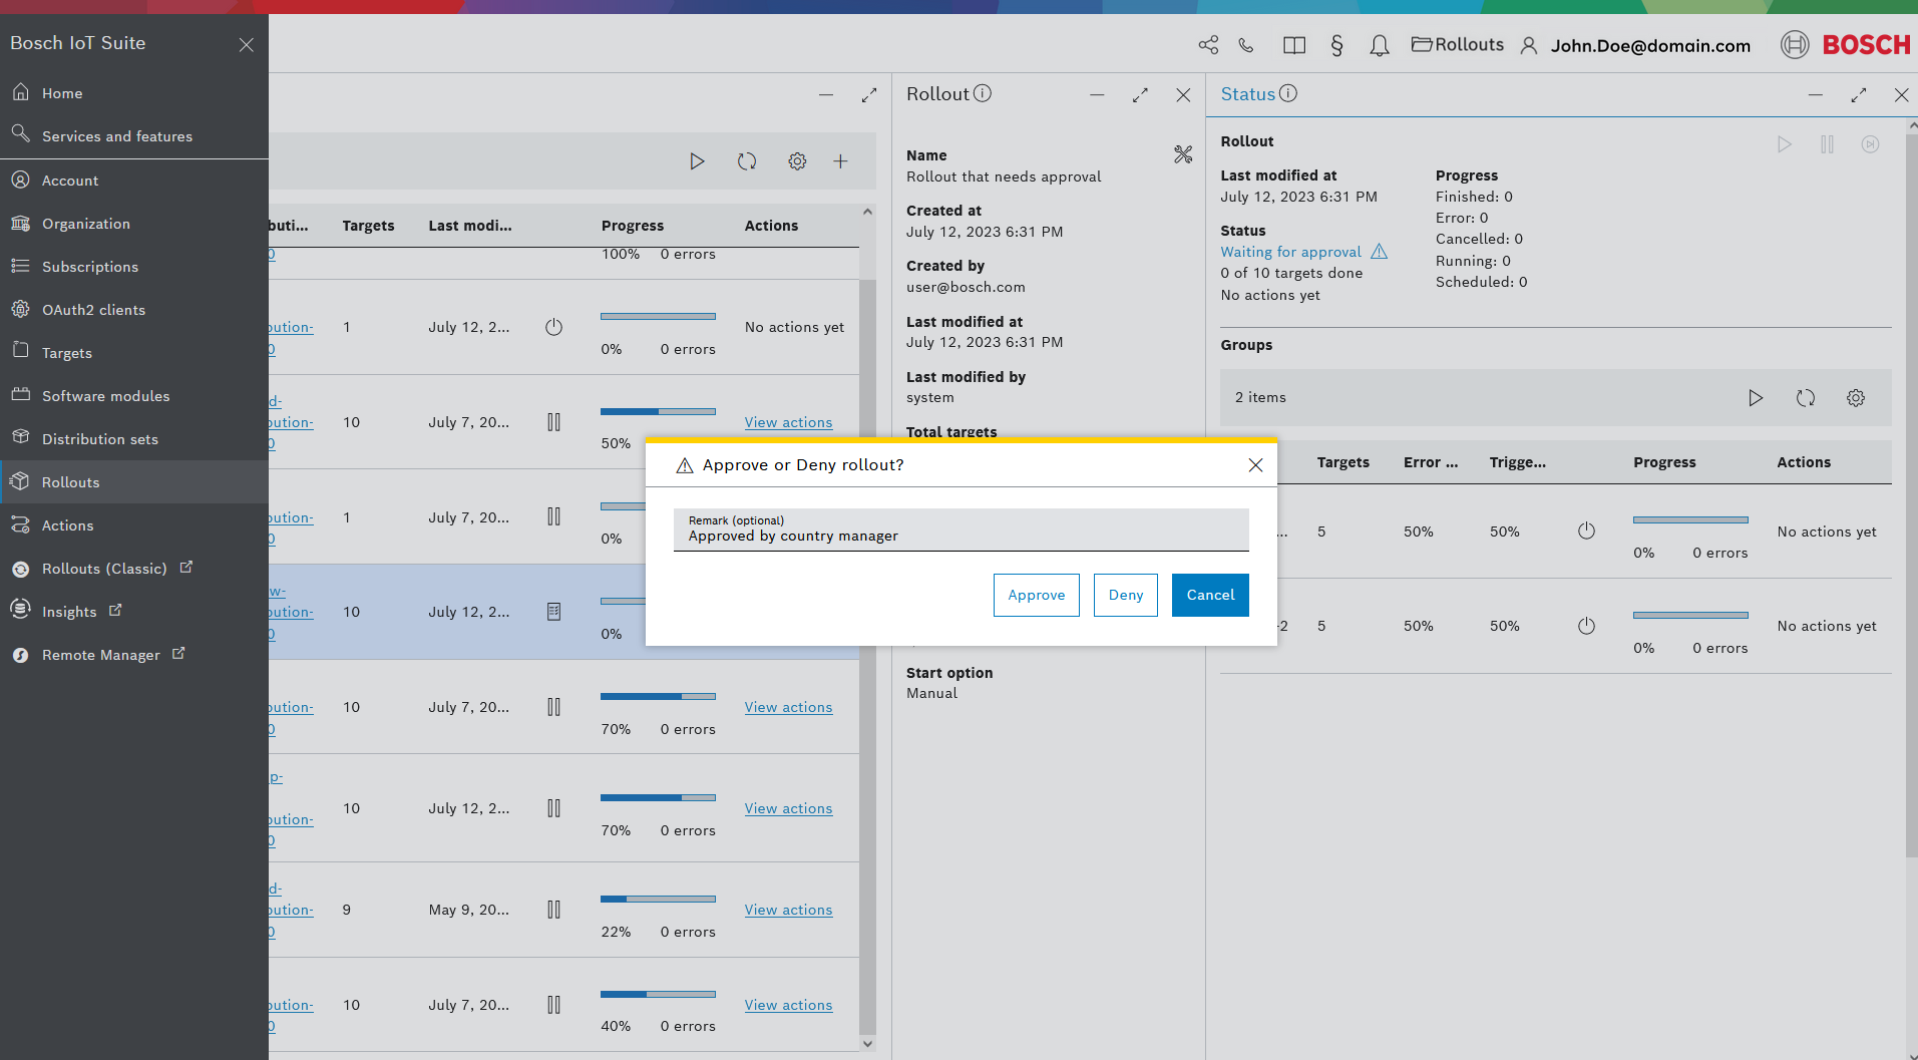
This opens a dialogue where the approver can write down an optional remark and choose whether to Approve or Deny the rollout by clicking the corresponding button.
If the rollout is approved, it is ready to start. If the rollout is denied, it cannot be edited or approved anymore, but only be copied or deleted.
The approval workflow is different from the user consent flow, which is presented in the UI through confirmation required checkbox in the rollout creation wizard.
With the approval workflow, the approval needs to be granted by an authorized user from the team.
With the user consent flow, the confirmation that the rollout is accepted and can be applied on the respective device, needs to be granted by the end user of the device.
Both the approval workflow and the user consent flow can be activated for a rollout and do not interfere with each other.
Stop a rollout
To stop a rollout you need the UPDATE_ROLLOUT permission.
The stop of a rollout is non-reversible action - once stopped a rollout cannot go in active state again.
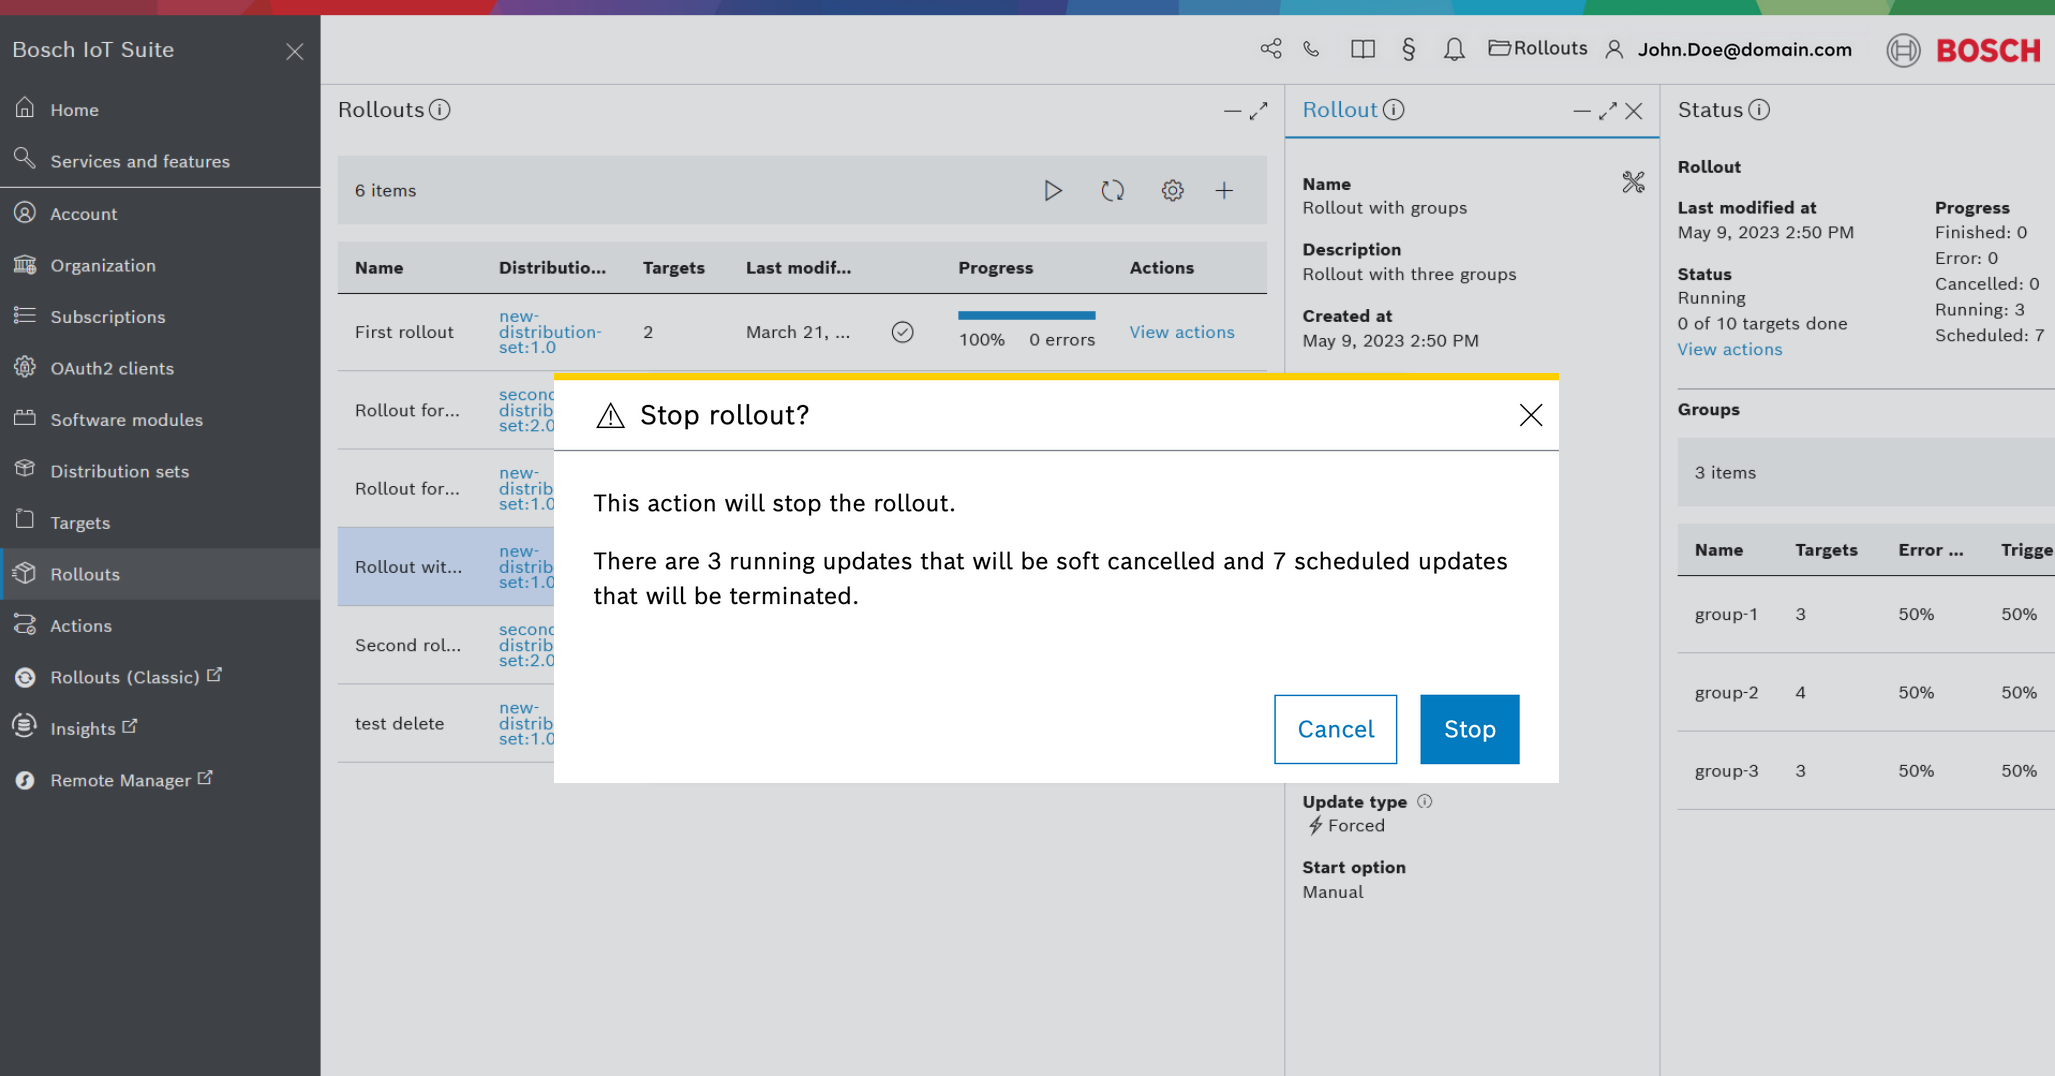
When a rollout is stopped all its running actions will be soft cancelled, whereas all its scheduled actions will be deleted.
For that, click the configure icon and in the menu that opens, select the Stop action.
Then a confirmation dialog informs of what happens with the started actions.
Delete a rollout
To delete a rollout you need the DELETE_ROLLOUT permission.
It is possible to delete any software rollouts which are no longer relevant, even such that have already started.
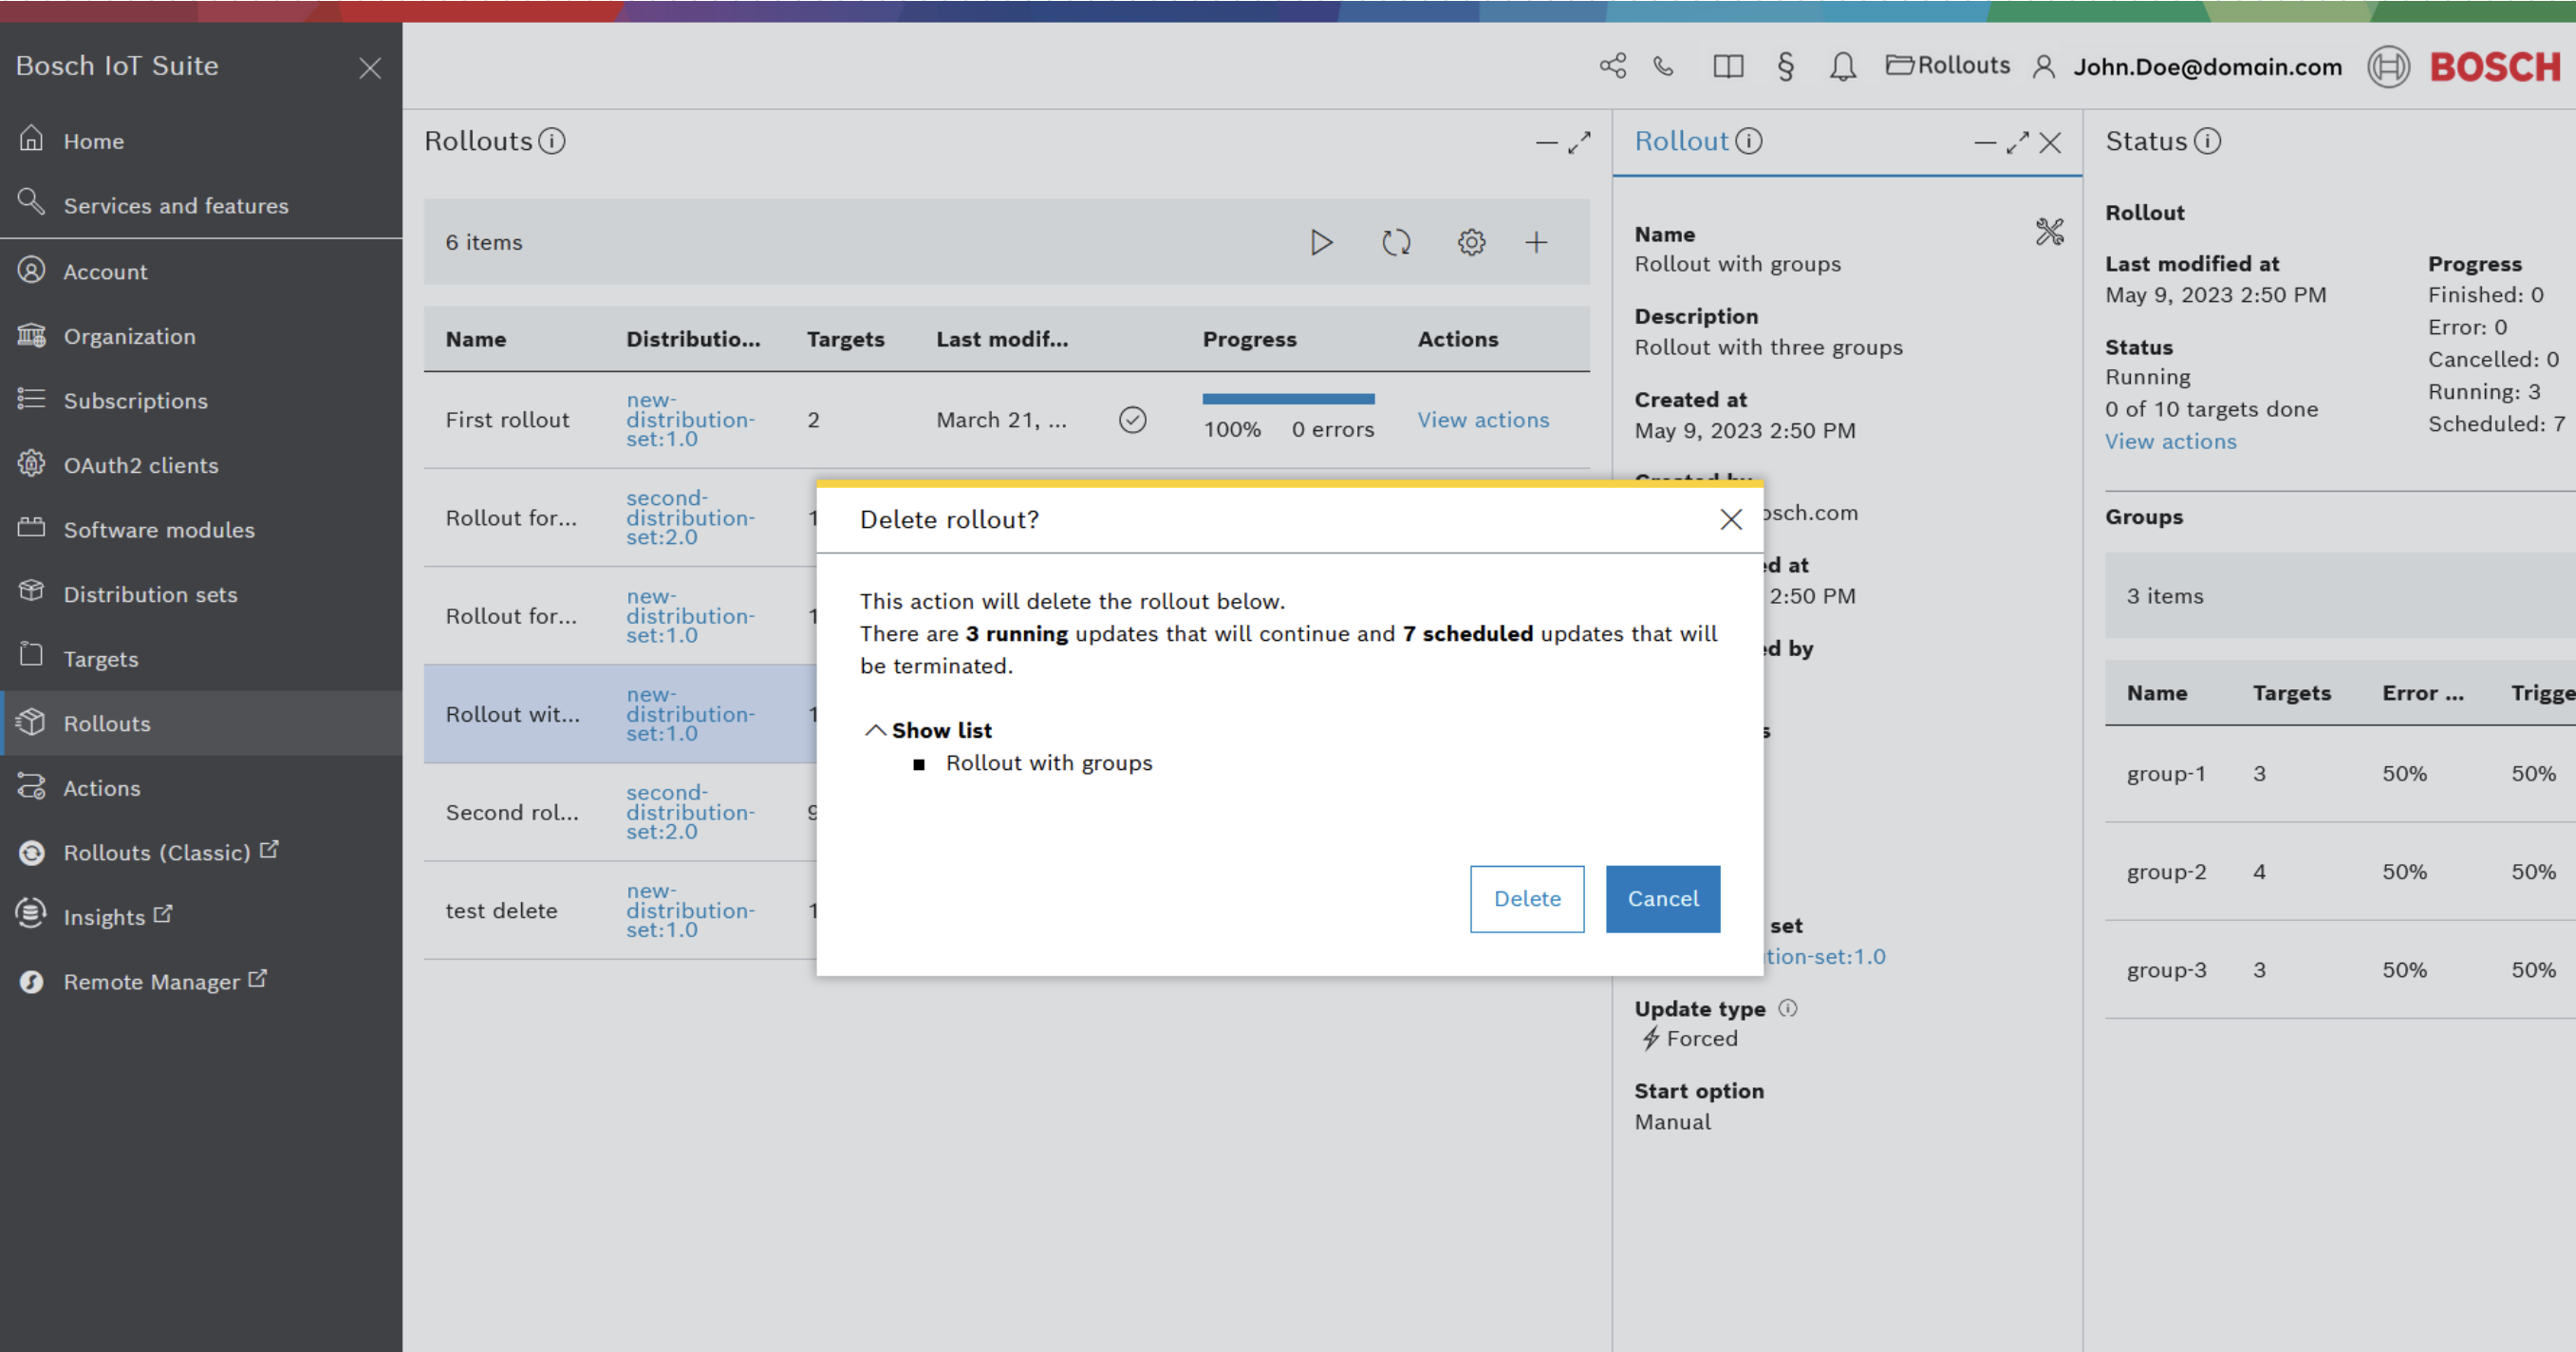
For that, click the configure icon and in the menu that opens, select the Delete action.
You will be prompted to confirm your choice. After confirmation, the rollout will be deleted.
In case the rollout was already started, the confirmation dialog informs of what happens with the started actions.
Hard deletion
If you confirm the deletion of a rollout which has not started yet, it will be removed completely from the Bosch IoT Rollouts repository, i.e. it will be hard deleted.
Soft deletion
If you confirm the deletion of a rollout which has started already, it will be only soft deleted. It means that the rollout will still be available in the repository but not presented on the list of rollouts in the UI.
All its running actions will be force cancelled, whereas all its scheduled actions will be deleted.
In such cases, in the action history of the involved targets you will see only the already running actions.
