This scenario covers the following steps:
- assigning a distribution set to a device
- downloading the update on the device side
- providing feedback to Bosch IoT Rollouts
Table of contents:
Introduction
Updating a device requires actions both on the management side (UI/API) and the device side (DDI/DMF).
First, the already created update has to be assigned to a device. Then, the device has to retrieve the update, install it, and provide feedback to Bosch IoT Rollouts whether the update has been successful or not.
In case the user consent flow feature has been activated for the particular tenant, there is a step in between, where the end user is asked to confirm their consent to receive the update before the device can actually retrieve the update.
Prerequisites
Enabling the approval workflow
In certain cases, an update may have to be approved by a superior or responsible, before it can be rolled out.
This is supported in Bosch IoT Rollouts by the Approval Workflow feature.
To enable it, go to System Configuration view > Rollout Configuration and enable “Approve rollout …” in the Management UI (Classic).
1: Create a rollout for a single device
The initial step of installing an update to a device is the creation of a rollout via the Management UI or assigning the distribution set to a target via the Management API.
Via Management UI
When using the Management UI (part of the common Bosch IoT Suite UI), follow these steps:
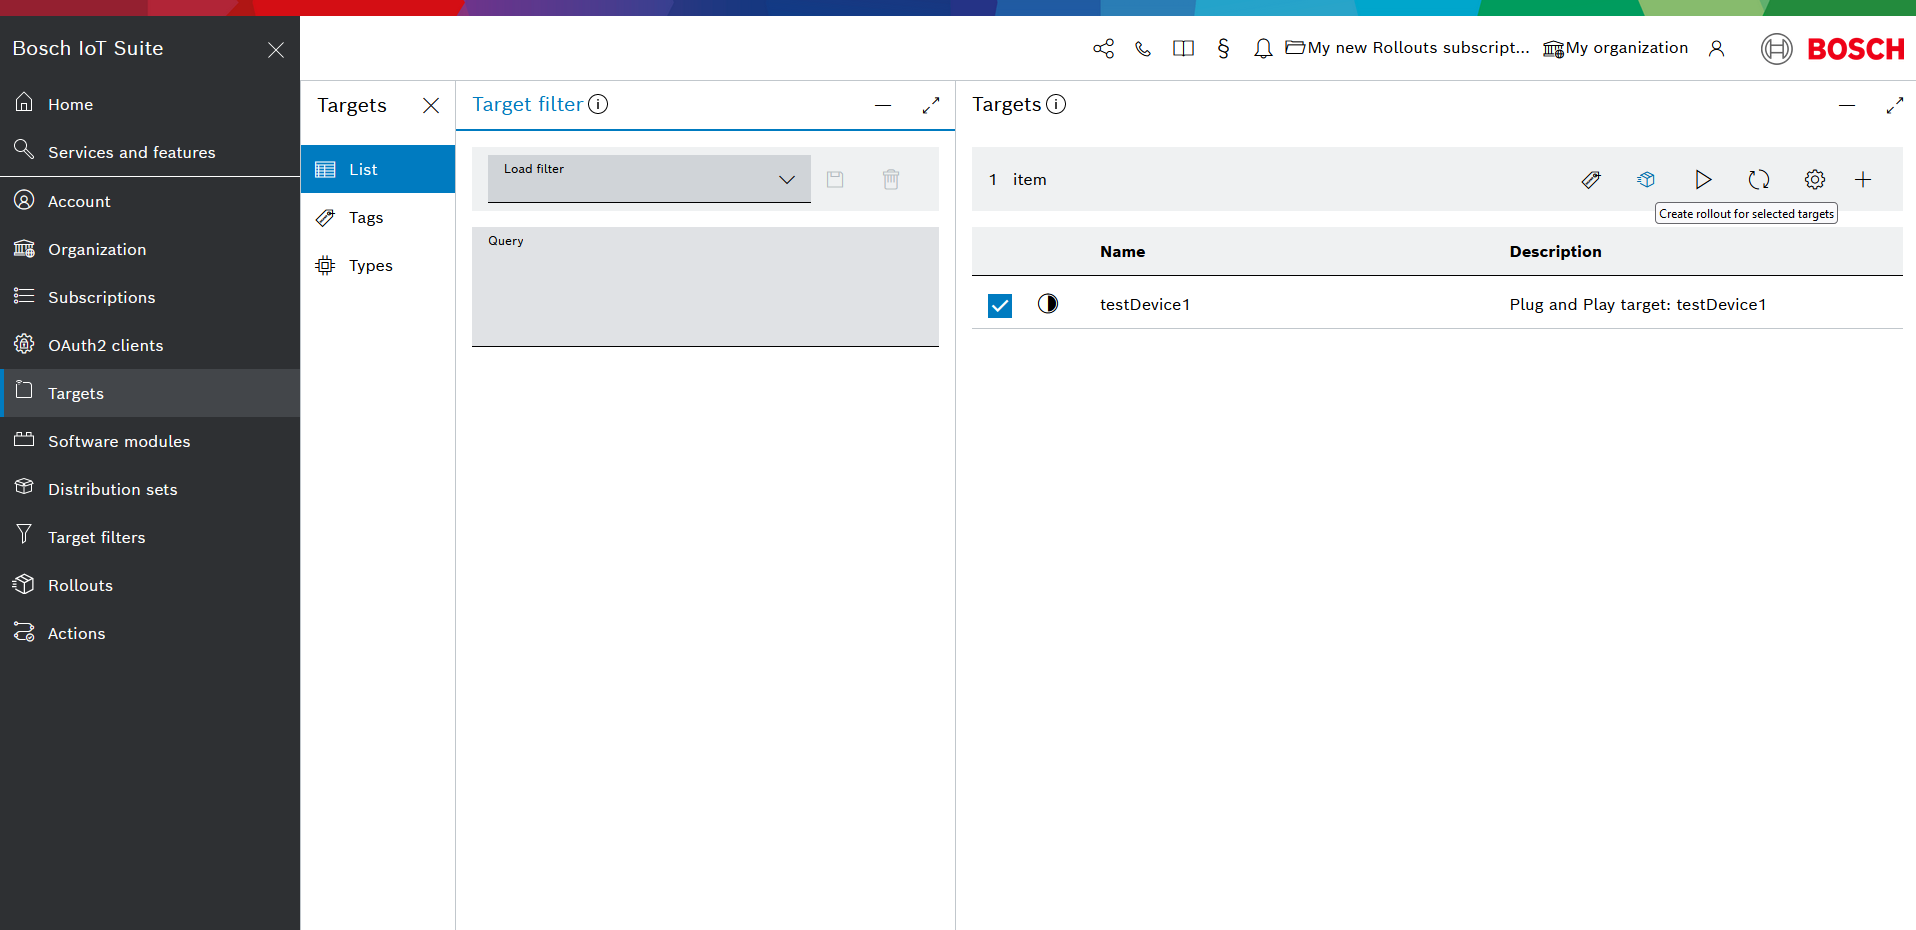
Go to Targets from the left navigation and select the relevant target from the list of targets through its checkbox.
Once you have provisioned more devices, you can select multiple at once and include them in the rollout as described in Create a rollout on manually selected targets.
- Click the parcel icon on top of the list of targets (icon tooltip saying Create rollout for selected targets).
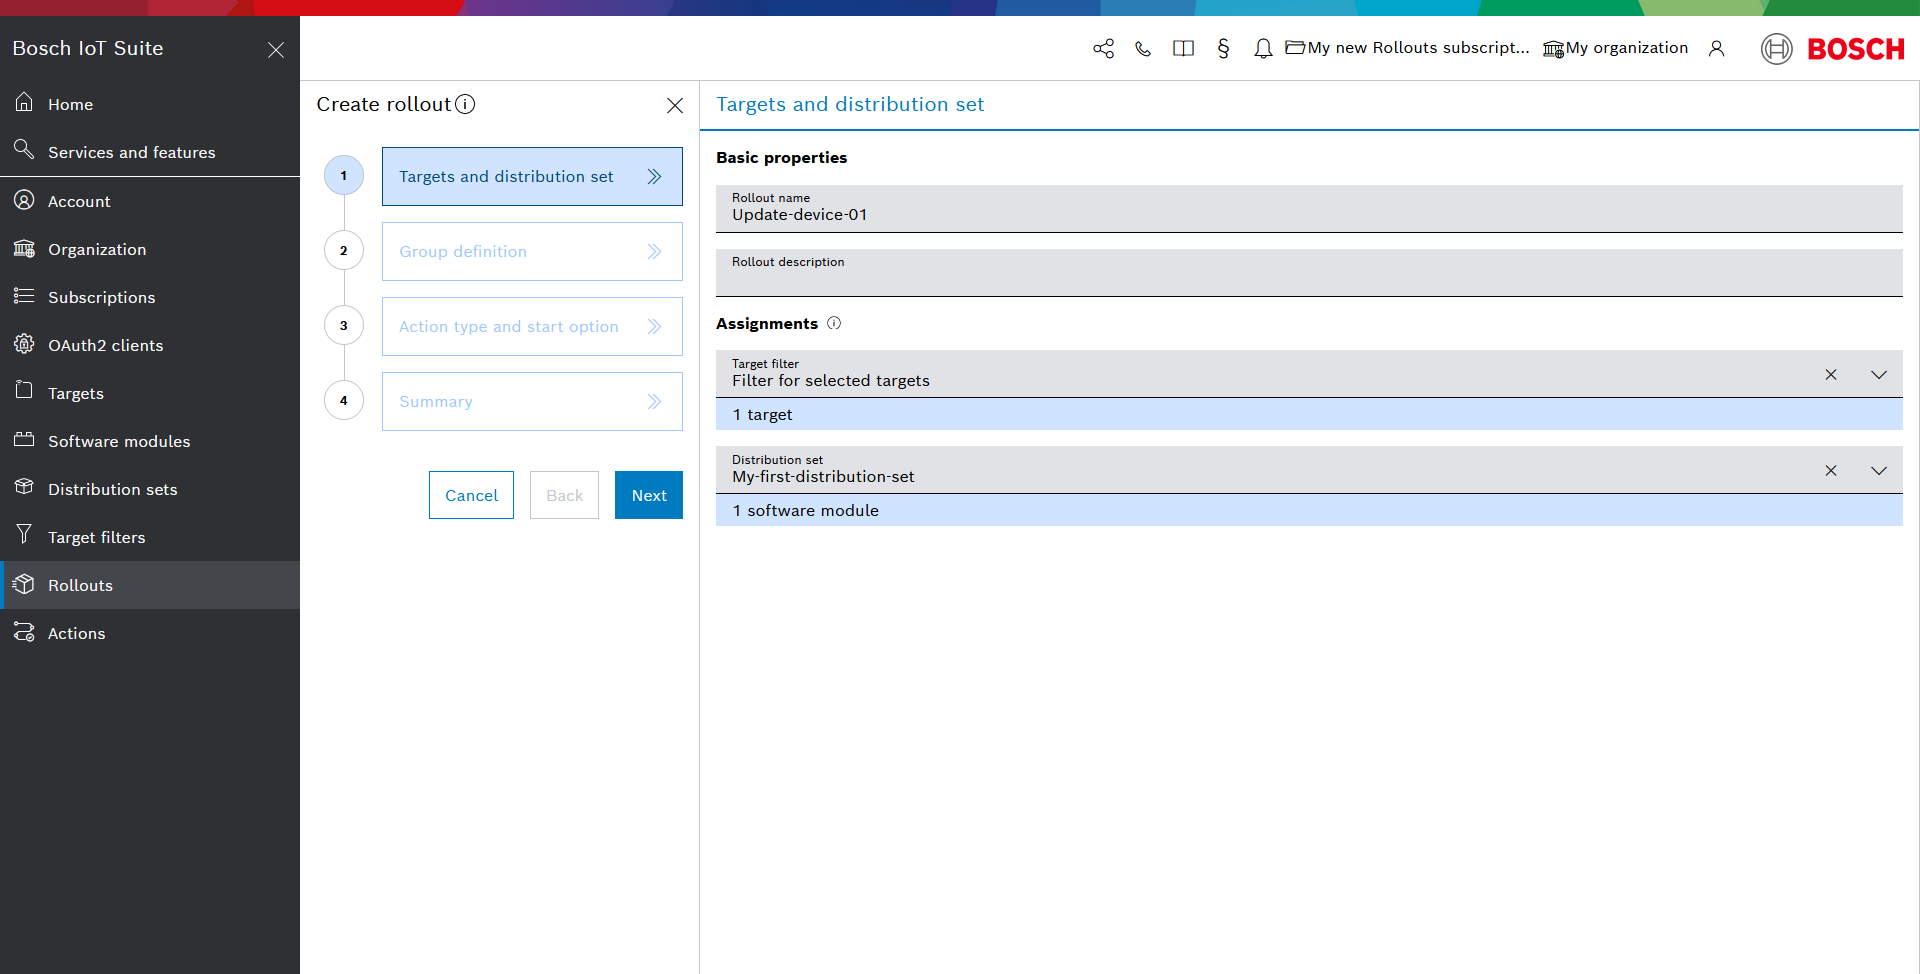
- As a result, the Create rollout wizard, part of the Rollouts UI feature, opens automatically. Once you are in the wizard:
- Type in the rollout name and optionally a description.
- The Target filter field is already filled in automatically with Filter for selected targets.
- From the next drop-down, select the Distribution set you want to distribute to the device.
- You can skip the Group definition step by clicking Next, as you are updating only one device.
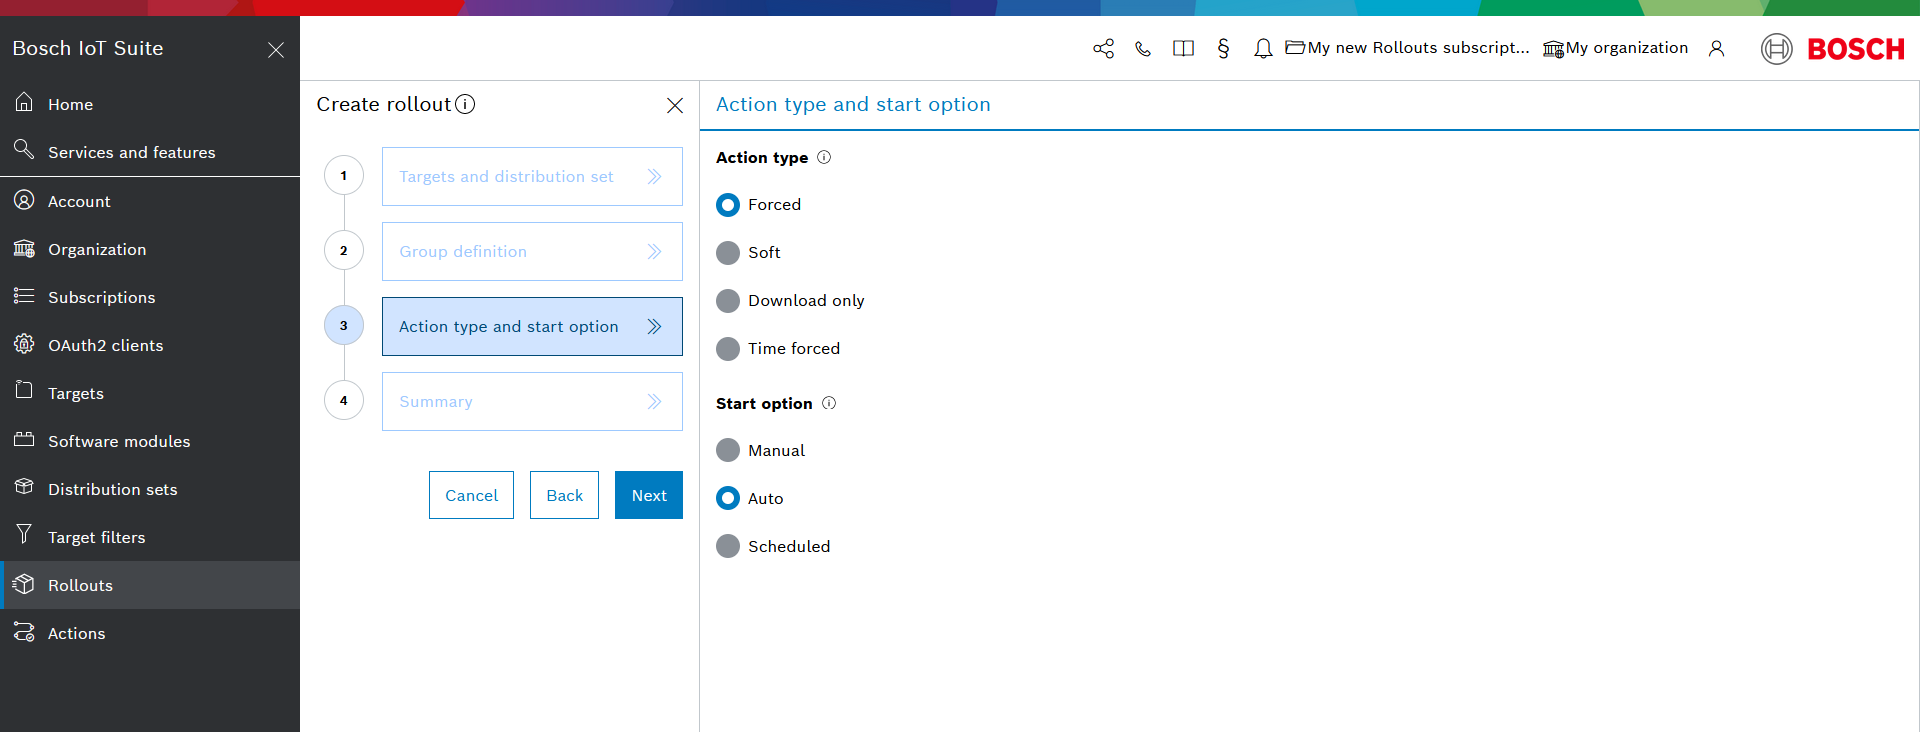
On the Action type and start option step, choose Forced and Auto.
This will automatically start your rollout, unless the approval workflow is enabled. For such cases, refer to Approve or Deny a rollout.
- Review your settings and click Create.
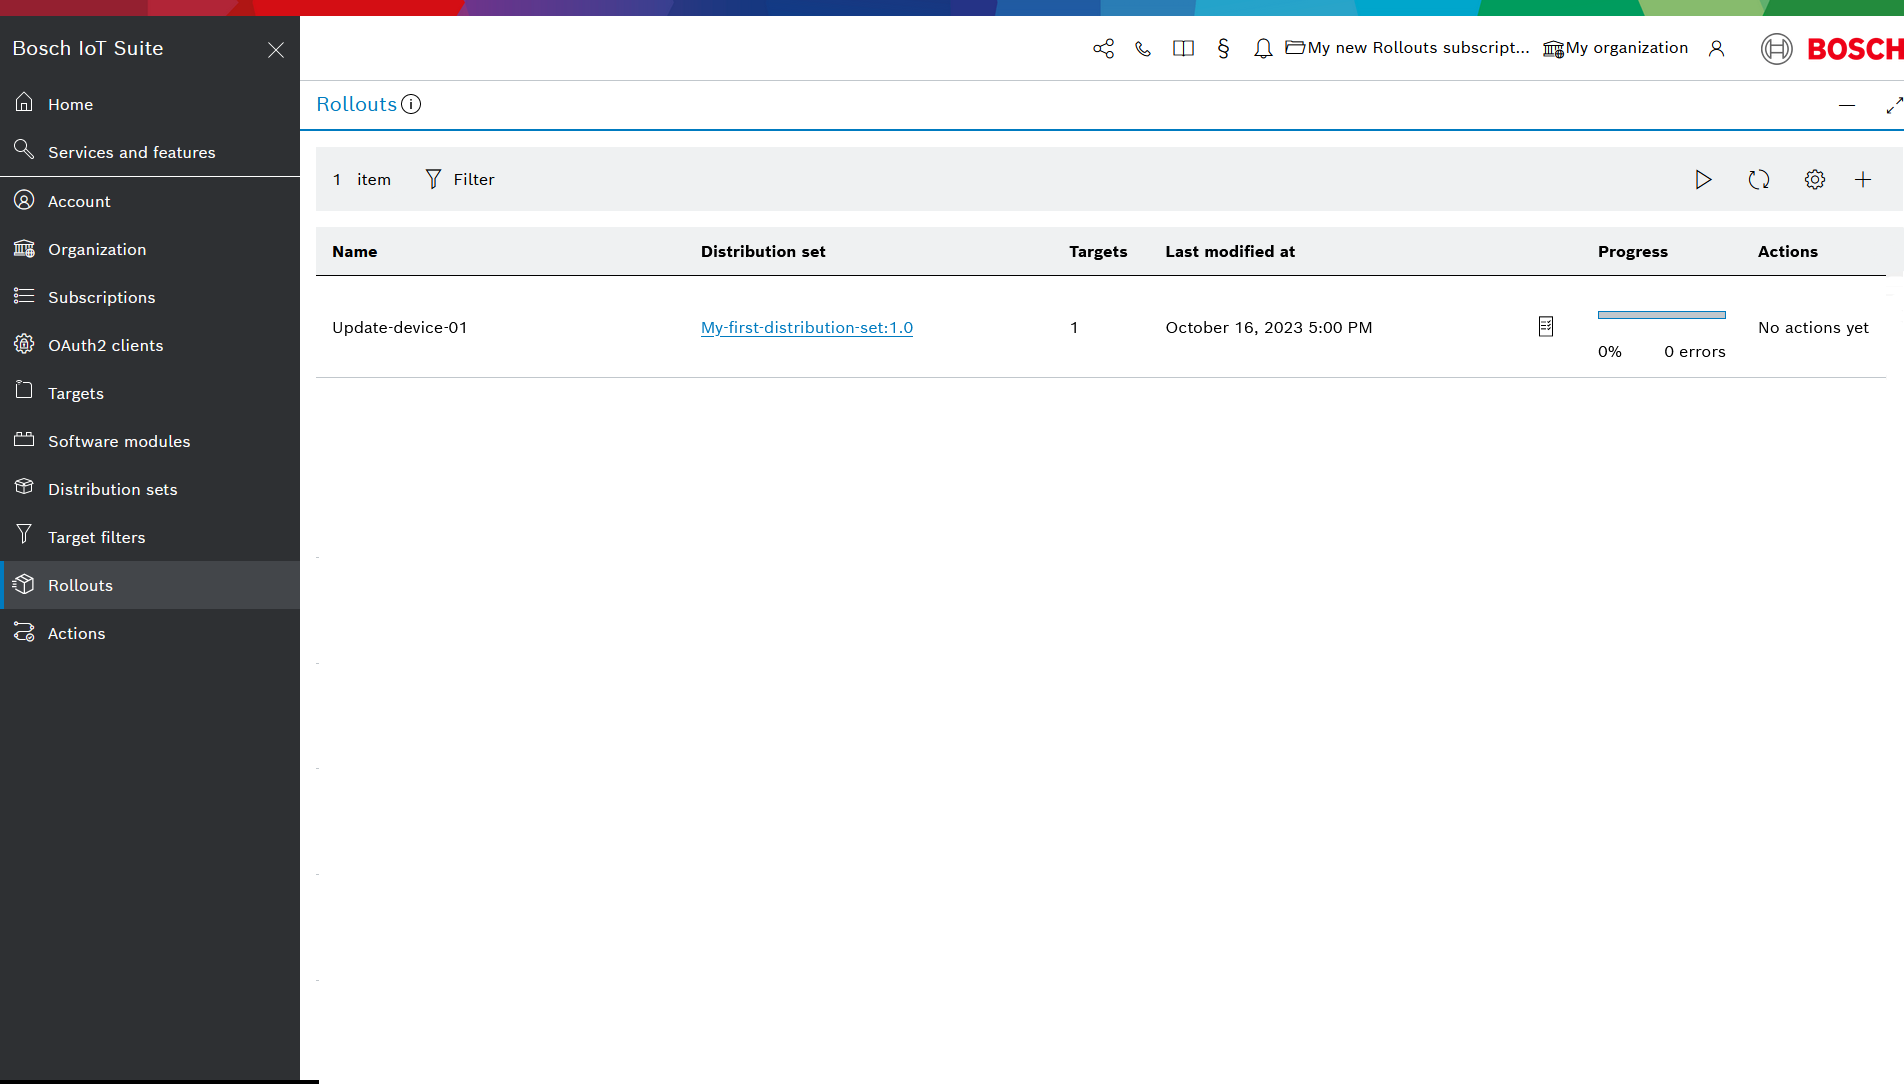
The new rollout will be displayed as part of your Rollouts list.
If you have enabled the approval workflow configuration for this tenant, see Approve or deny a rollout for a detailed guide on how to approve the rollout.
For a detailed guide refer to Manage targets and Create a Rollout.
Via Management API
You can also use the Management API to install the update that was created in the previous step. For that purpose, you have to assign the distribution set (DS_ID) which contains the update to the respective device. This is done with the following call.
Where to find the required tokens is explained at Getting started > API Replacement Token.
$ curl 'https://<HOST>/rest/v1/distributionsets/<DS_ID>/assignedTargets/' -u "<TENANT_ID>\<USERNAME>:<PASSWORD>" -i -X POST -H 'Content-Type: application/json;charset=UTF-8' -d'[{ "id" : "testDevice1", "type" : "forced"}]'{ "assigned": 1, "alreadyAssigned": 0, "total": 1}Upon execution of the call, the target status of device03 changes from REGISTERED to PENDING and the system is now waiting for the device to poll for updates.
2: Updating from a device’s perspective
After the update has been assigned to a device from the management side, it is the device’s turn.
It can either discover that there is an update by polling via the Direct Device Integration API, or react to the DOWNLOAD_AND_INSTALL event sent via the Device Management Federation (DMF) API.
Via Direct Device Integration API
Retrieving an update via the Direct Device Integration API comprises at least four steps:
2.1: Poll for updates
A device connected to Bosch IoT Rollouts via the DDI API usually polls its resource in a configured time interval. Once a distribution set is assigned to that device, the response contains a link to the update (deploymentBase).
$ curl 'https://<HOST>/<TENANT_ID>/controller/v1/testDevice1' -i -H 'Accept: application/hal+json' -H 'Authorization: TargetToken <TARGET_TOKEN>'{ "config": { "polling": { "sleep": "00:05:00" } }, "_links": { "deploymentBase": { "href": "https://<HOST>/<TENANT_ID>/controller/v1/testDevice1/deploymentBase/845?c=1492353743" } }}There is a slight difference when the user consent flow feature has been activated for this tenant.
In such a case, instead of a deploymentBase, the response will contain a confirmationBase and the device has to interact with it to confirm the action. Find out more here.
2.2: Get Information about the update
By following the provided link to the update action, the device receives detailed information about the update. This includes also links to the comprised artifacts.
$ curl 'https://<HOST>/<TENANT_ID>/controller/v1/testDevice1/deploymentBase/845?c=1492353743' -i -H 'Accept: application/hal+json' -H 'Authorization: TargetToken <TARGET_TOKEN>' -d{ "id": "845", "deployment": { "download": "forced", "update": "forced", "chunks": [ { "part": "os", "version": "2.0", "name": "new-software-module", "artifacts": [ { "filename": "example.file", "hashes": { "sha1": "d2e7291c2c52b87b2ee00983217e1bcc0909251f", "md5": "b14f29fe8cea6b25e62a8e5c48b5a3a1", "sha256": "ef6f7bbae45f41b62c26c5150e3ee673b4169991c5c570393fbc4e8d43581016" }, "size": 28, "_links": { "download": { "href": "https://<HOST>/<TENANT_ID/..." } } } ] ] }}2.3: Download the artifact from the given URL
By following the download link of each artifact, a device can download all update-relevant artifacts.
$ curl 'https://<HOST>/<TENANT_ID>/...' -i -H 'Accept: application/hal+json' -H 'Authorization: TargetToken <TARGET_TOKEN>'This is a test update file.2.4: Provide feedback to Bosch IoT Rollouts
The device may choose how much feedback it wants to provide to Bosch IoT Rollouts. However, it is mandatory to provide the information on whether the update has been successful or not, thus allowing the backend to stay up to date regarding the installed distribution set.
$ curl 'https://<HOST>/<TENANT_ID>/controller/v1/testDevice1/deploymentBase/845/feedback' -i -X POST -H 'Accept: */*' -H 'Content-Type: application/json' -H 'Authorization: TargetToken <TARGET_TOKEN>'-d '{ "id" : "845", "status" : { "result" : { "finished" : "success" }, "execution" : "closed", "details" : [ ] }}'In the example above, the target indicates that the update has been successful. Therefore, the target status of device03 changes from PENDING to IN_SYNC .
Find details on State machines in section concepts.


