View distribution set details
Once you have created a distribution set, you can view its details by selecting it on the list.
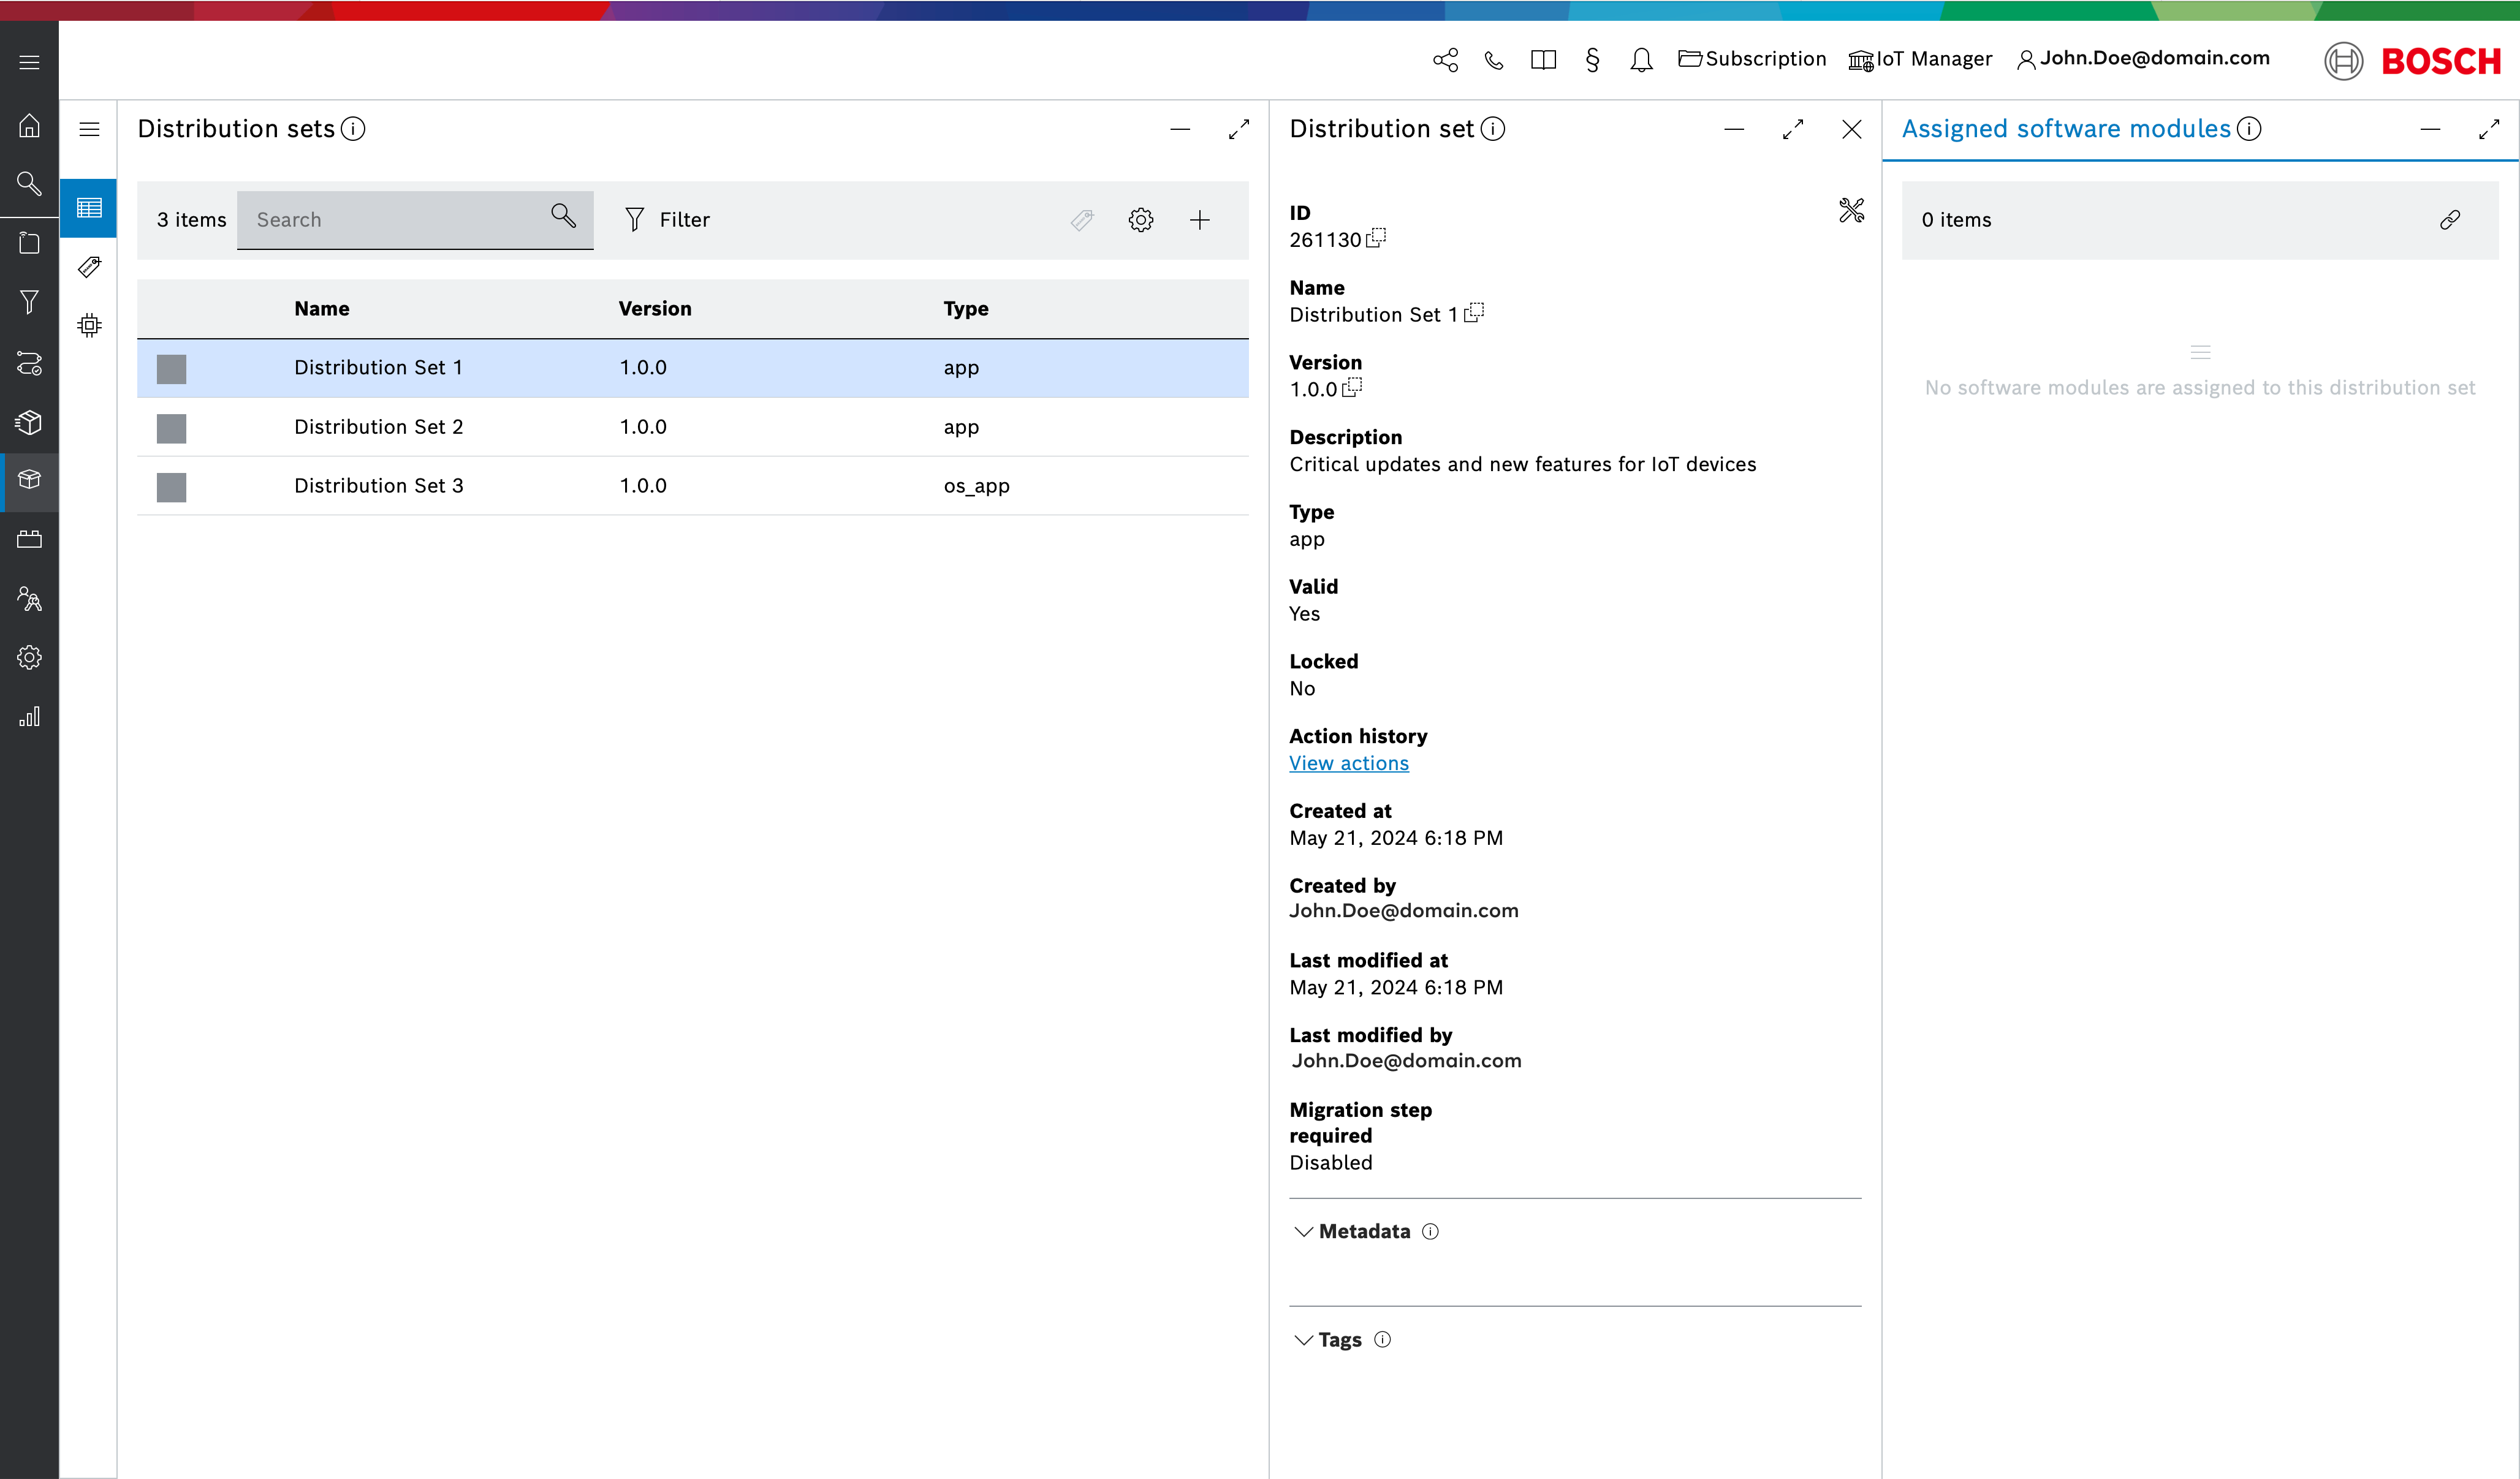
This will open the Distribution set blade view as well as the Assigned software modules blade view.
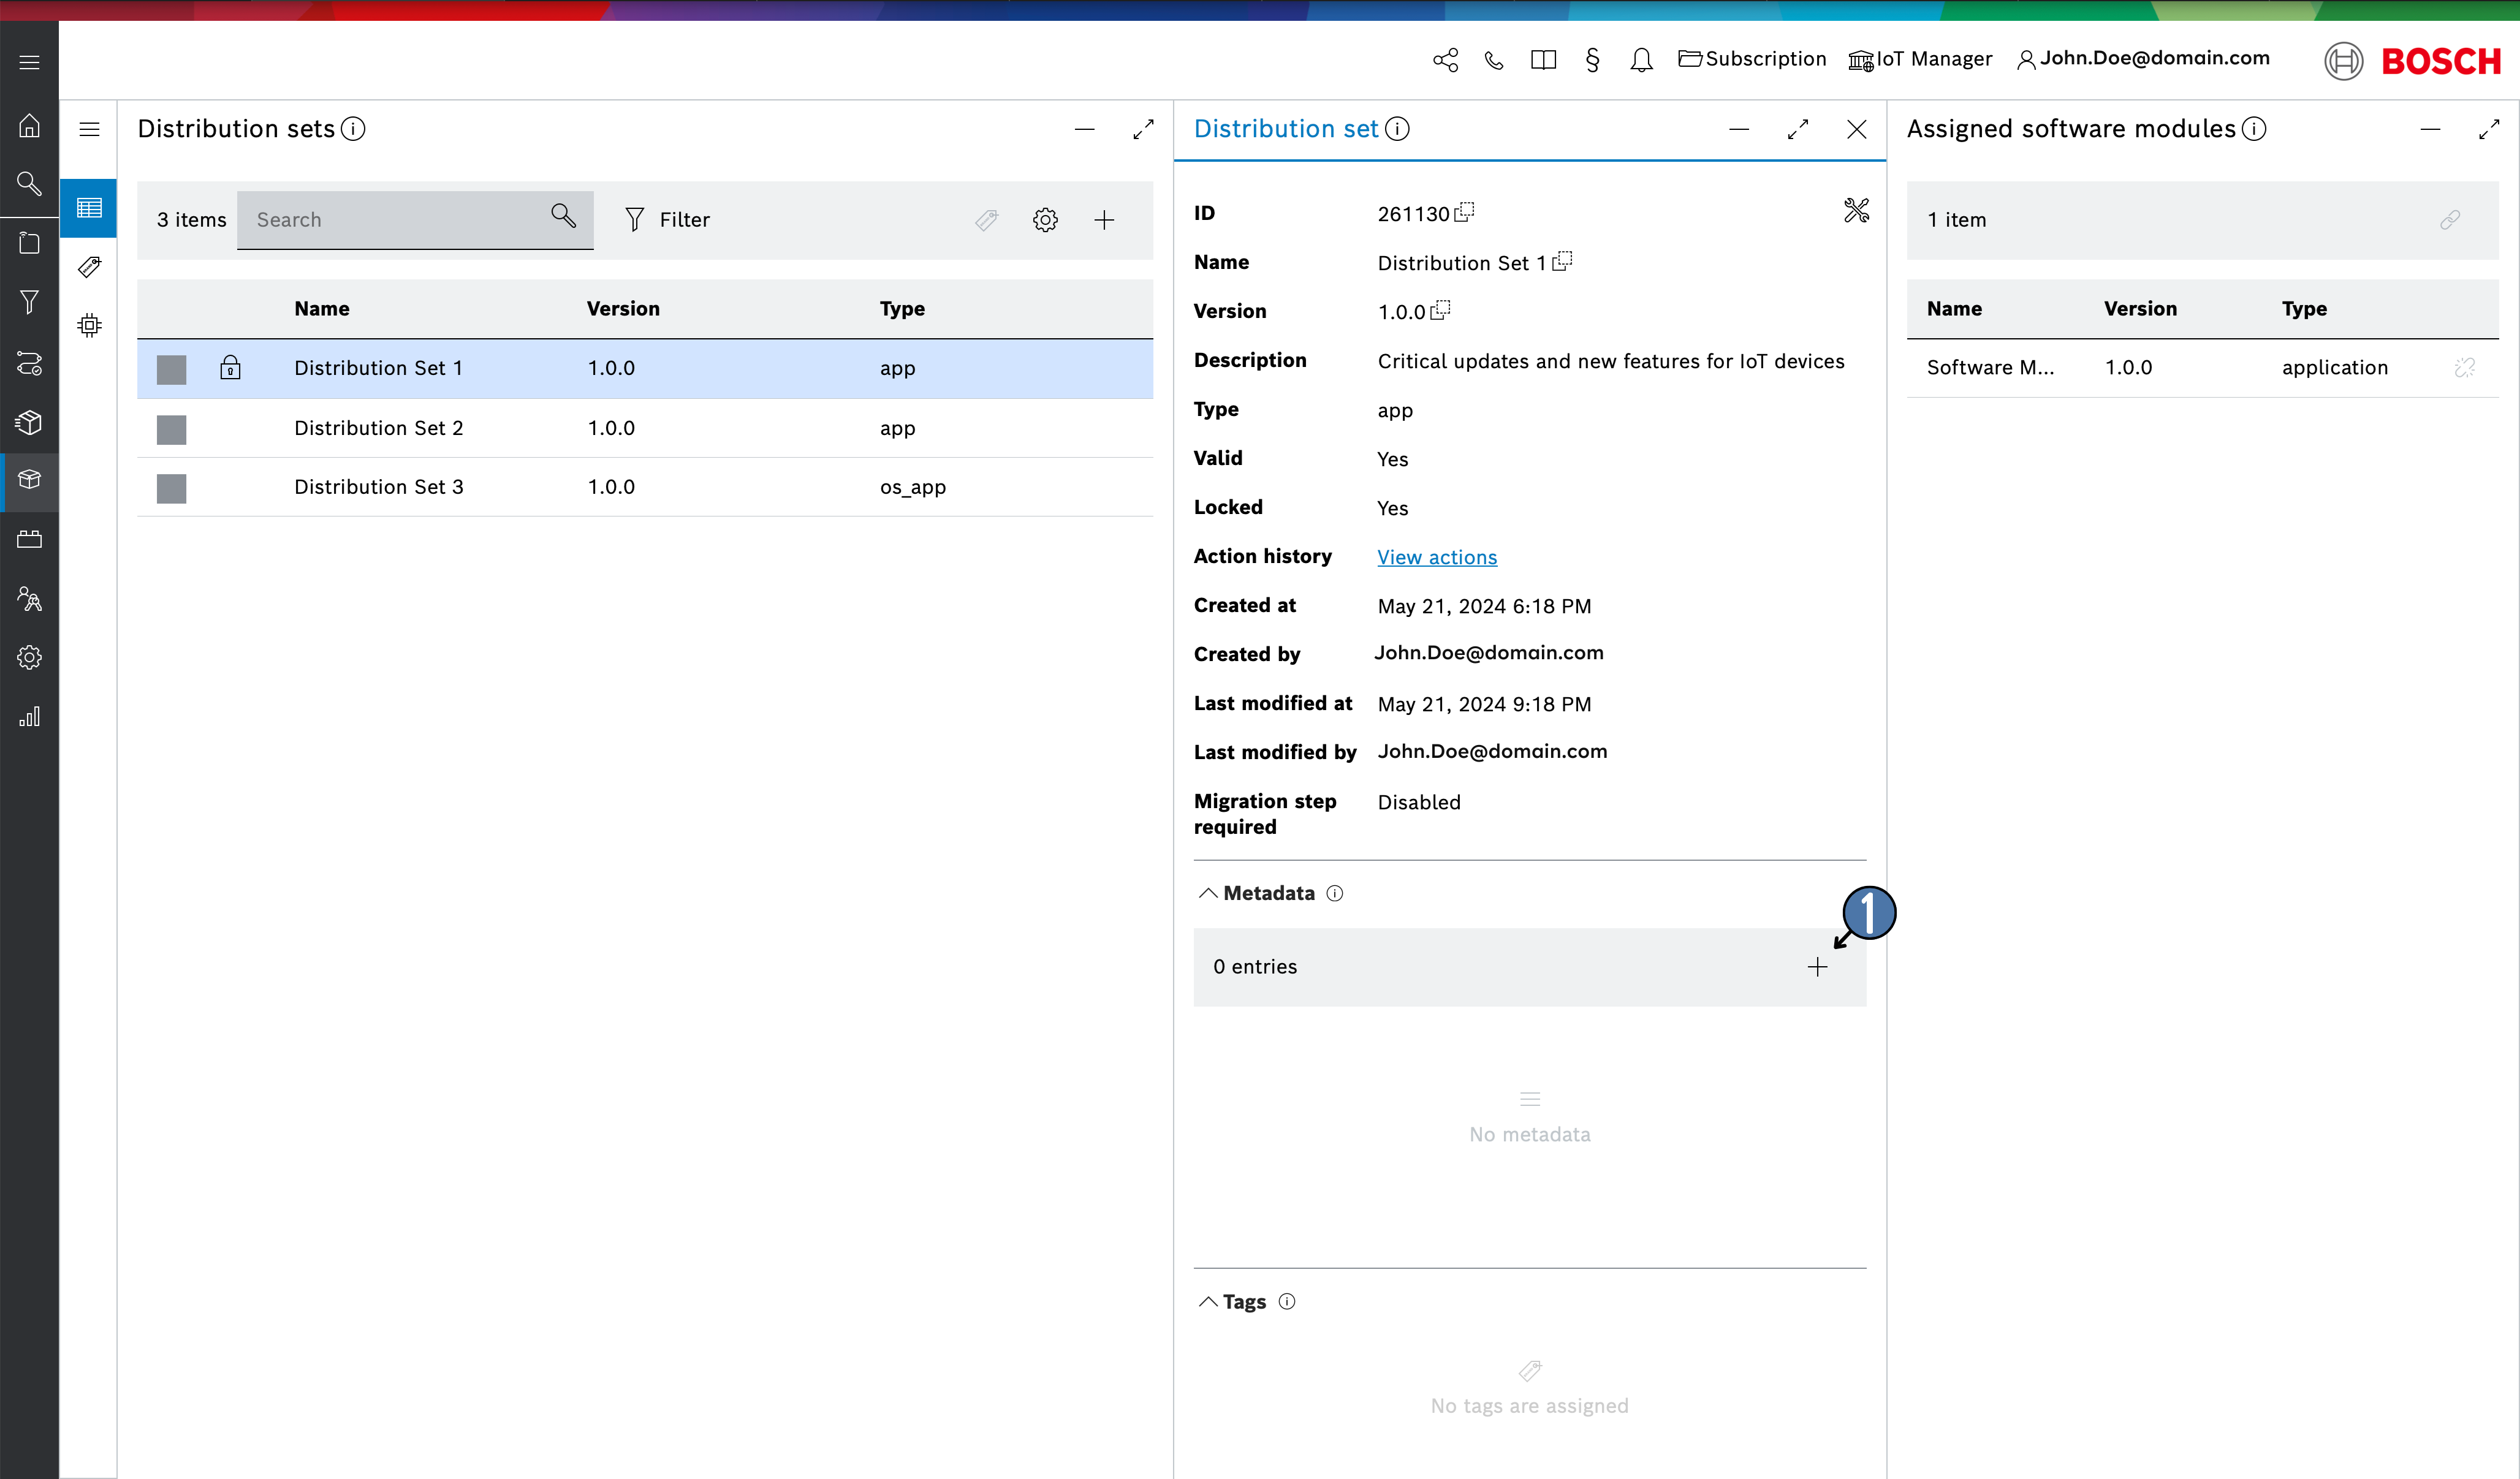
The Distribution set blade view contains useful distribution set-related information such as created and last modified timestamp, the user who created or modified it last, whether it requires a migration step and will inform you if the distribution set is locked.
The Assigned software modules blade view will contain a list of all assigned software modules.
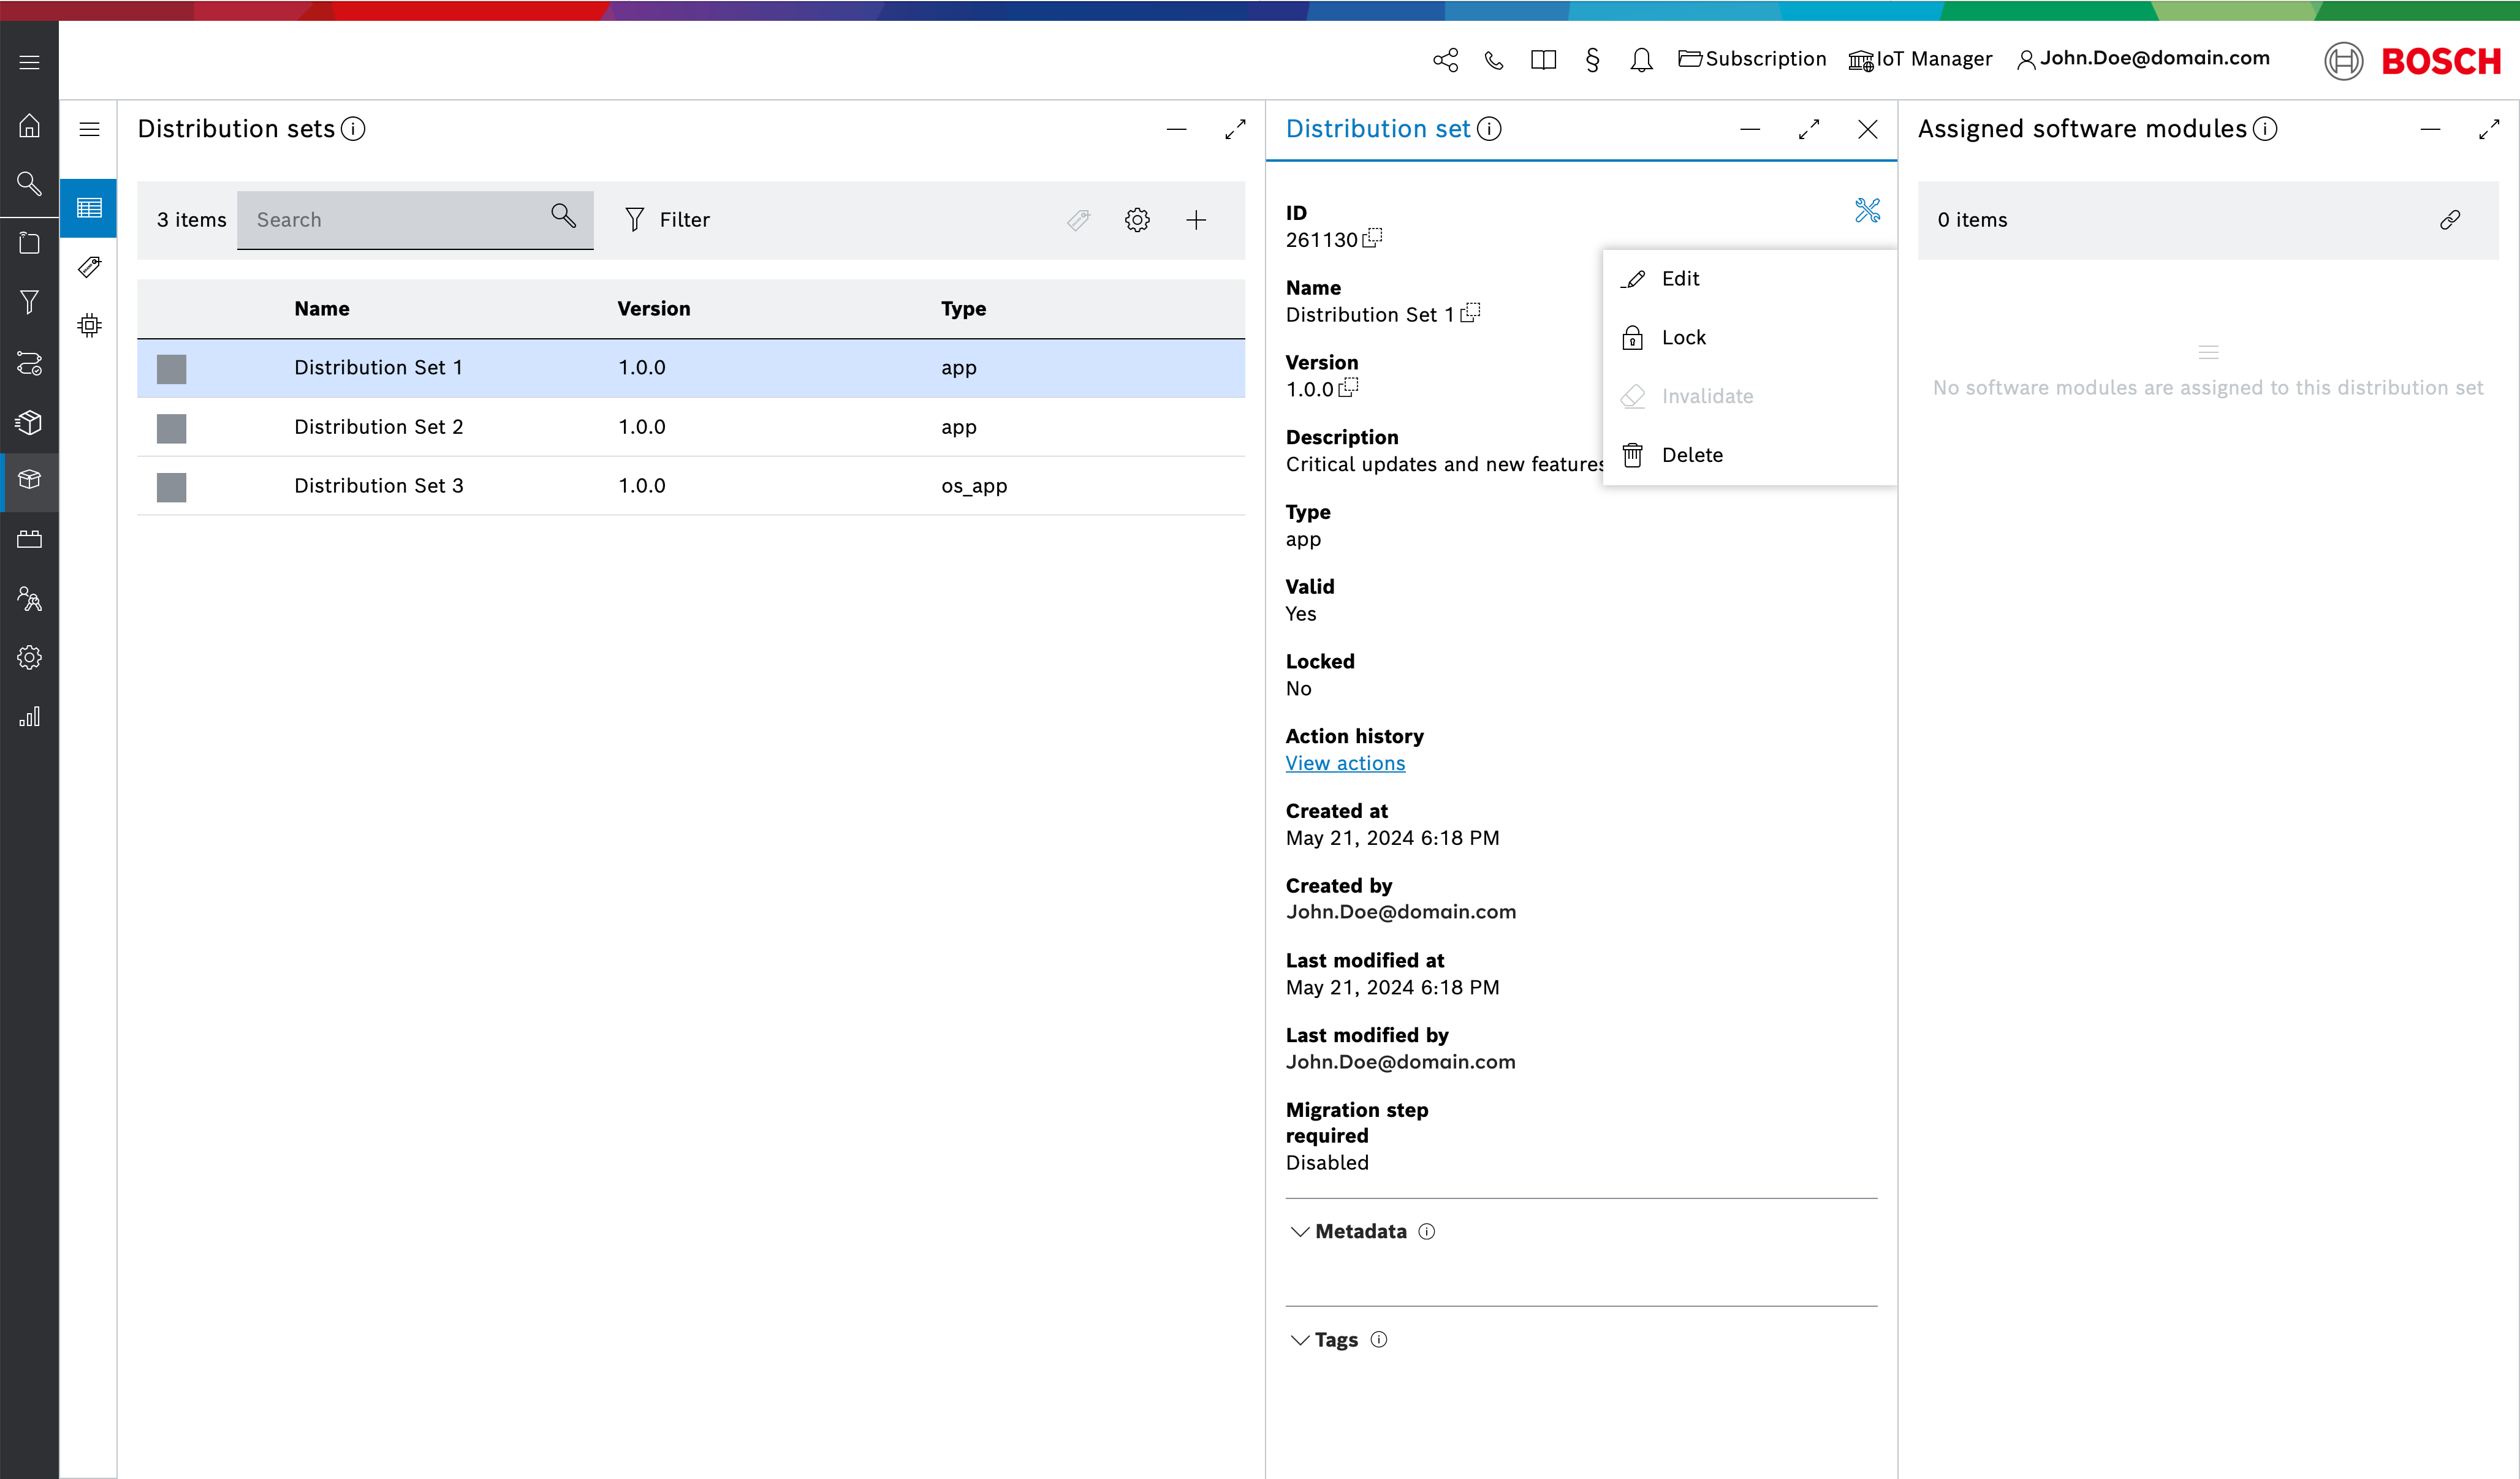
Distribution set actions
The distribution set actions ![]() icon opens a dialog that provides the following management actions:
icon opens a dialog that provides the following management actions:
- Edit - Edit the description of the distribution set.
- Lock/Unlock - Prevent or permit the assignment or unassignment of additional software modules to the distribution set.
- Invalidate - The distribution set cannot be assigned to targets anymore and it is going to be removed from all auto assignments. The user can choose to cancel all rollouts and (force) cancel all actions connected to this distribution set.
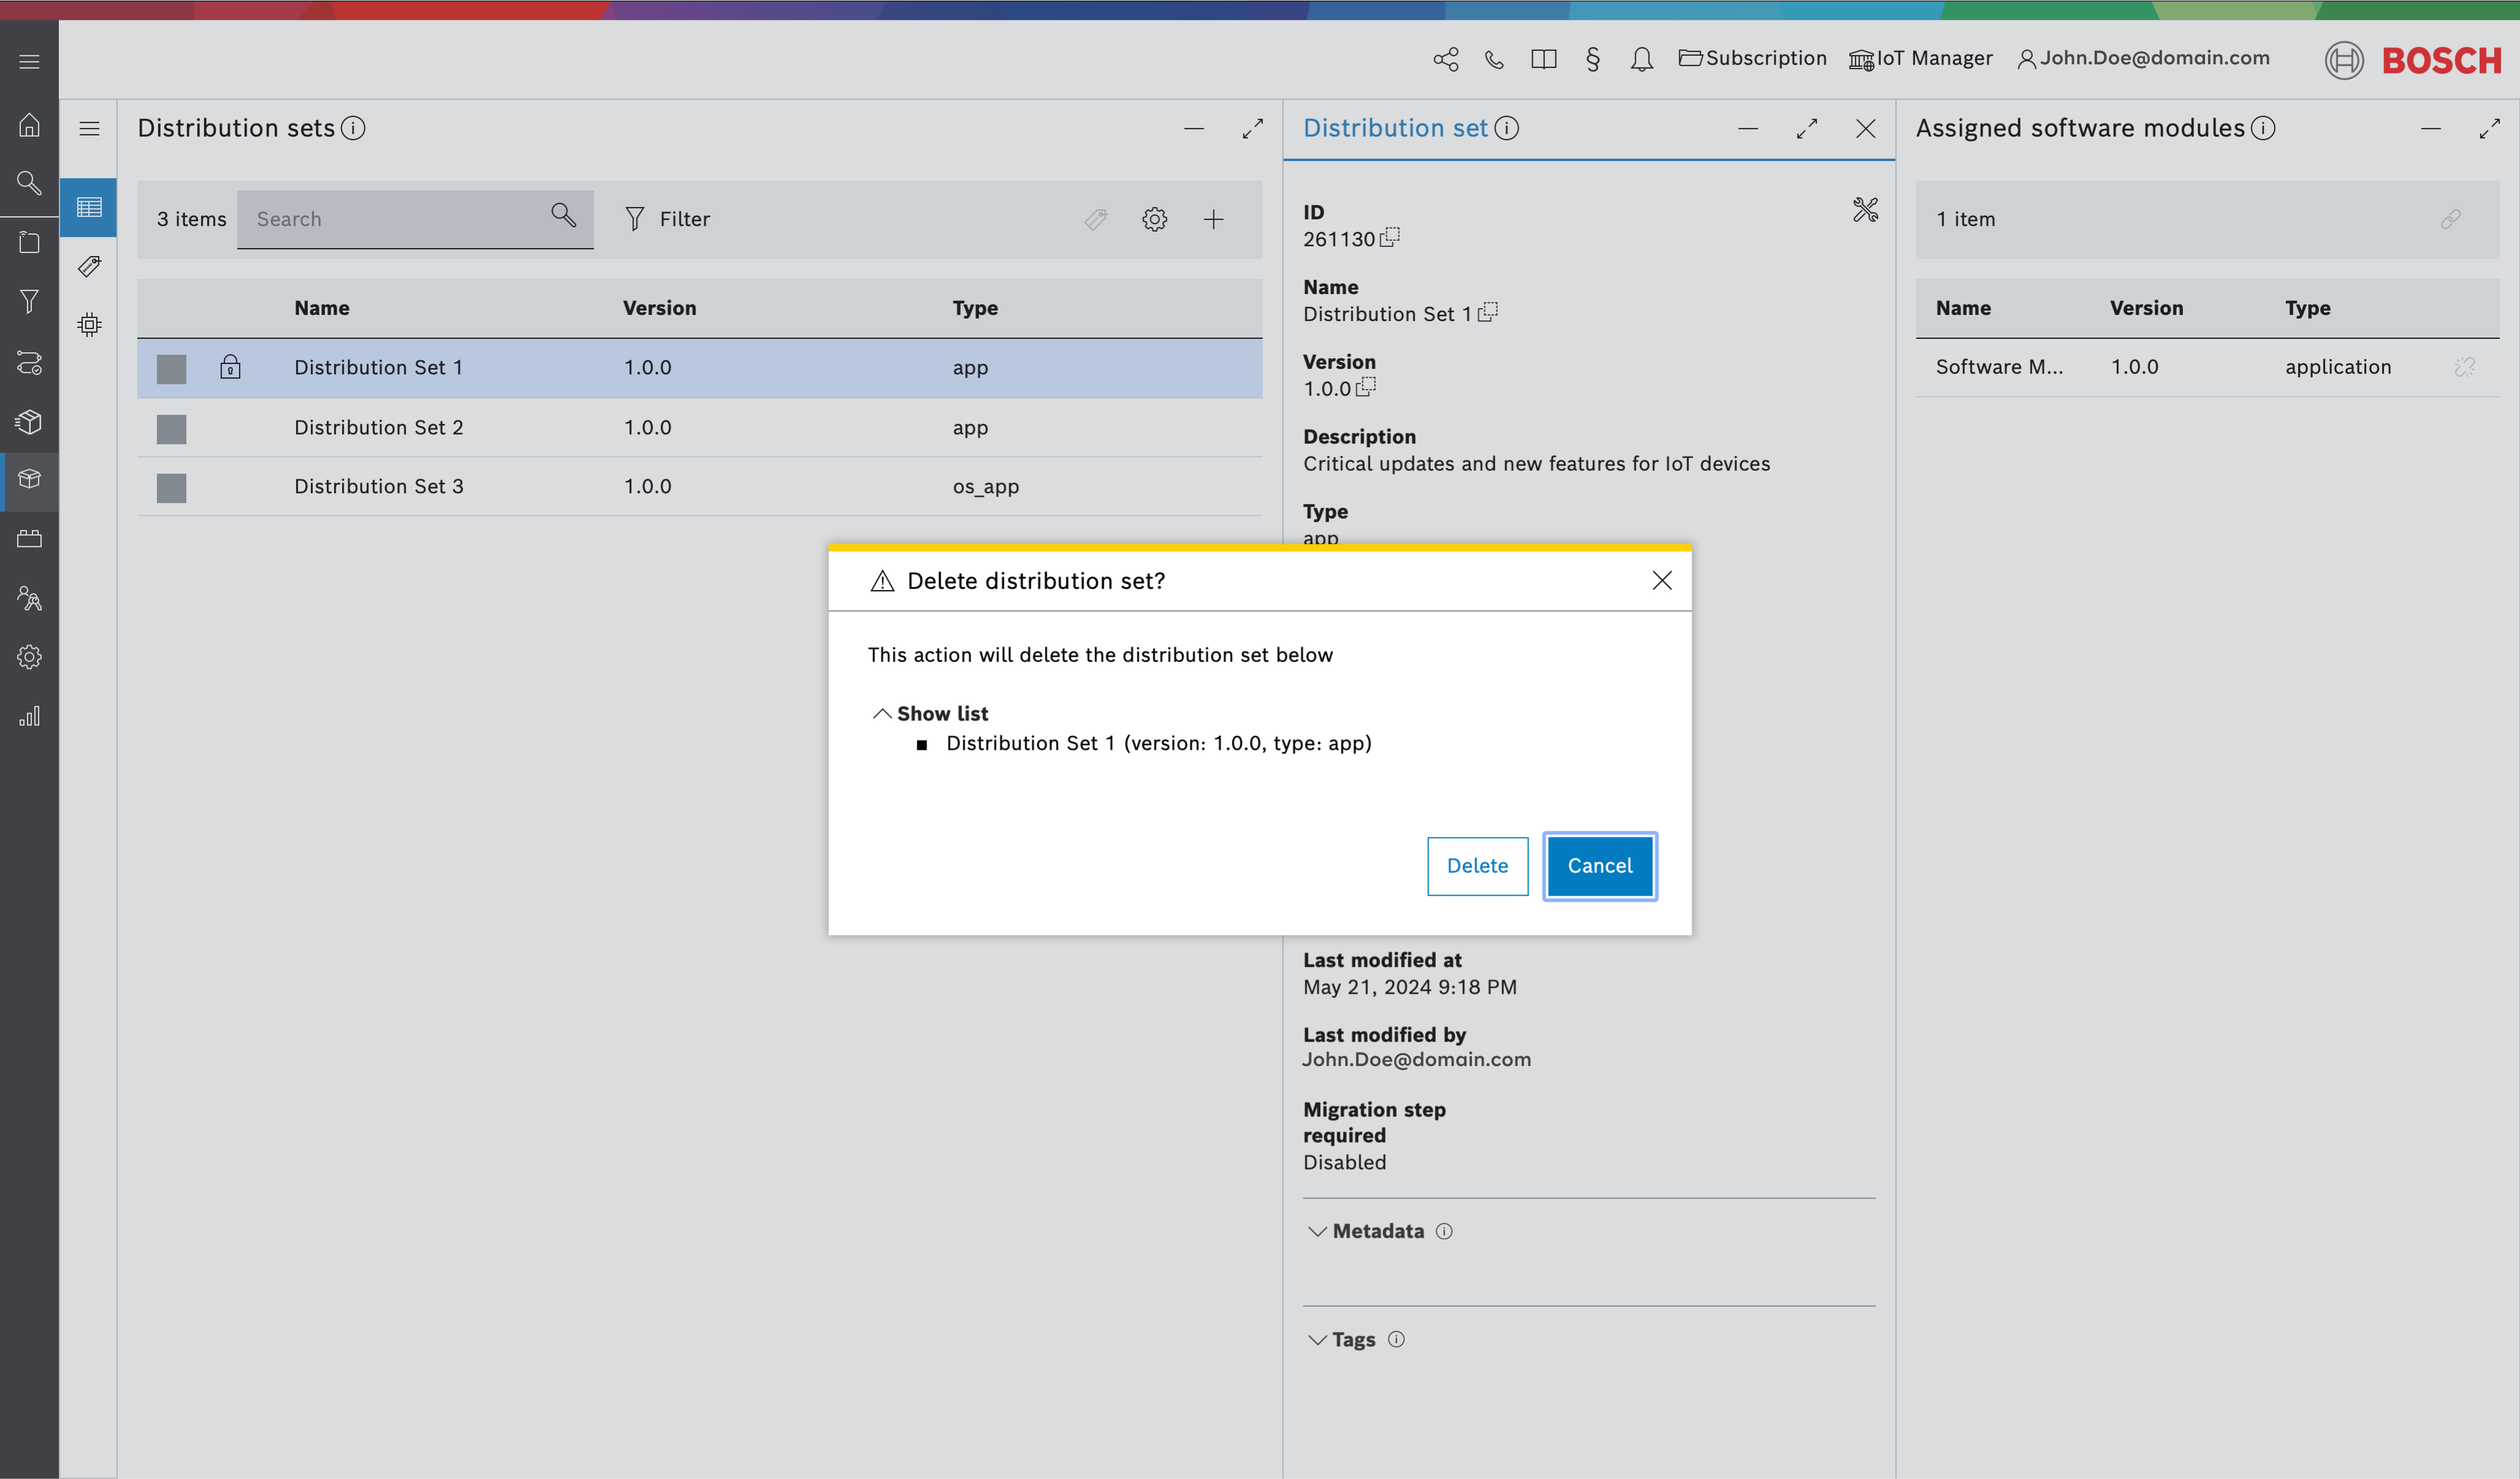
- Delete - Delete the distribution set.
The Invalidate action is irreversible and the distribution set cannot be used any more after invalidating
Edit distribution set
You are only allowed to edit the optional fields of the distribution set.

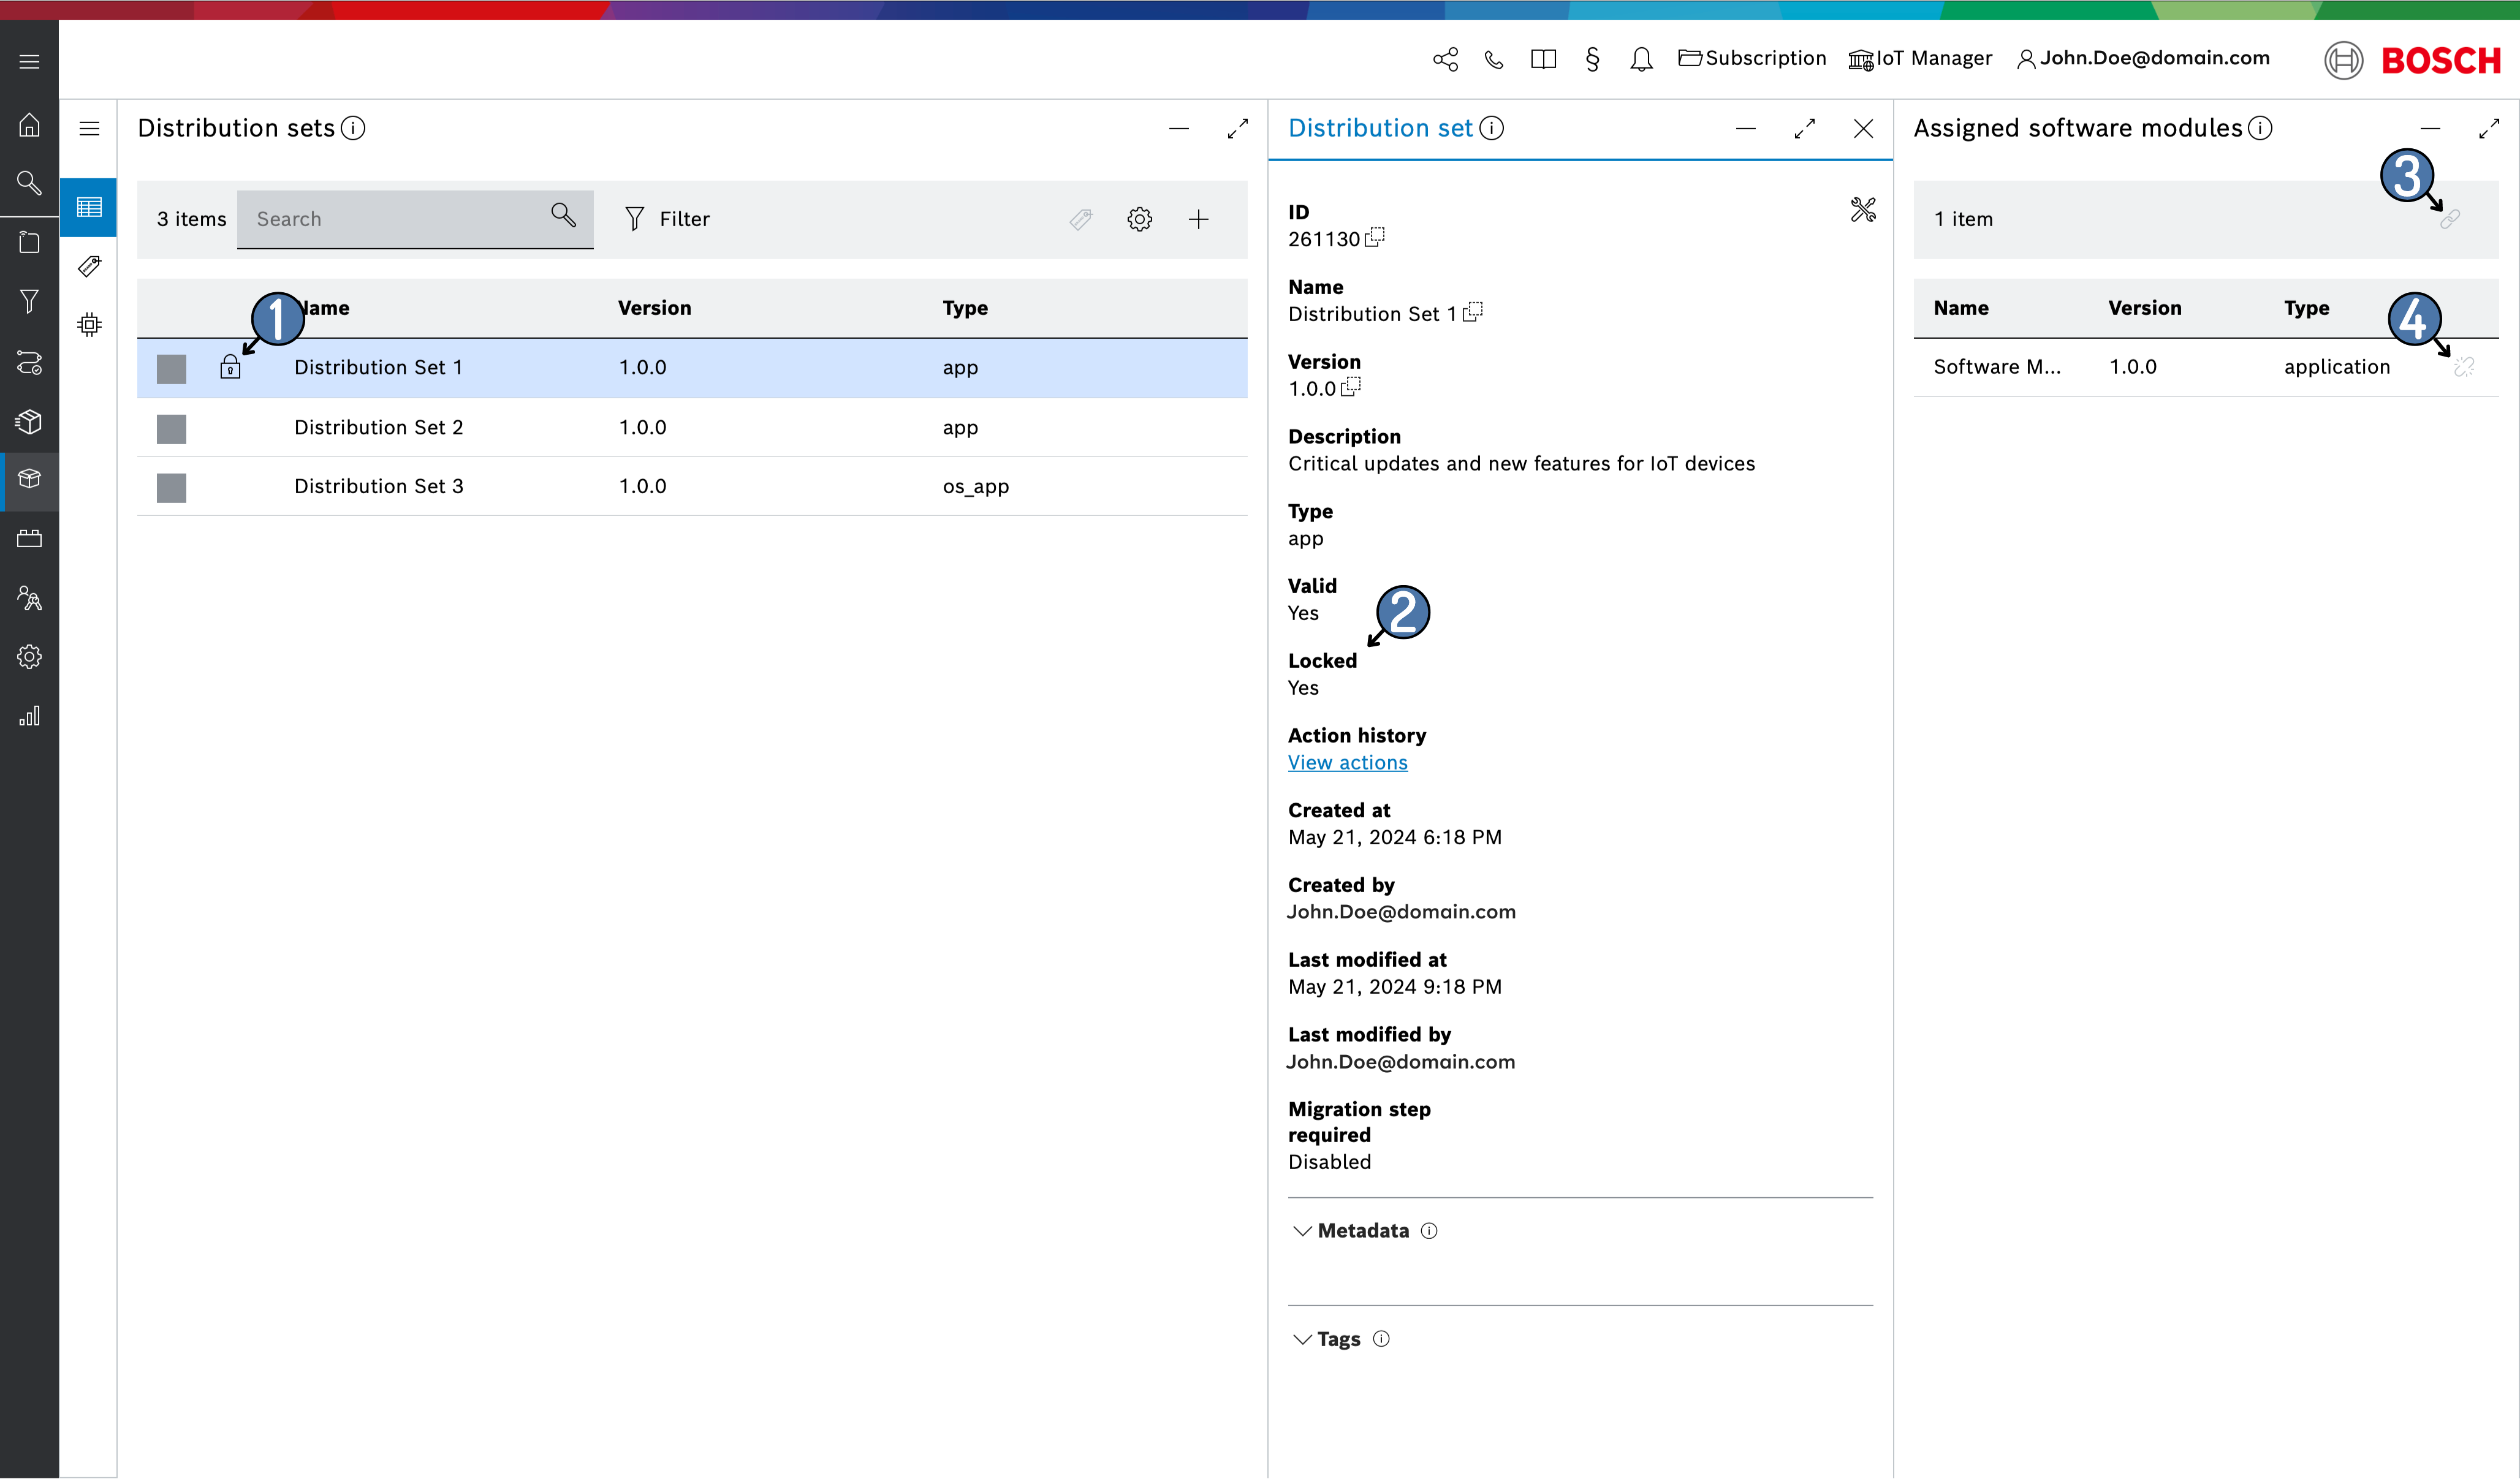
Locking and Unlocking a distribution set
The distribution set has a management action to manually lock or unlock it, controlling whether new software modules can be assigned or unassigned.
Locking a distribution set can be done manually and automatically.
Manual Locking
- You can choose to lock the distribution set manually by the Lock
 distribution set action.
 - Once locked, no additional software modules can be assigned or unassigned to and from the distribution set until an explicit manual Unlock
 distribution set action is performed.
Automatic (Implicit) Locking
- When a distribution set is assigned, it will automatically lock to prevent users from assigning or unassigning software modules from an already assigned distribution set.
- Once a distribution set is assigned and locked, it ensures that the set remains stable without any changes until an explicit manual Unlock distribution set action is performed.
- Automatic lock can be enabled and disabled by the Implicit lock toggle configuration . Refer to Configuration.
- Even with automatic locking enabled, manual overrides provide flexibility to accommodate specific client needs.
For Automatic locking, ensure the user performing the distribution set assignment has the Repository Update permission. Permission can be updated from the Access control feature.
Locking a distribution set will result in:
- Locked icon in front of the distribution set name from the distribution set list. (given the Locked icon column in the distribution set list is enabled via
 )
) - The Locked information flag in the Distribution set blade view will be shown as Yes.
- The Assign
 button to assign additional software modules to the distribution set will be disabled.
 - The Unassign
 button to unassign software modules from the distribution set will be disabled.
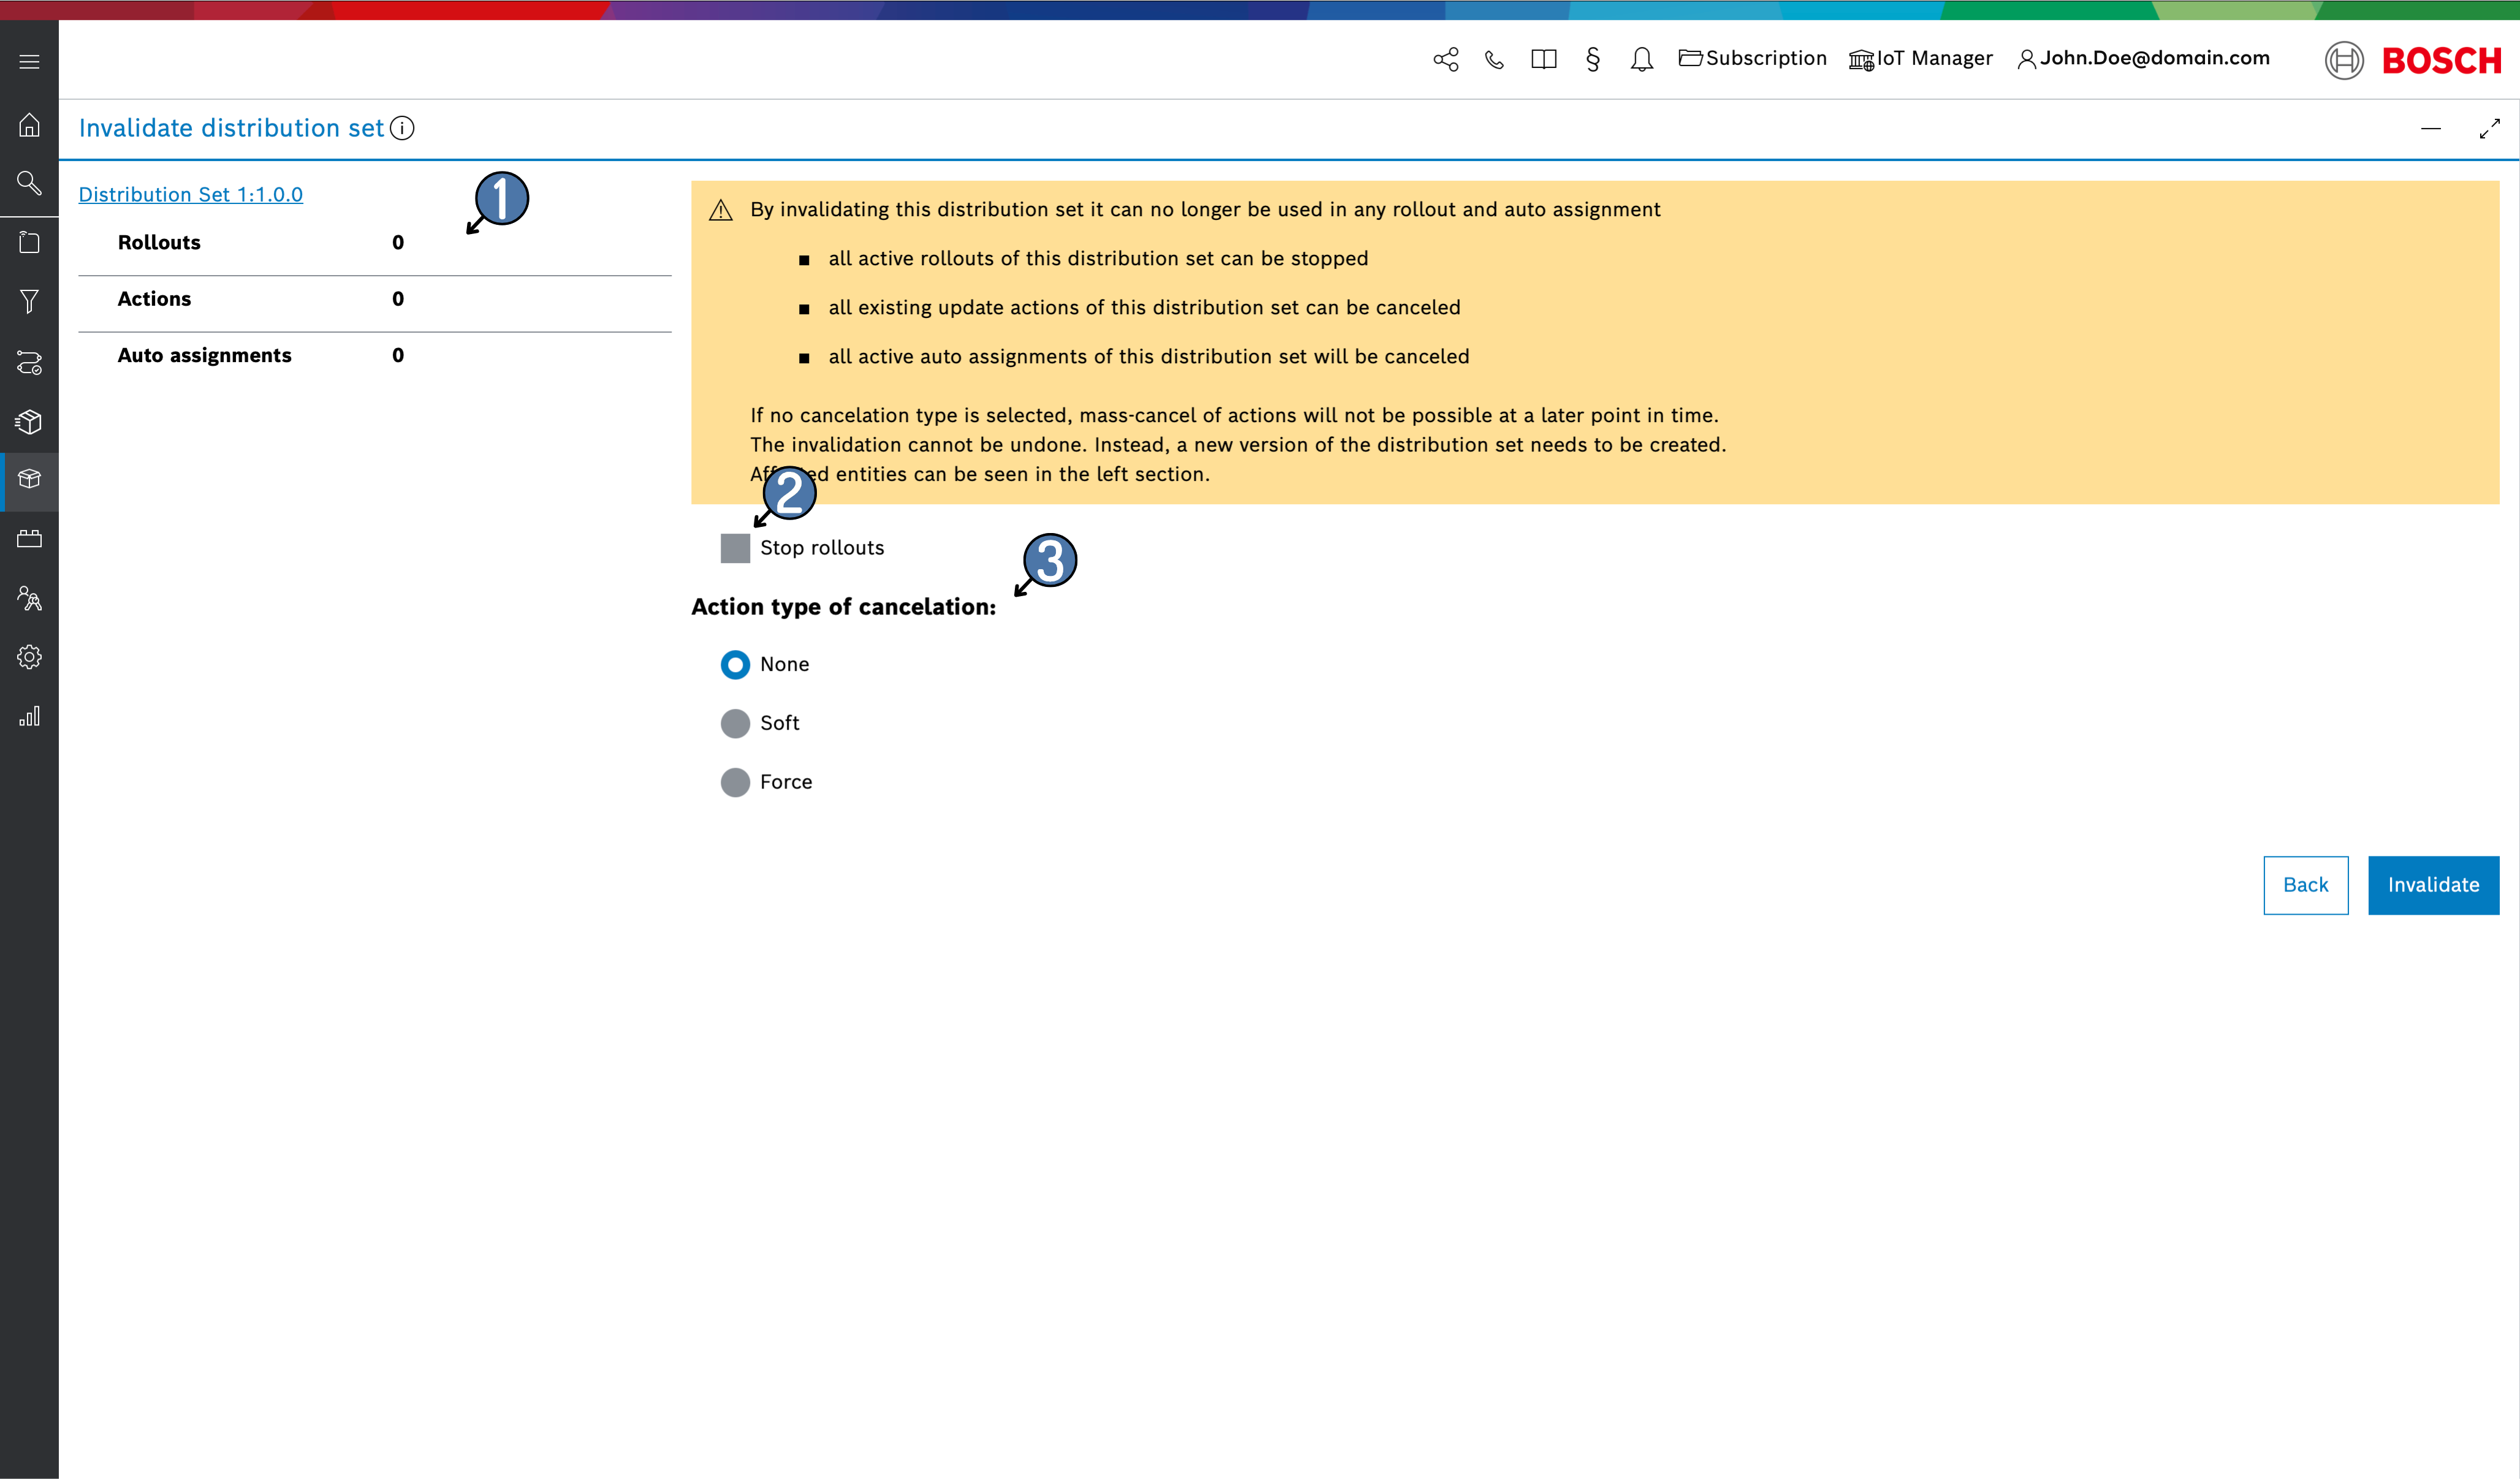
Invalidate distribution set
Invalidated distribution sets can no longer be used in any rollout and auto assignment. Invalidation cannot be undone.
After clicking the Invalidate distribution set action a new Invalidate distribution set blade view will be shown.
In the new blade view you will be able to:
- View all affected rollouts, actions and auto assignments.
- Decide to stop all active rollouts of this distribution set.
- Decide to cancel all existing actions of this distribution set.
Delete distribution set
You will be asked for confirmation to delete a distribution set.
Distribution set metadata
At the bottom of the Distribution set blade view, you will see the Metadata section.
The Metadata section displays a list of all the key:value pair metadata entries which have been added to the selected distribution set and provides metadata management actions.
Create a metadata entry
Click the + icon on the right of the Metadata section.
Type in the desired Key and Value in the Add metadata pop up. 
Click Add.
The new metadata entry will be then added to the list. It is possible to delete or edit the value of each metadata entry through the respective icons on the right.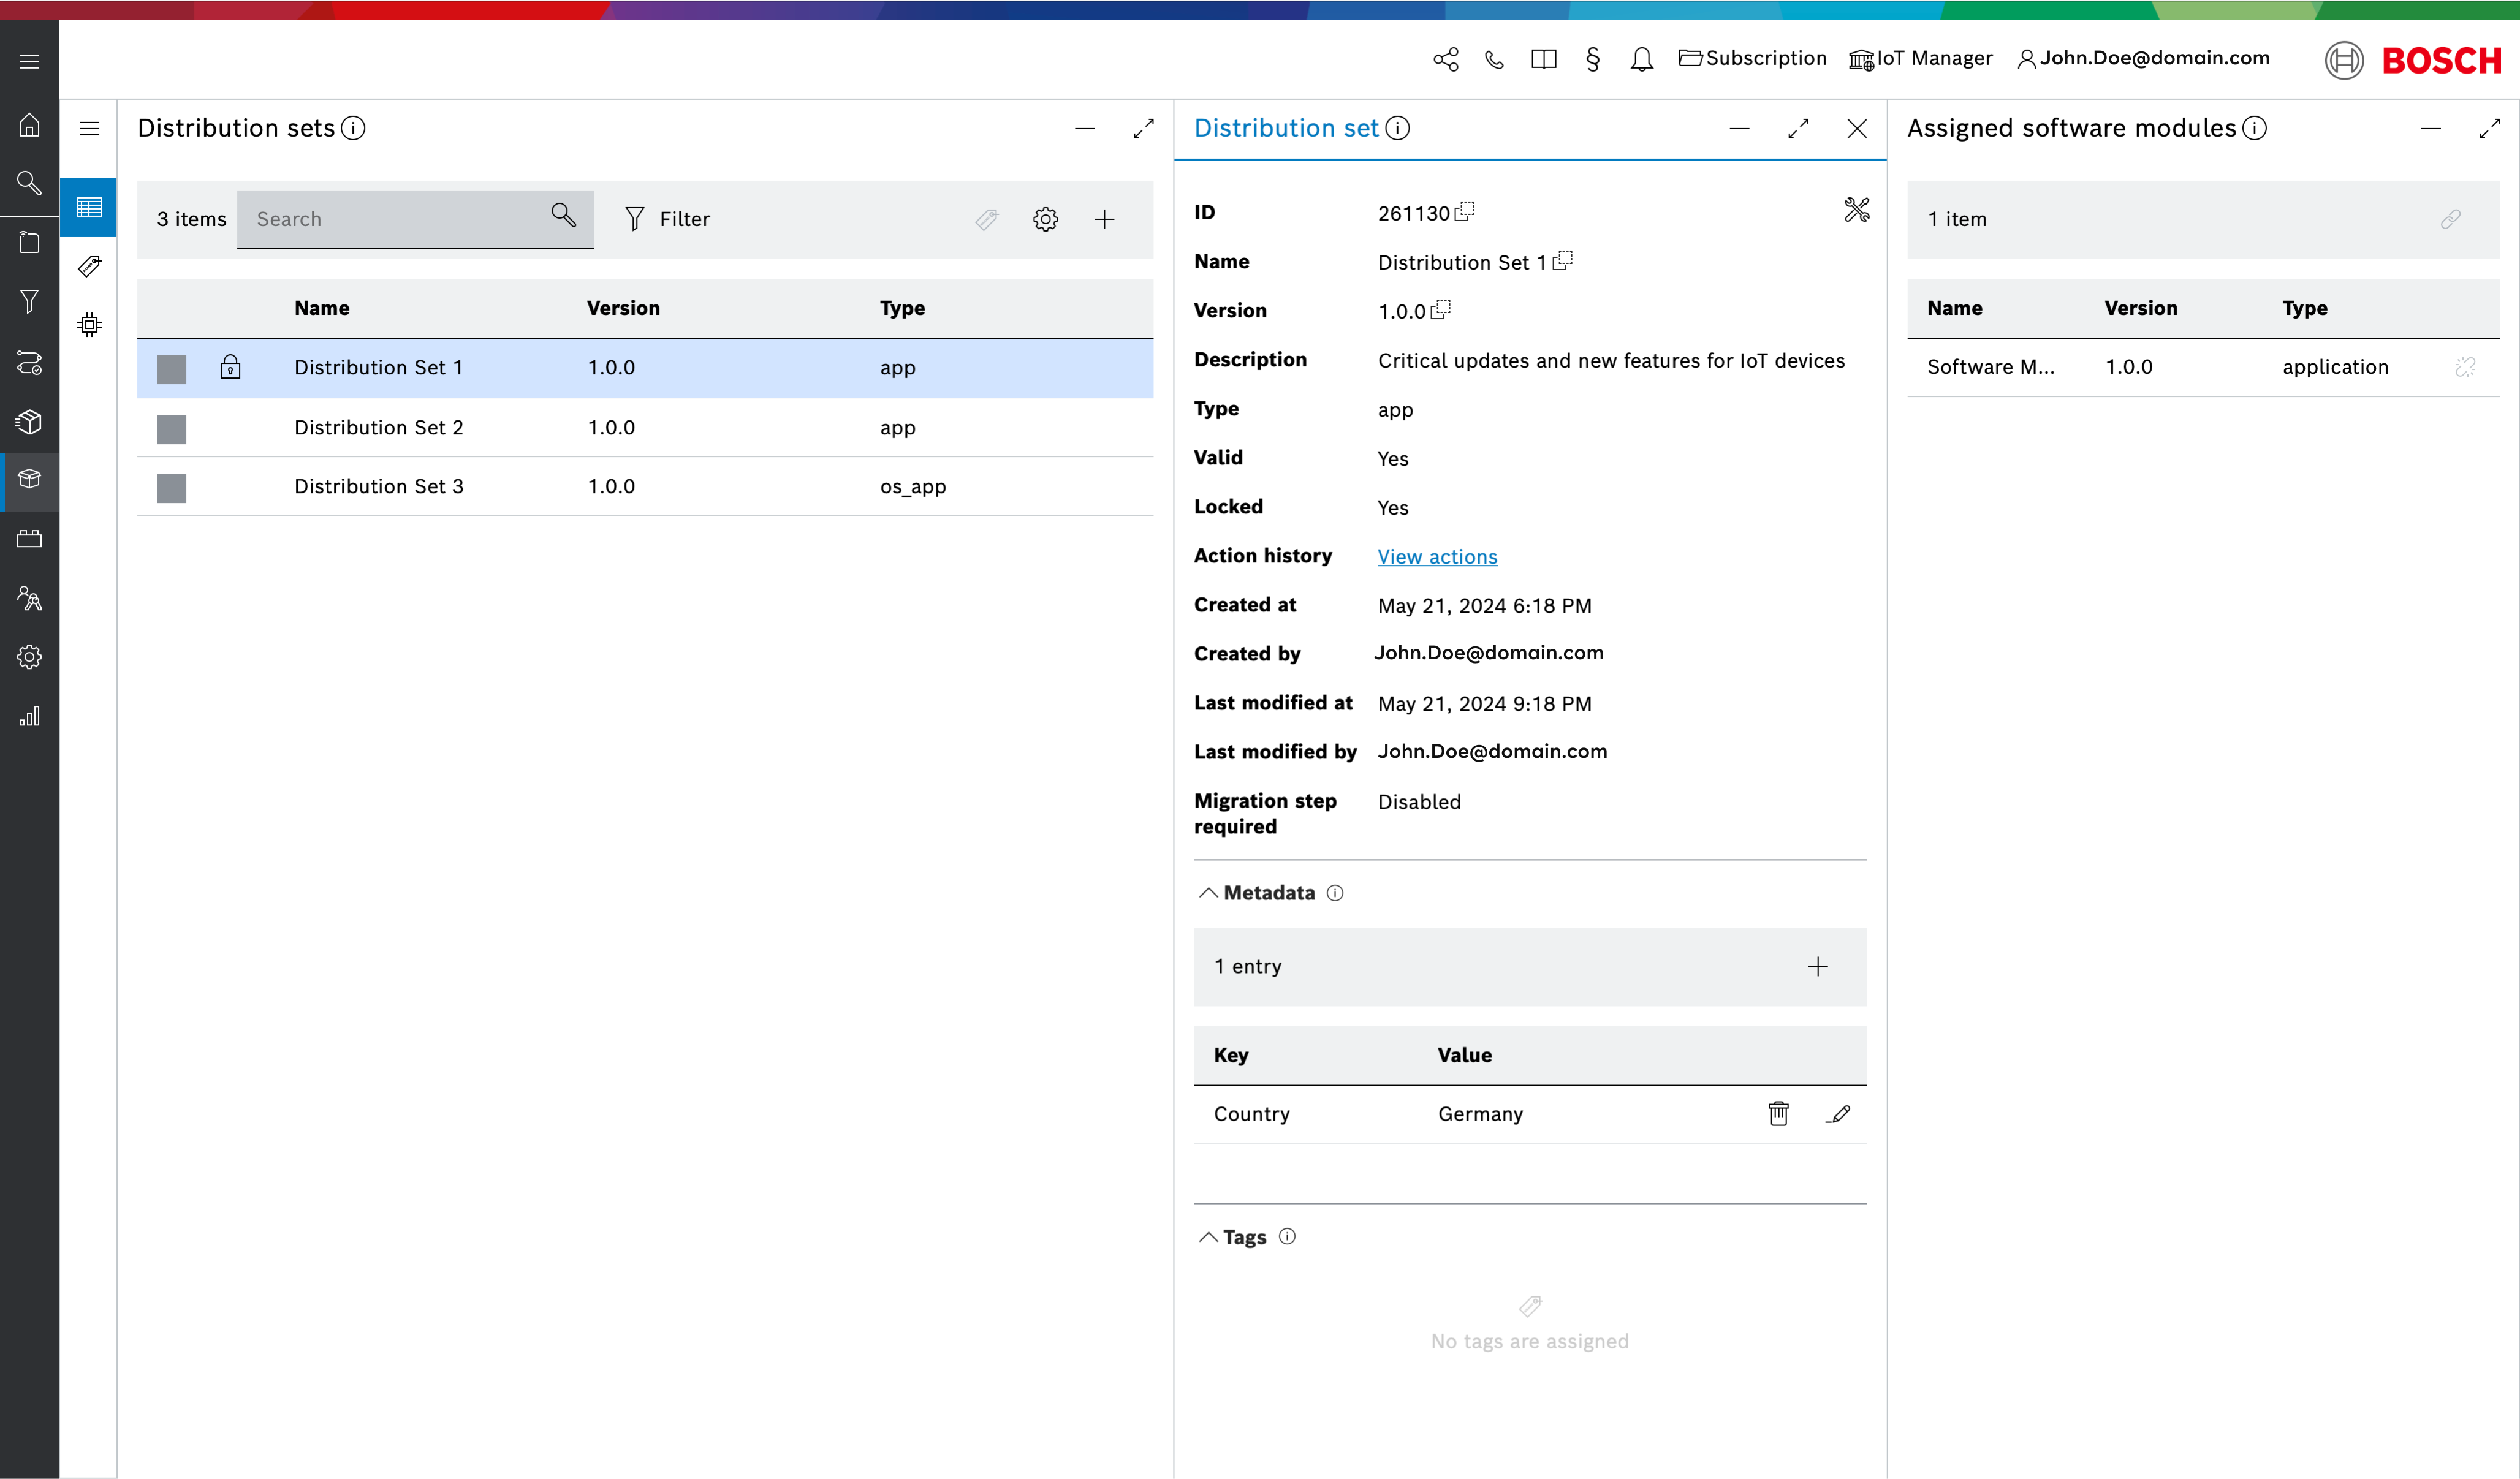
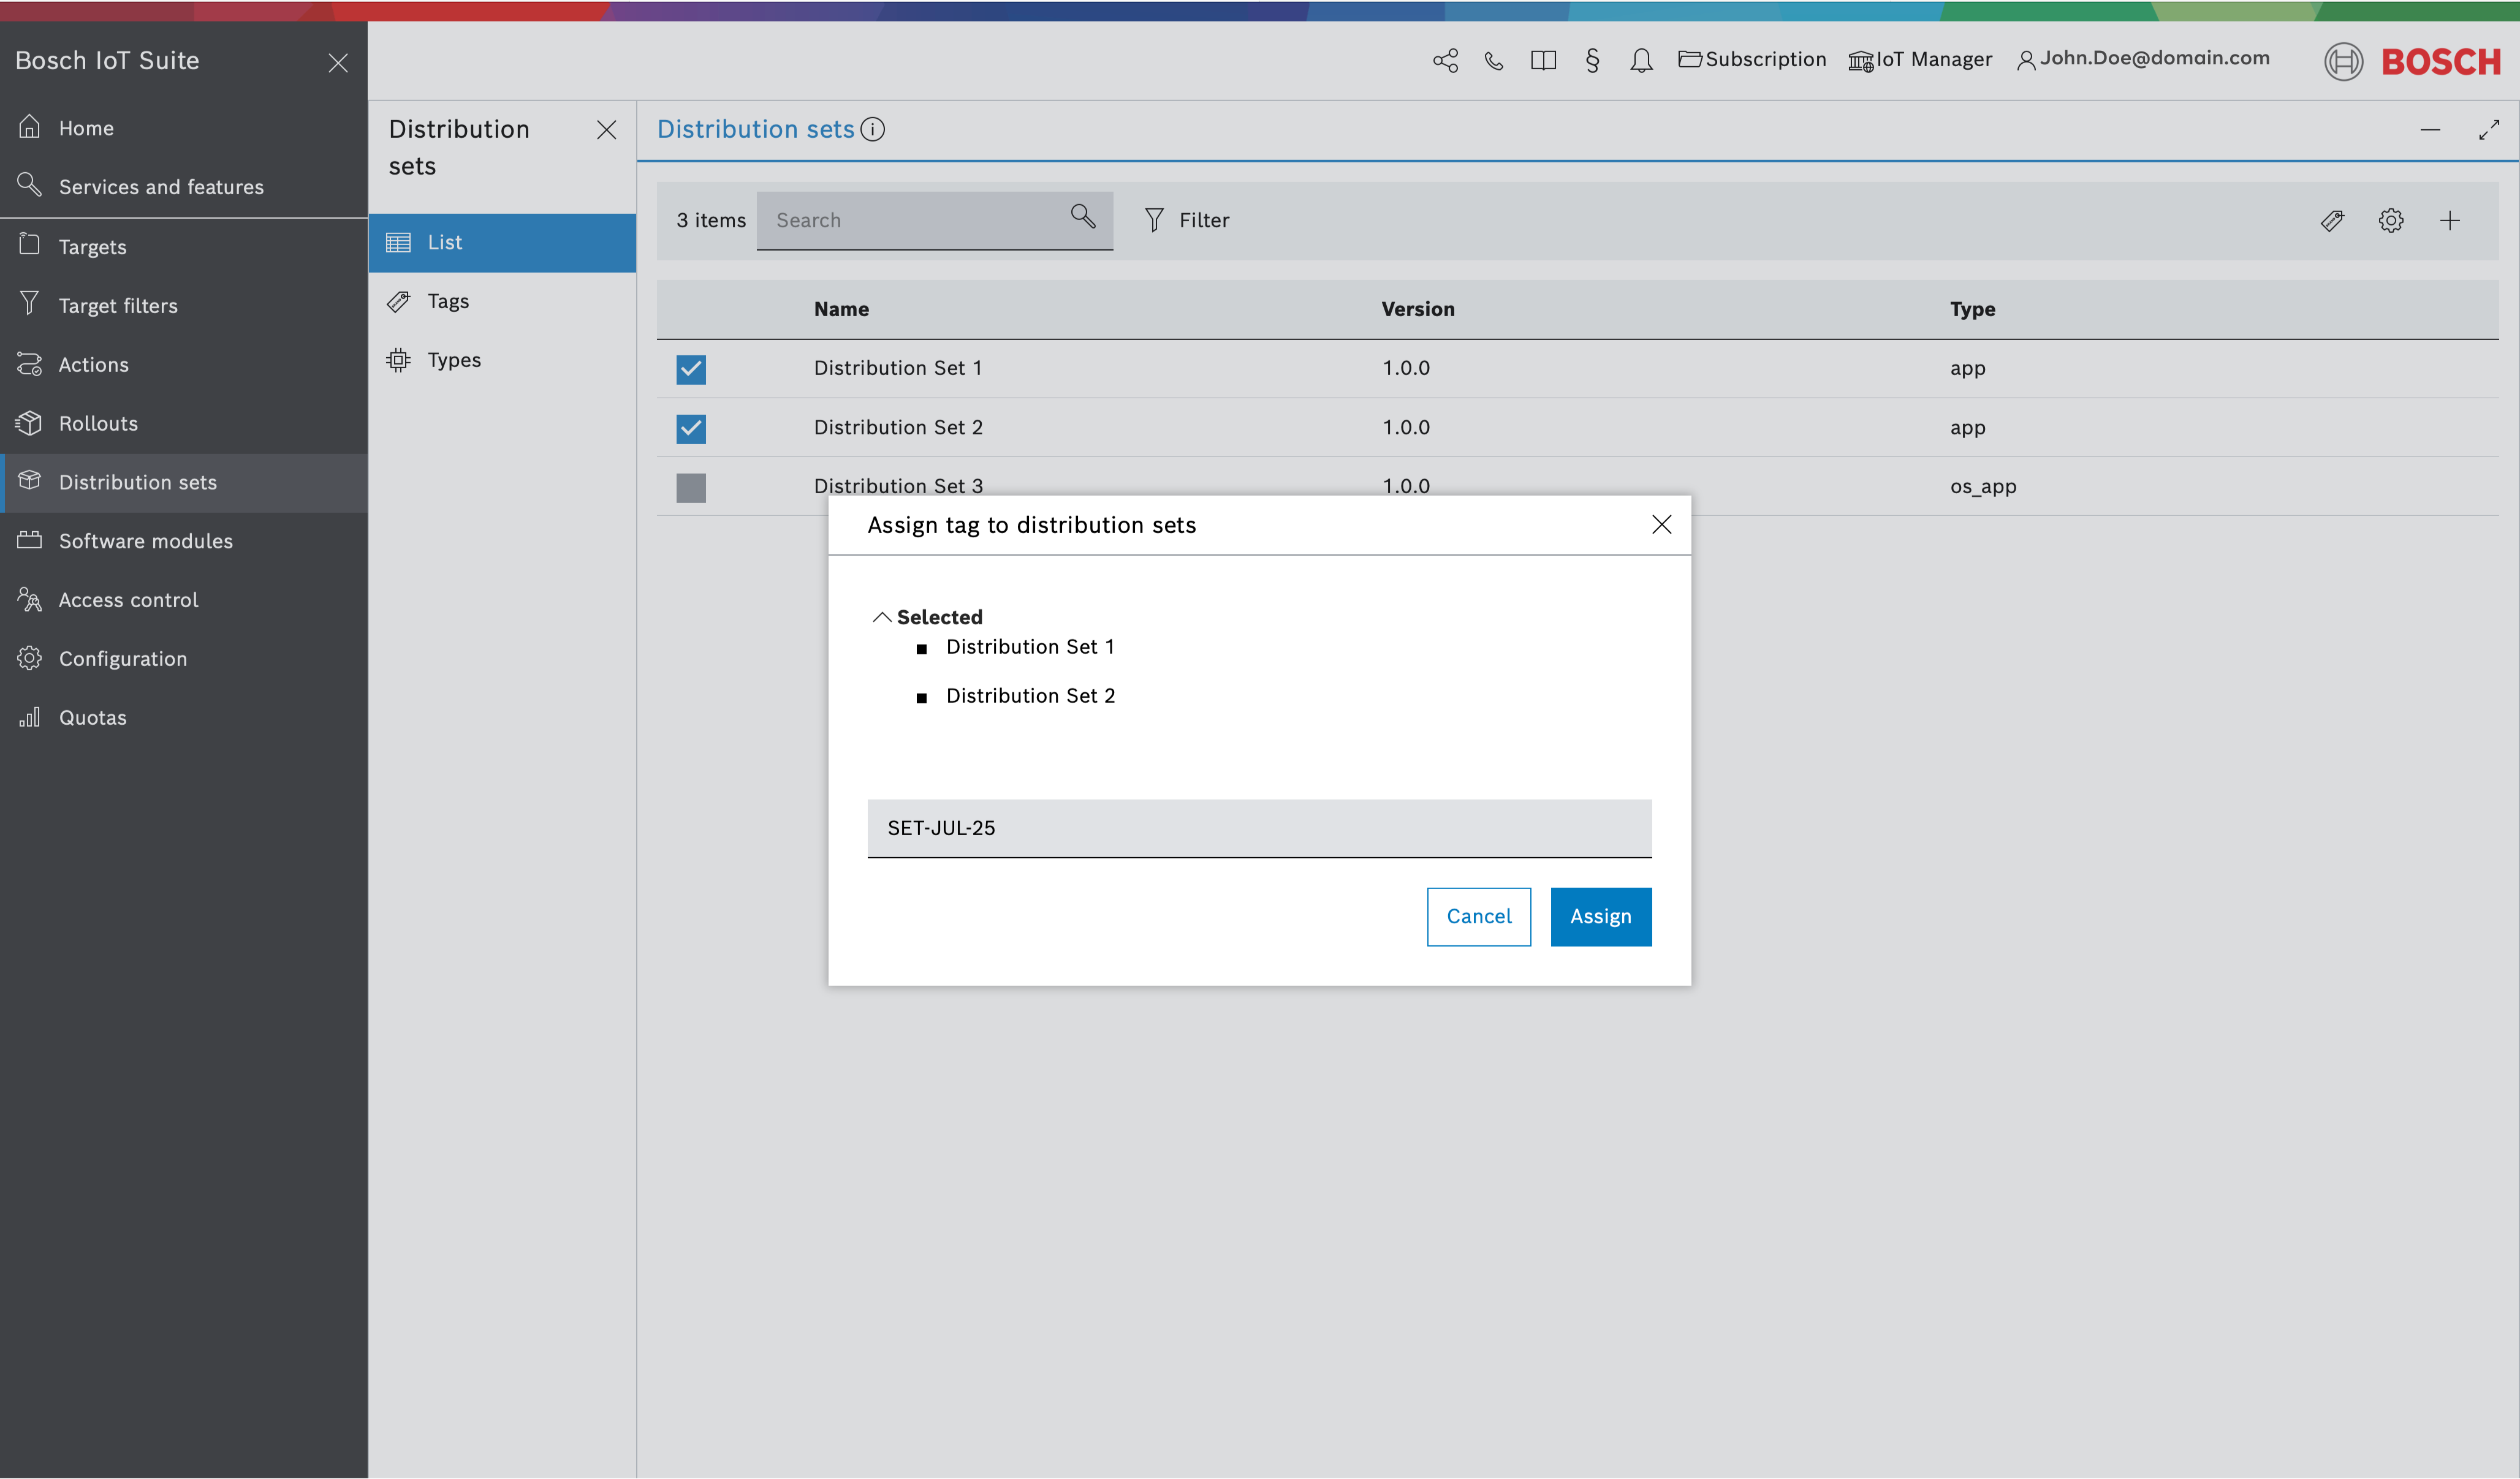
Tag distribution set
You can assign a tag to one or multiple distribution sets by:
- Select the desired distribution sets from the list.
- Click the Assign tag
 icon.
icon. - Type in the name of a tag. If the tag doesn't exist a new tag with the same name will be created automatically.
- Click Assign.
To see all the tag a distribution set is tagged with. Click on the desired distribution set and expand the Tags section of the Distribution set blade view.

To untag a distribution set simply click the X button next to the tag in the Tags section of the Distribution set blade view.