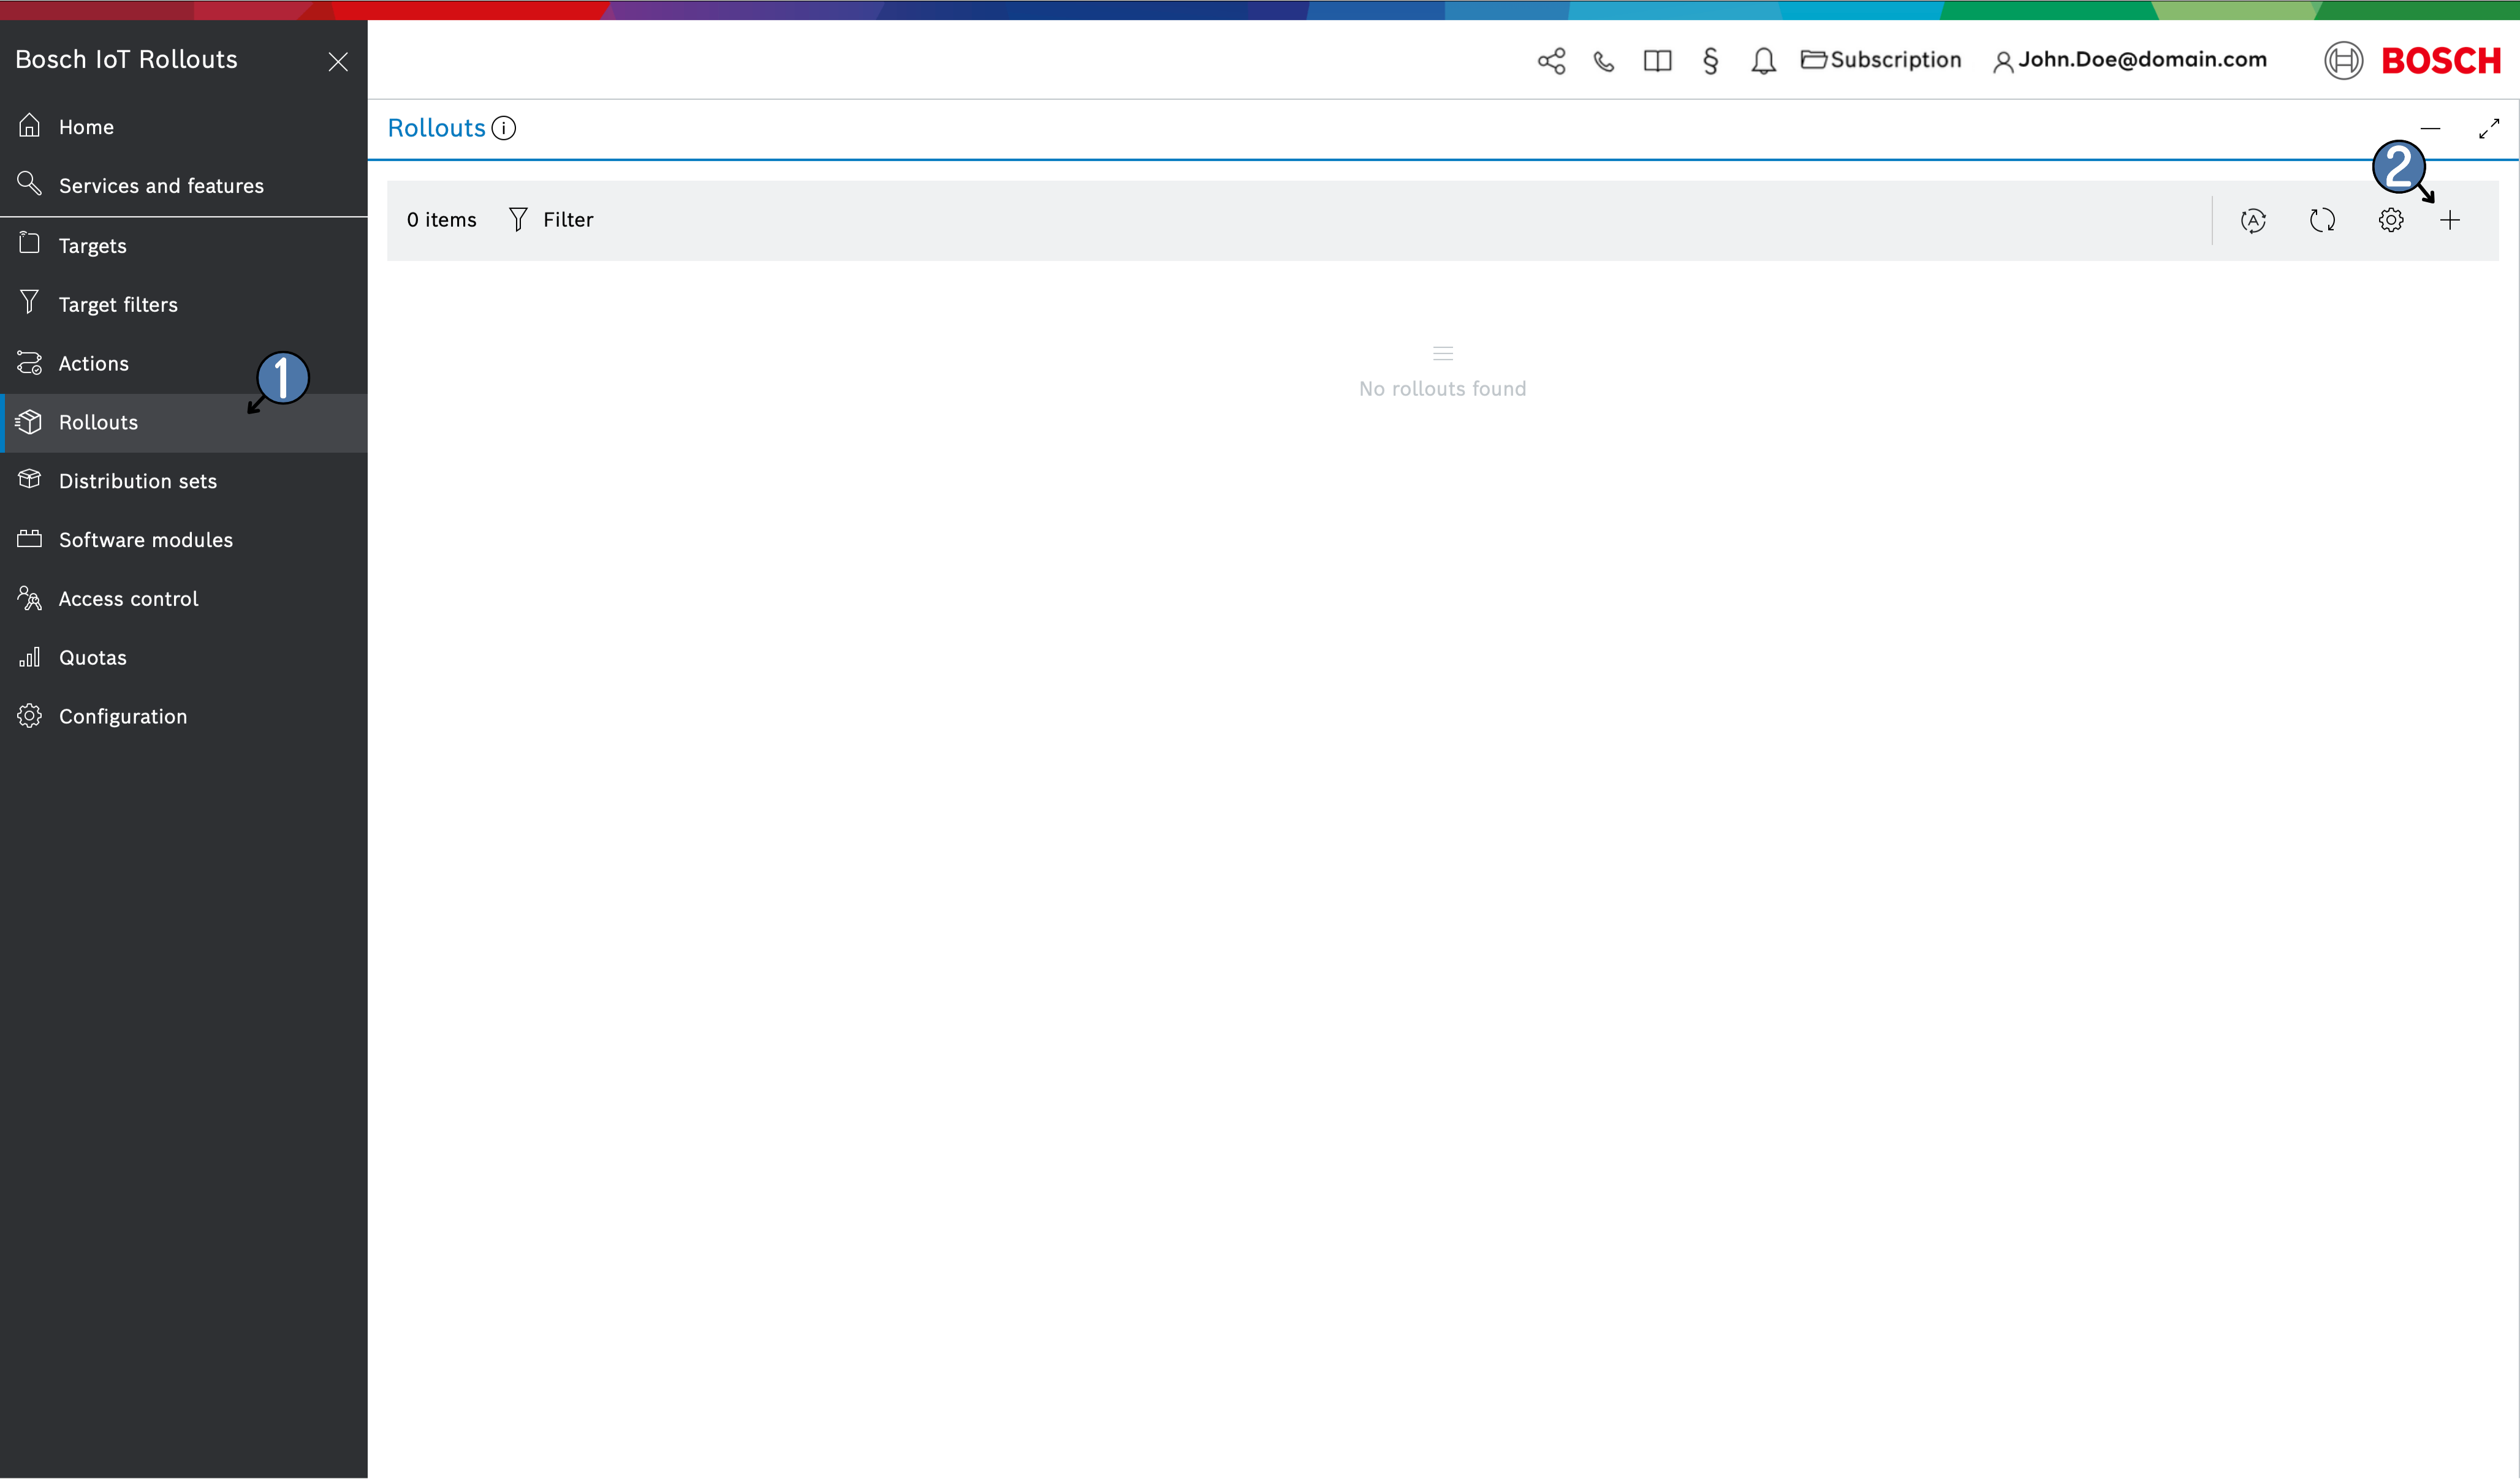
Open Rollouts from the left navigation and click the + icon in the header to start creating a new rollout . This launches the Create Rollout wizard with a series of steps:
Targets and Distribution Set
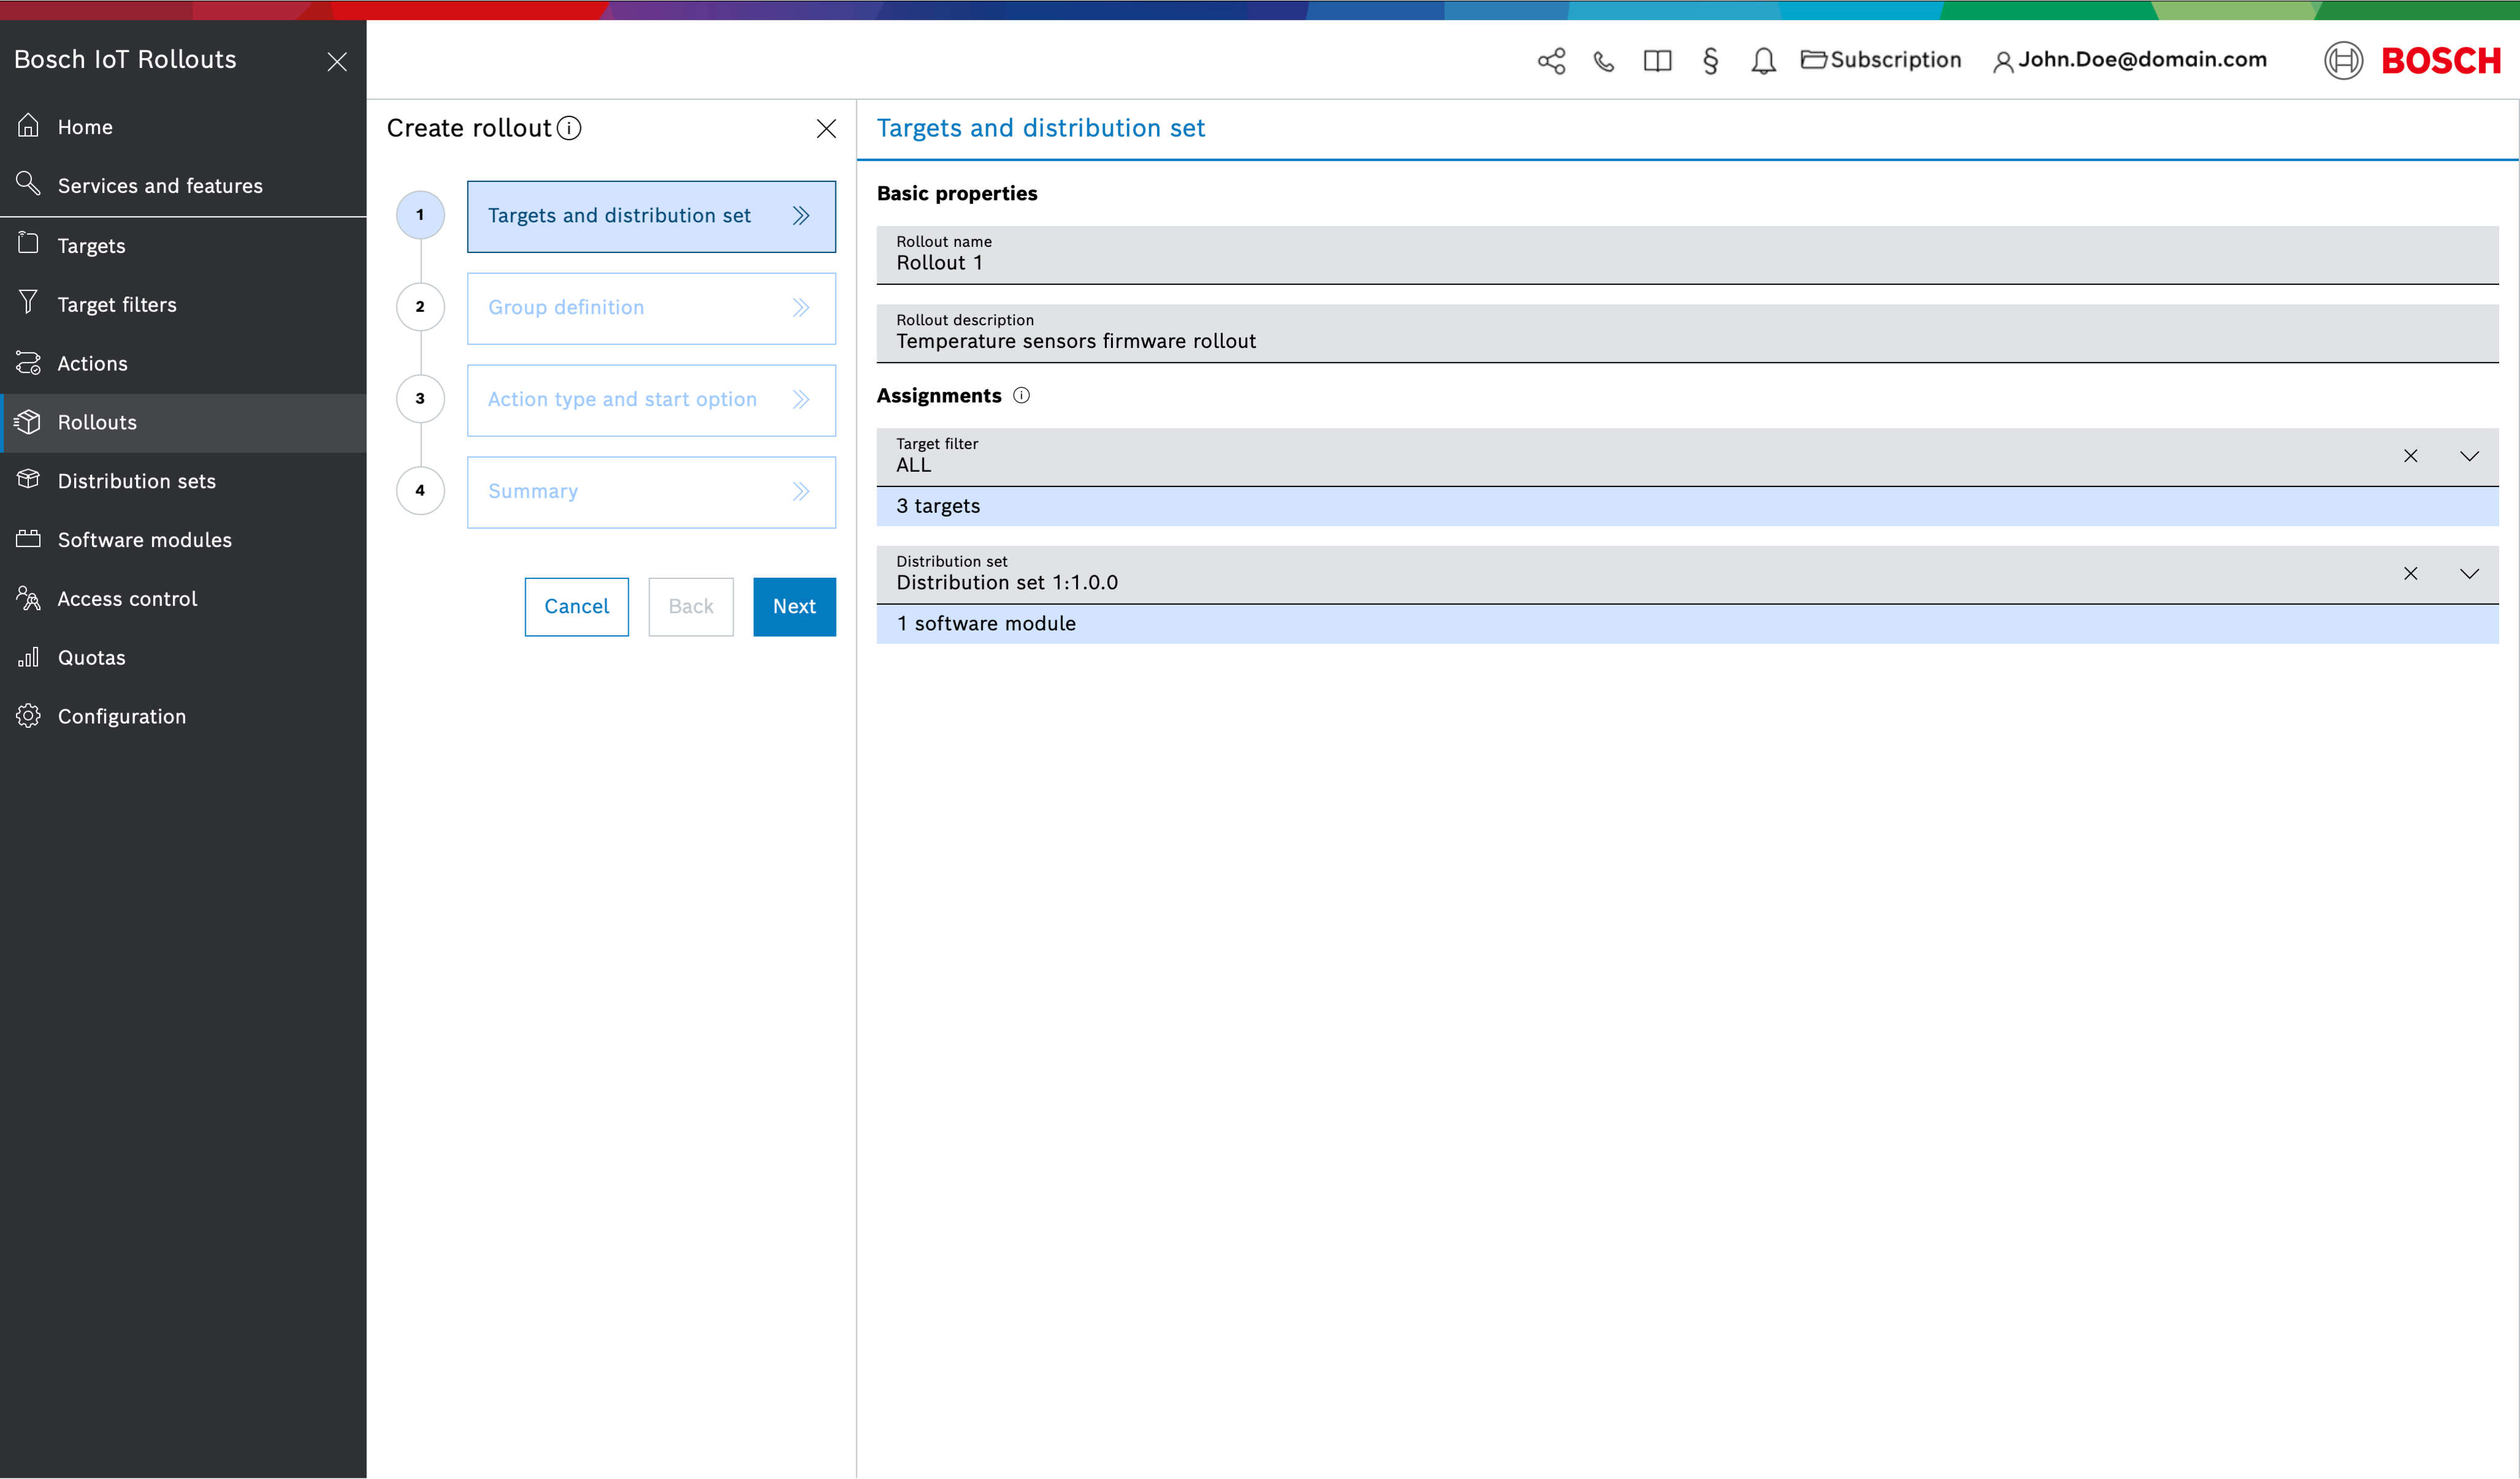
The first step is to specify the Target selection and Distribution Set to deploy:
- Basic properties
- Rollout name – enter a unique name for this rollout
- Rollout description – optionally, enter a description for the rollout campaign
Assignments
- Target filter – choose an existing target filter or search for one by typing in the field. The number of targets matching the selected filter will be automatically displayed under the field.
If there are not matching targets to the filter, a warning will be displayed and only Dynamic Rollout creation will be available !

- Distribution set – select an existing distribution set to deploy, or search for it by name . Only complete distribution sets (containing all required software module types) can be selected. For instance, an OS with app(s) type distribution set must include an OS module and one or more App modules . The number of software modules in the chosen distribution set is displayed below the selection field
- Target filter – choose an existing target filter or search for one by typing in the field. The number of targets matching the selected filter will be automatically displayed under the field.
Click Next to proceed after filling in these details
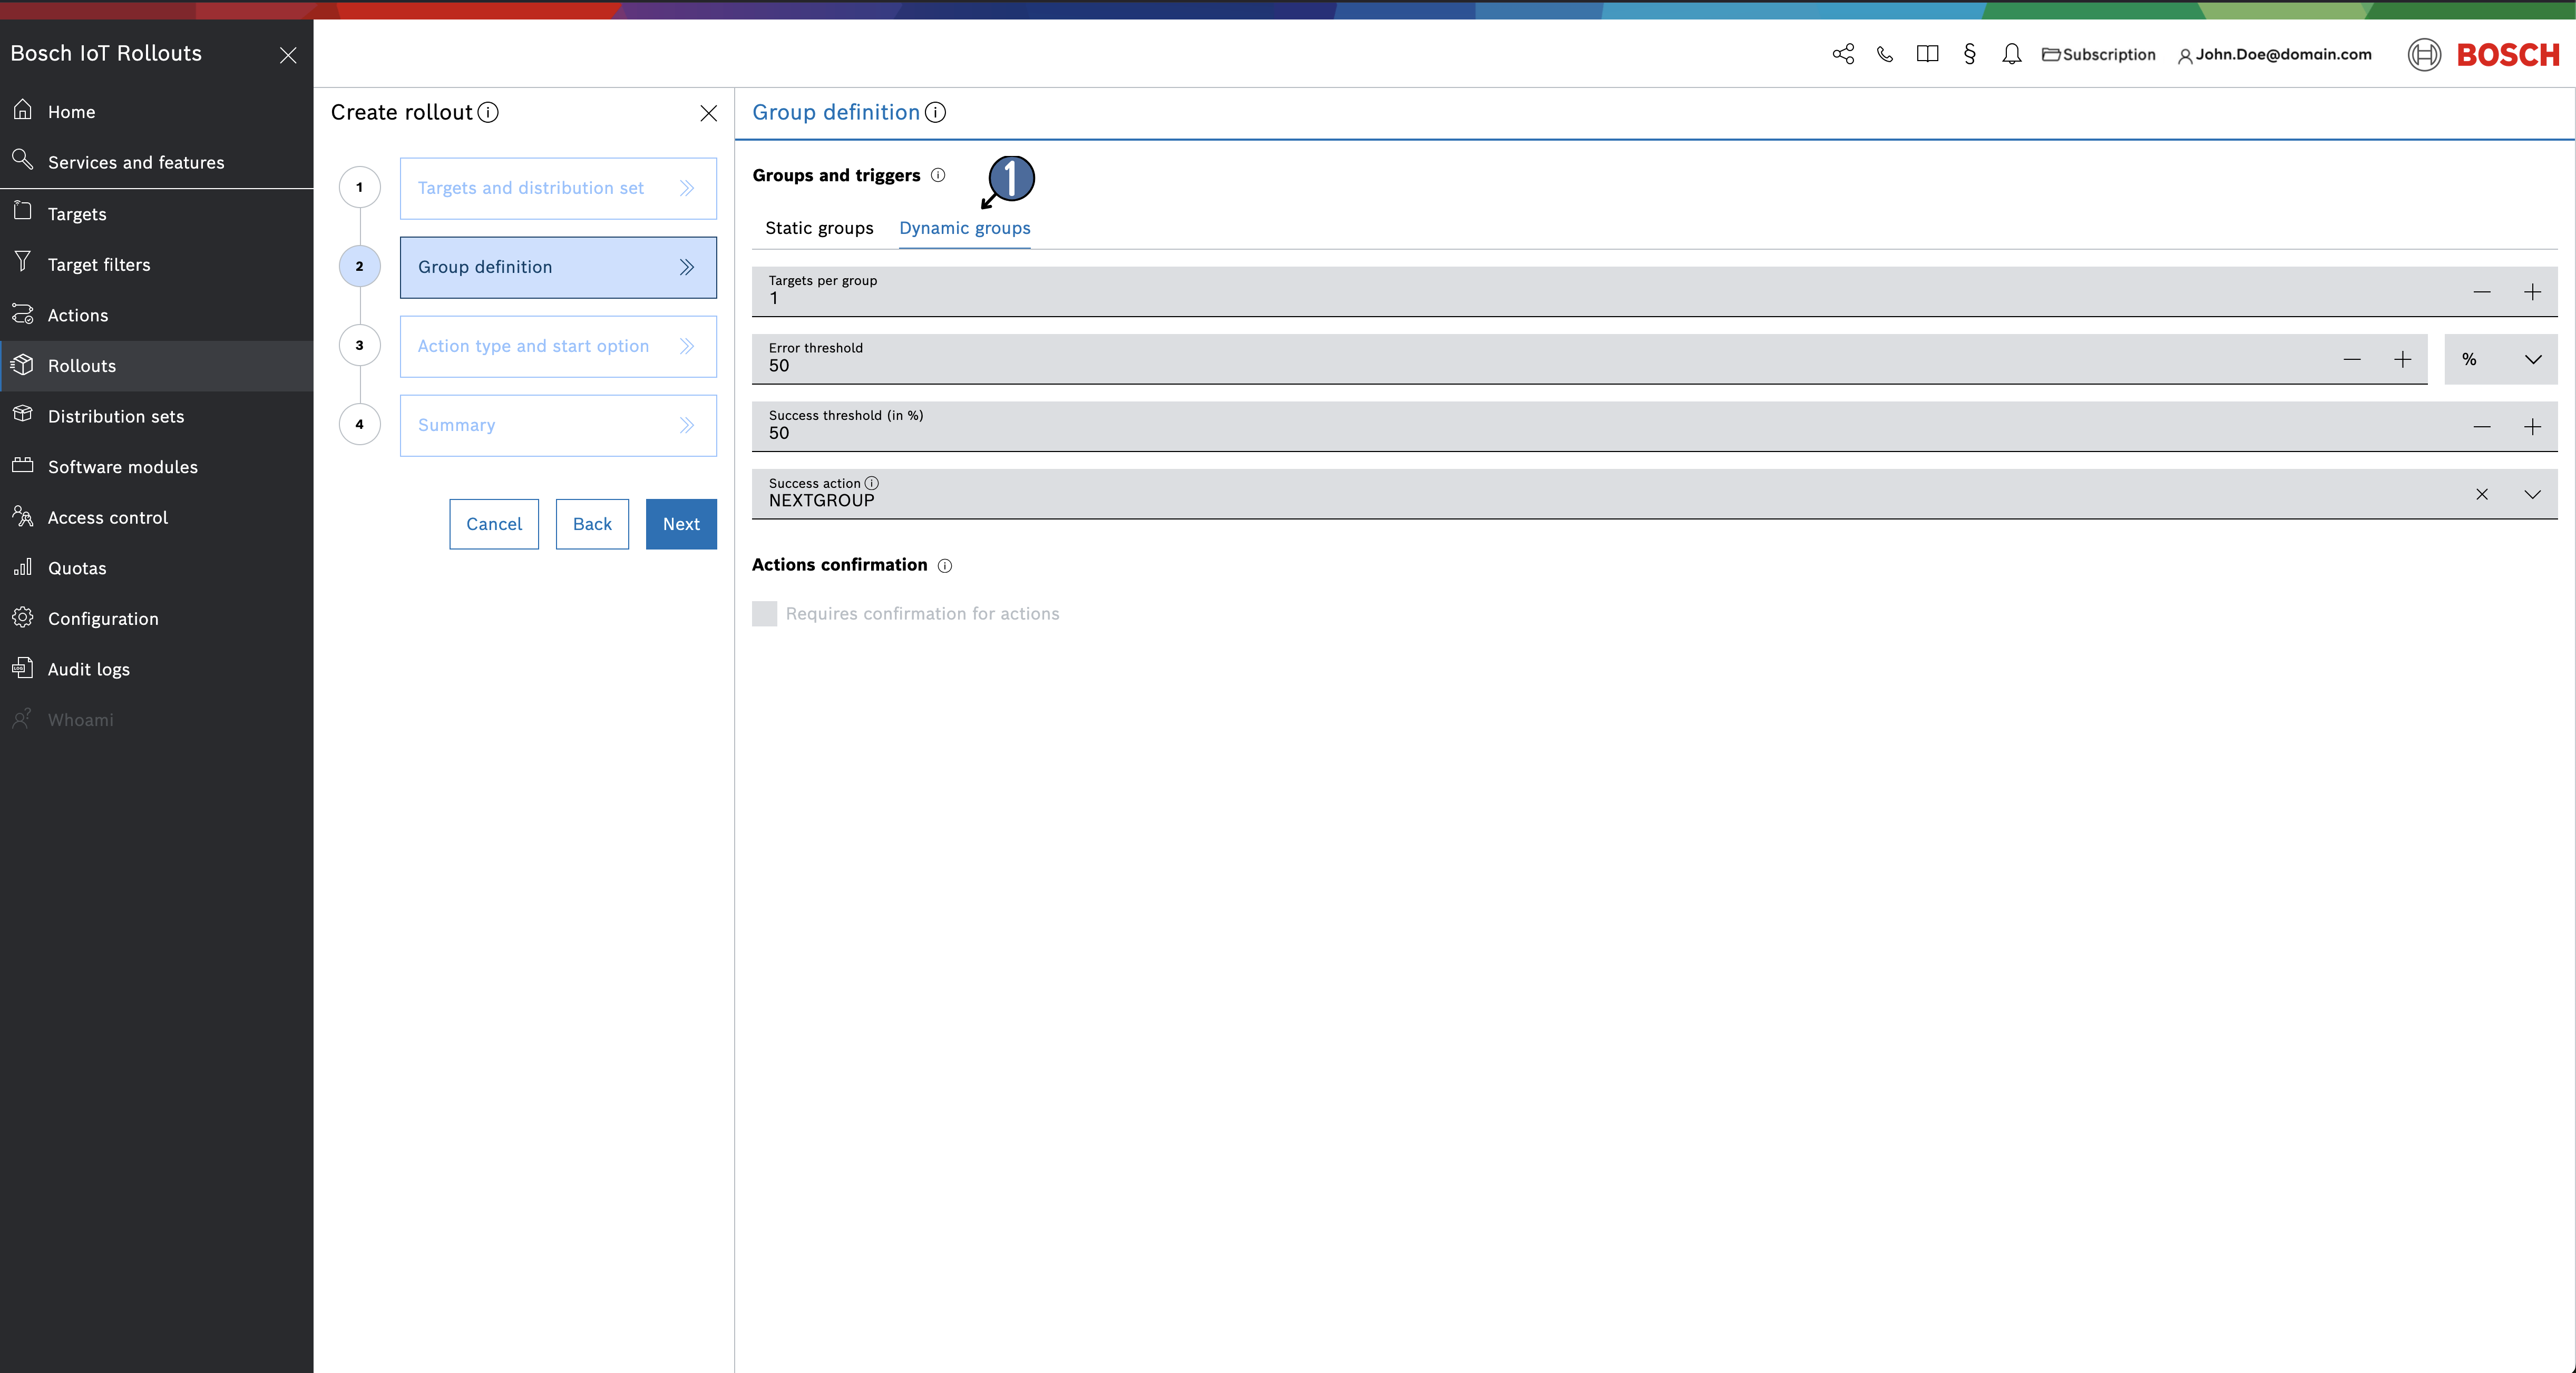
Group Definition
On the second dialog (Group Definition), you will choose Dynamic groups to create a Dynamic Rollout. (By default, the wizard is set to Static groups, but for a dynamic rollout you must switch to Dynamic groups.)
Selecting Dynamic groups allows you to create a Dynamic Rollout, which automatically includes both existing Targets and any future Targets that meet the specified filter criteria . Unlike a static Rollout, new Targets that register or Targets that become eligible after the Rollout is created will still be added to a Dynamic Rollout. Each dynamic group will consist of a set number of Targets, and new groups are generated as needed when the existing groups reach their Target capacity or have been triggered to start the next group.
- Targets per group - the number of targets that each dynamic group should contain . Once a group reaches this number of targets, any additional incoming targets will start a new dynamic group.
- Error threshold - the allowable failure rate (percentage or absolute number of targets) in a group before the entire rollout is emergency-stopped (also works as in static groups)
- Success threshold - the percentage of targets in a group that must successfully complete the update which will trigger Success Action.
- Success Action - Defines what happens when the success threshold is reached for a rollout group. Two options are currently available NEXTGROUP or PAUSE.
- NEXTGROUP triggers the next group of the rollout
- PAUSE pauses the whole Rollout and awaits manual Resume in order to start next group of the Rollout
- Action Confirmation - check the box if the end user of a device needs to be asked for consent before the update can be installed (requires enabling the User Consent mechanism)
For details, see User consent flow.
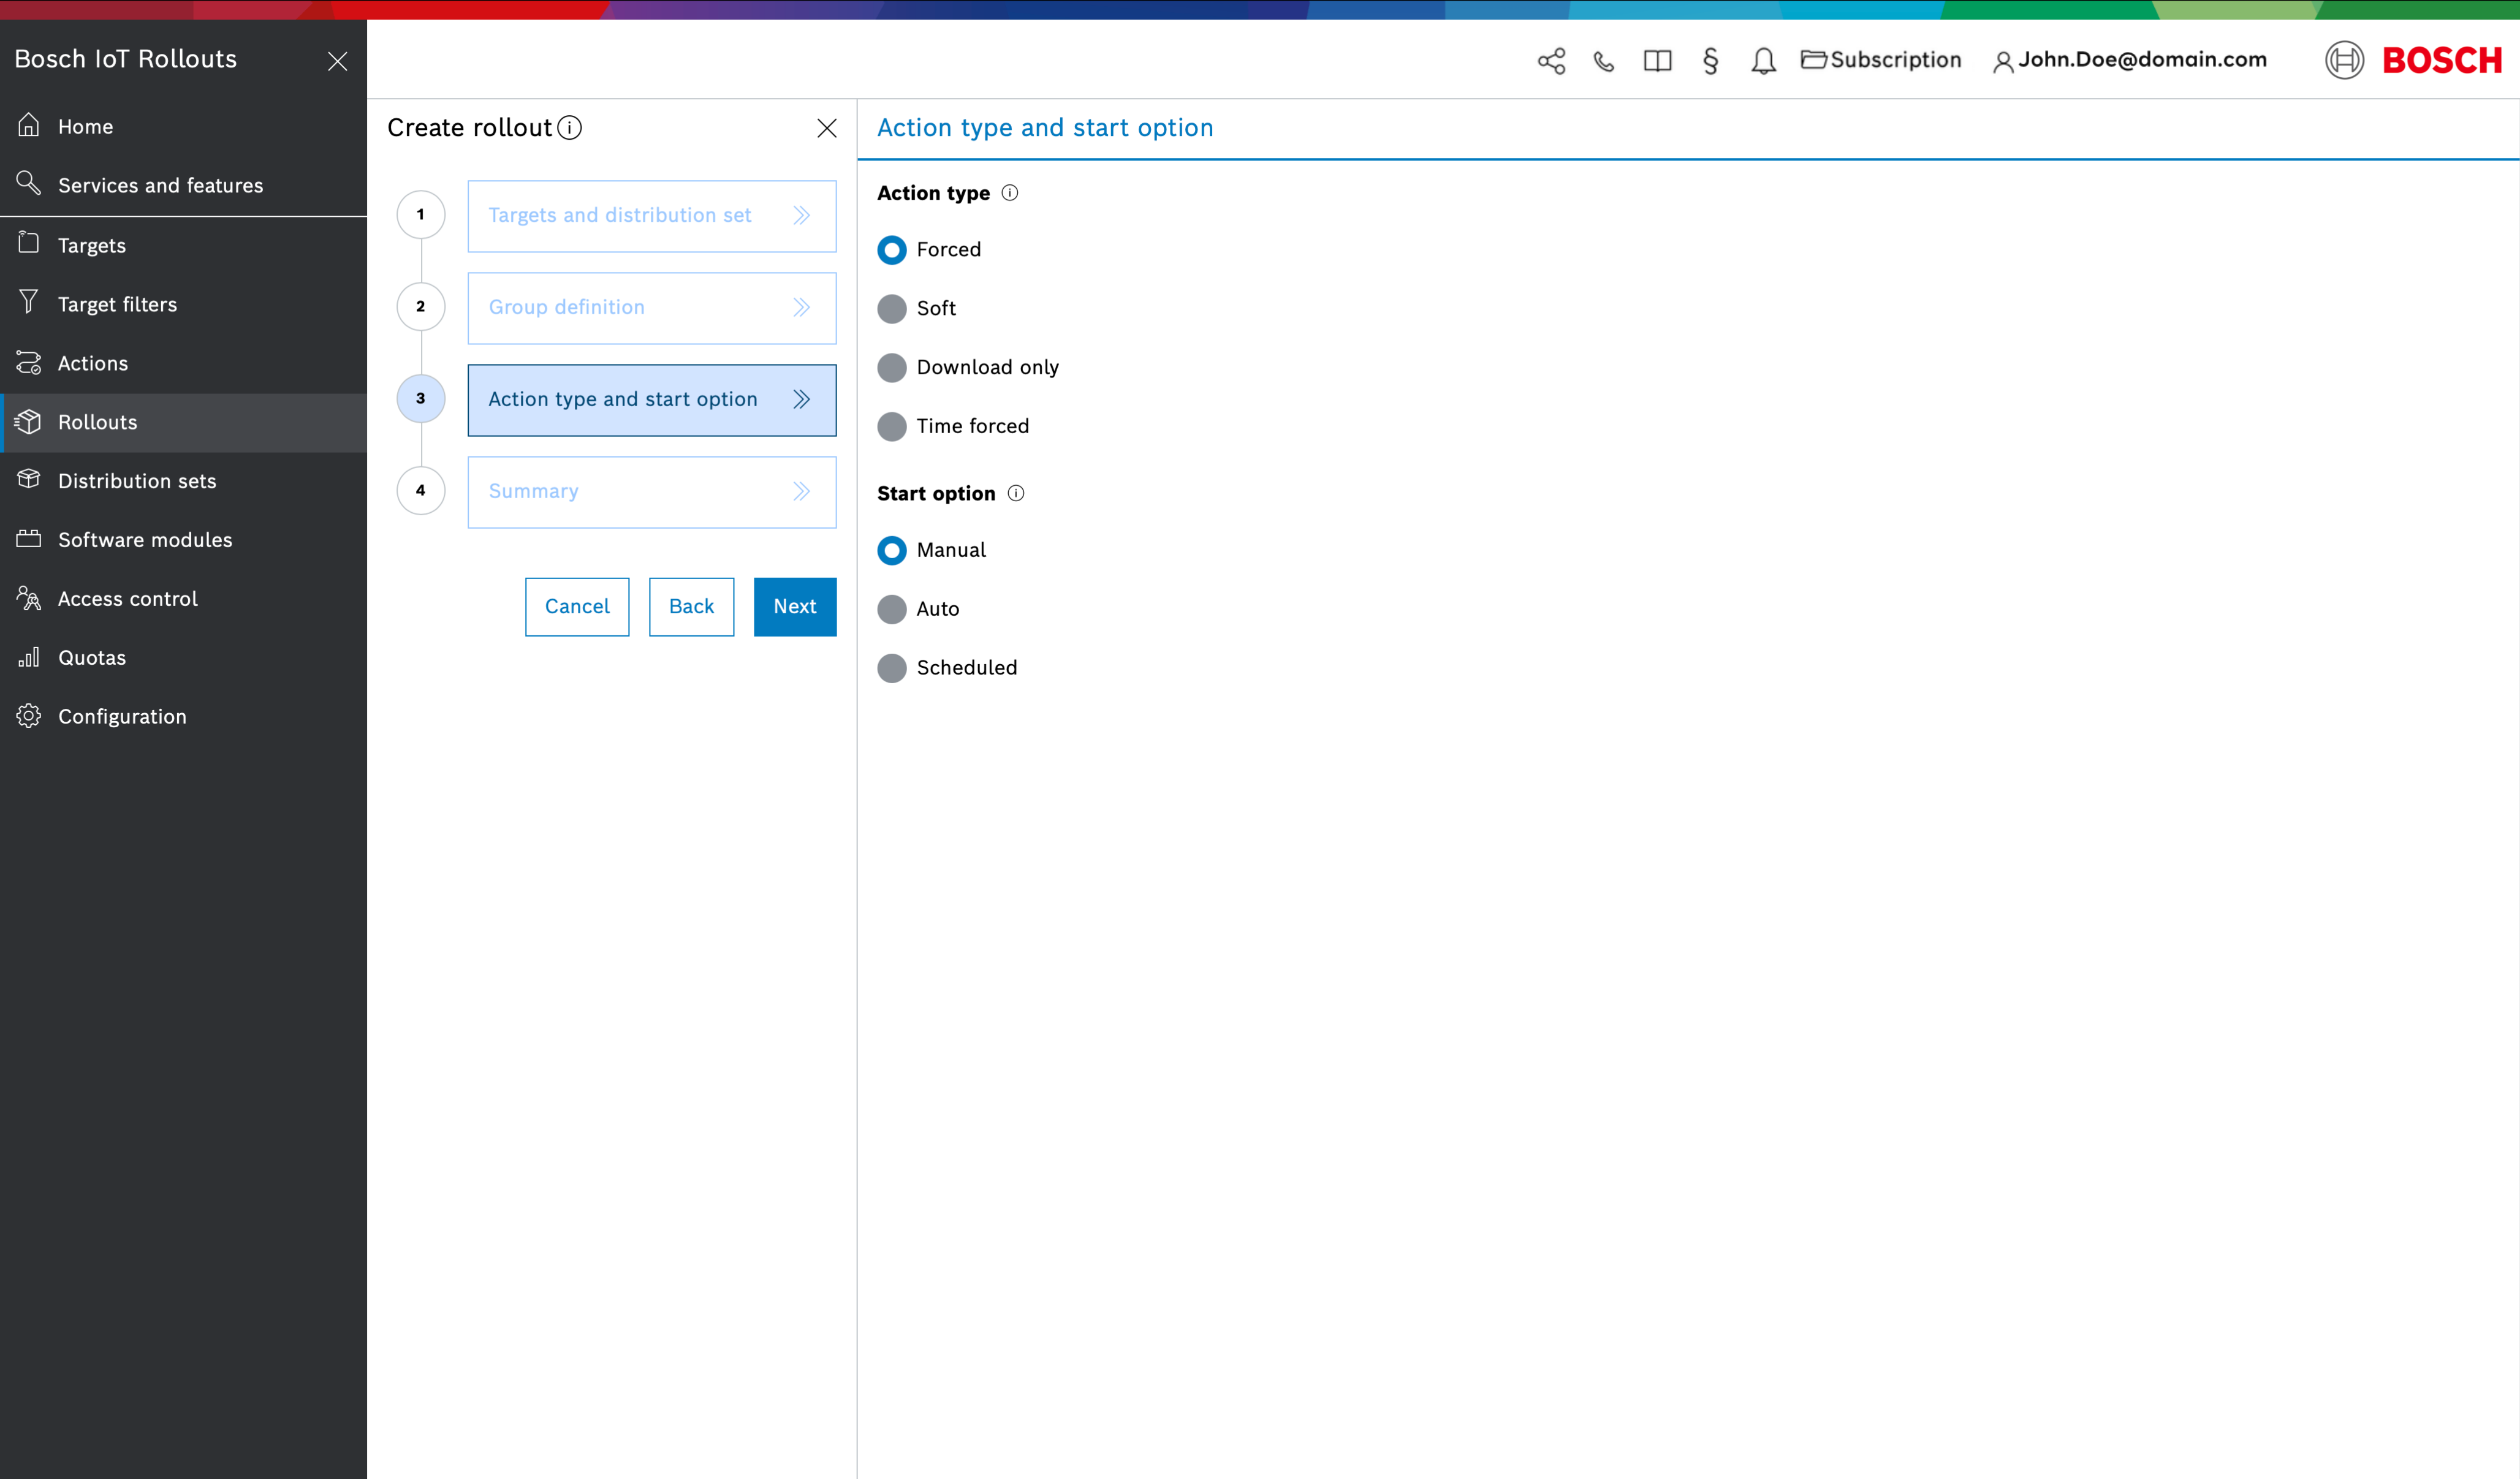
Action Type and Start Option
Next, choose the Action Type and Start Option for the Dynamic Rollout:
- Action Type: This setting controls how the device receives and applies the update . The options are the same as for static rollouts:
- Forced – the device must install the update immediately.
Soft – the device can install the update at its convenience (e.g. with user approval or on a schedule).
Download only – the update is only downloaded to the device, not installed.
Time forced – the update starts as Soft, but will automatically switch to Forced at a specified time if not completed earlier.
Manual – the rollout will wait for a manual start trigger by a user.
Auto – the rollout will automatically start as soon as it’s created.
Scheduled – the rollout will start automatically at a predetermined date/time once it’s ready.
- Start Option: This defines when the rollout execution begins.
Summary
Review the configuration of your dynamic rollout in the Summary step. If everything looks correct, click Create to finalize the rollout, or use Back to modify any settings. After creation, the new rollout will appear in the Rollouts list.
Because this is a Dynamic Rollout, remember that it needs to be started to begin distributing updates to targets (if you chose an automatic or scheduled start, it will start accordingly; if you chose manual, you or another user must click the Start button for the rollout) . If the rollout start was set to Manual, the update process will not commence until you trigger it in the UI  (see Manage Rollouts for how to start and control rollouts). Once running, the dynamic rollout will continuously add new groups for newly arriving targets that match the filter.
Just like with static rollouts, you can use the Copy Rollout feature later to clone the structure of this rollout for future campaigns.
Rollout Override Precedence
Cascading Rollouts Using Target Filters
Dynamic rollouts can also be used in a cascading update strategy by leveraging target filters to sequence multiple rollouts by version. The approach is similar to static rollouts: you create a series of rollouts, each targeting devices with a specific currently installed version of the software. For example:
- Rollout 1: Target filter – installedds.name == "<Distribution set name>" and installedds.version == 1.0.0.
This selects all devices with a currently installed Distribution set with version 1.0.0 . Rollout 1 would deploy version 2.0.0 to these devices. - Rollout 2: Target filter – installedds.name == "<Distribution set name>" and installedds.version == 2.0.0.
This selects all devices with a currently installed Distribution set with version 2.0.0 (after Rollout 1). Rollout 2 deploys version 3.0.0 to them. - Rollout 3: Target filter – installedds.name == "<Distribution set name>" and installedds.version == 3.0.0.
This targets devices on version 3.0.0 (updated by Rollout 2) and updates them to the next release.
By chaining rollouts in this way, each rollout upgrades the devices to the next version step-by-step. Using version-specific filters (installedds.name and installedds.version) ensures that a device only enters a given rollout when it has the exact prior version installed. This methodical approach provides better control and oversight across multiple rollout waves.
Diagnosing Target Involvement in a Dynamic Rollout
In a dynamic rollout, you might notice that a particular target (device) that meets the filter criteria is not receiving the update. To investigate why a target is not included, you should inspect the target’s action history. The action history (available in the device’s detail view) logs all update actions assigned to that device, along with timestamps and results. By reviewing this history, you can determine if the device was perhaps already updated by another rollout or assignment.
A common reason a target is skipped in a dynamic rollout is that a newer rollout’s action already took precedence for that device. Dynamic rollouts are designed such that if a device has an action from a more recently created rollout, it will not get a duplicate action from an older rollout. In practice, this means if the device was targeted by a later rollout (or even a manual assignment) that installed a newer version, the current dynamic rollout will not include that device because it no longer matches the filter or its update is considered fulfilled by the other rollout.