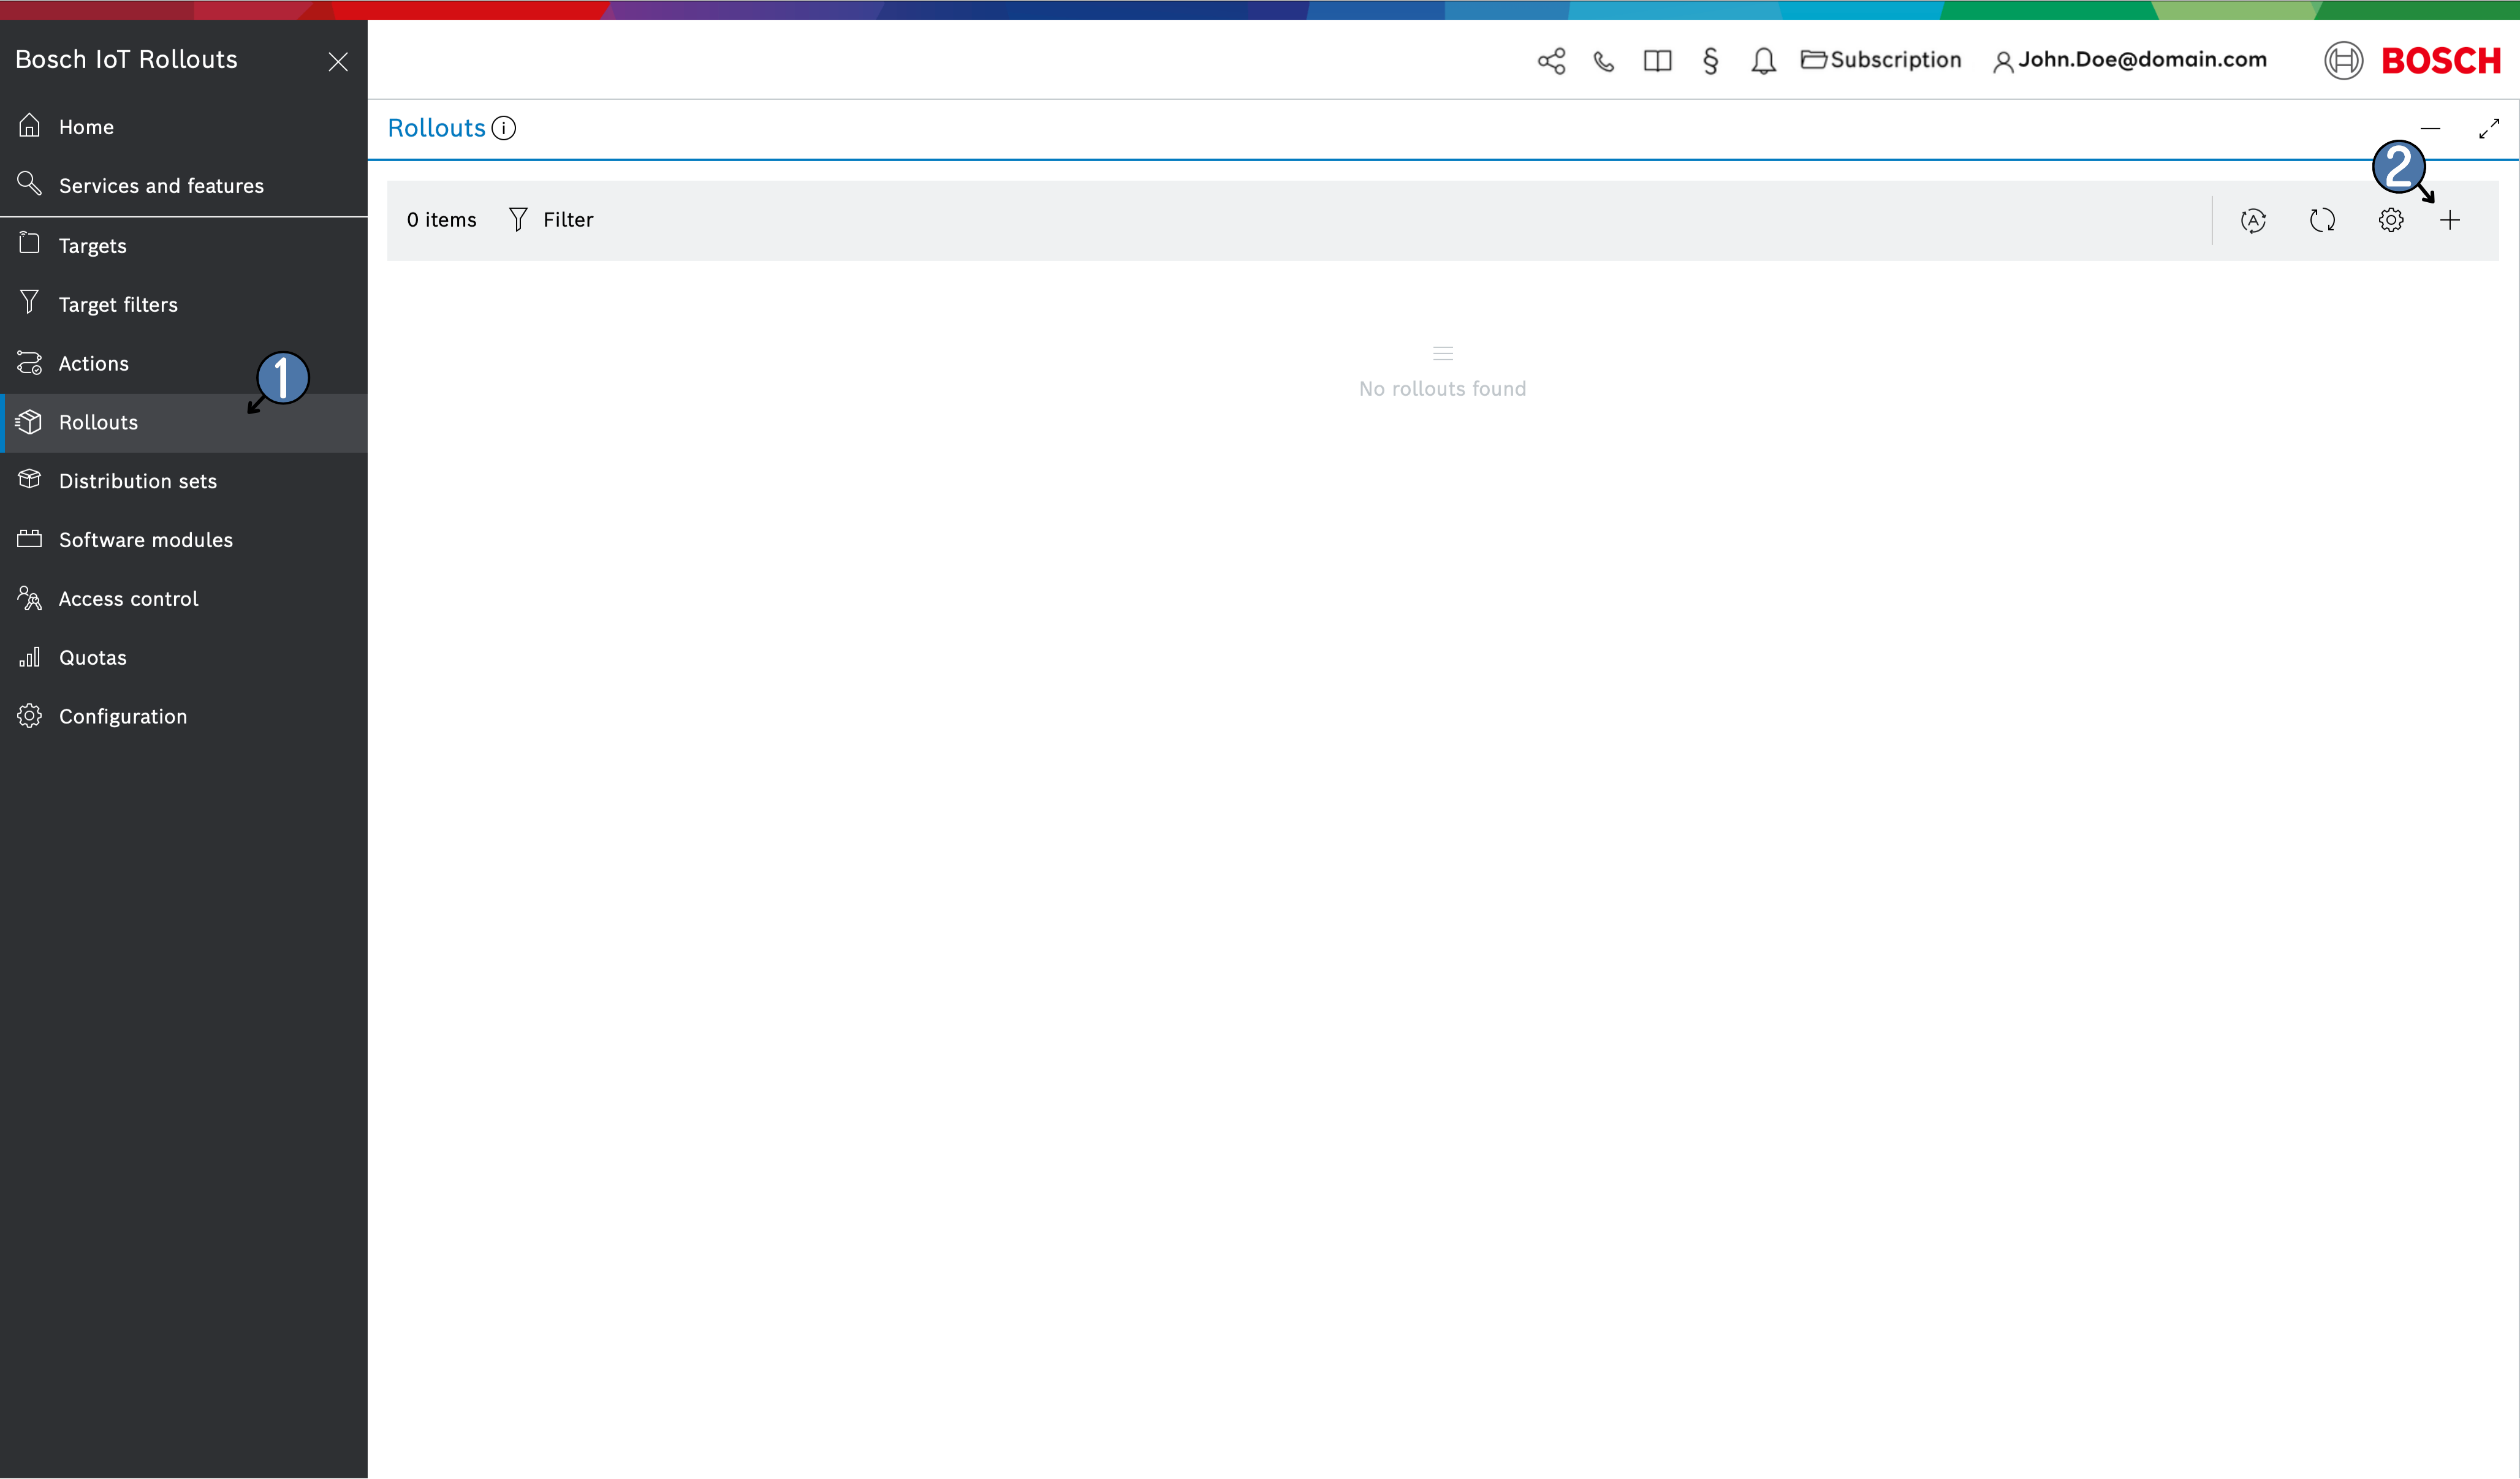
Open Rollouts from the left navigation menu and click the + icon in the header. This action opens the Create Rollout wizard, which will guide you through several steps:
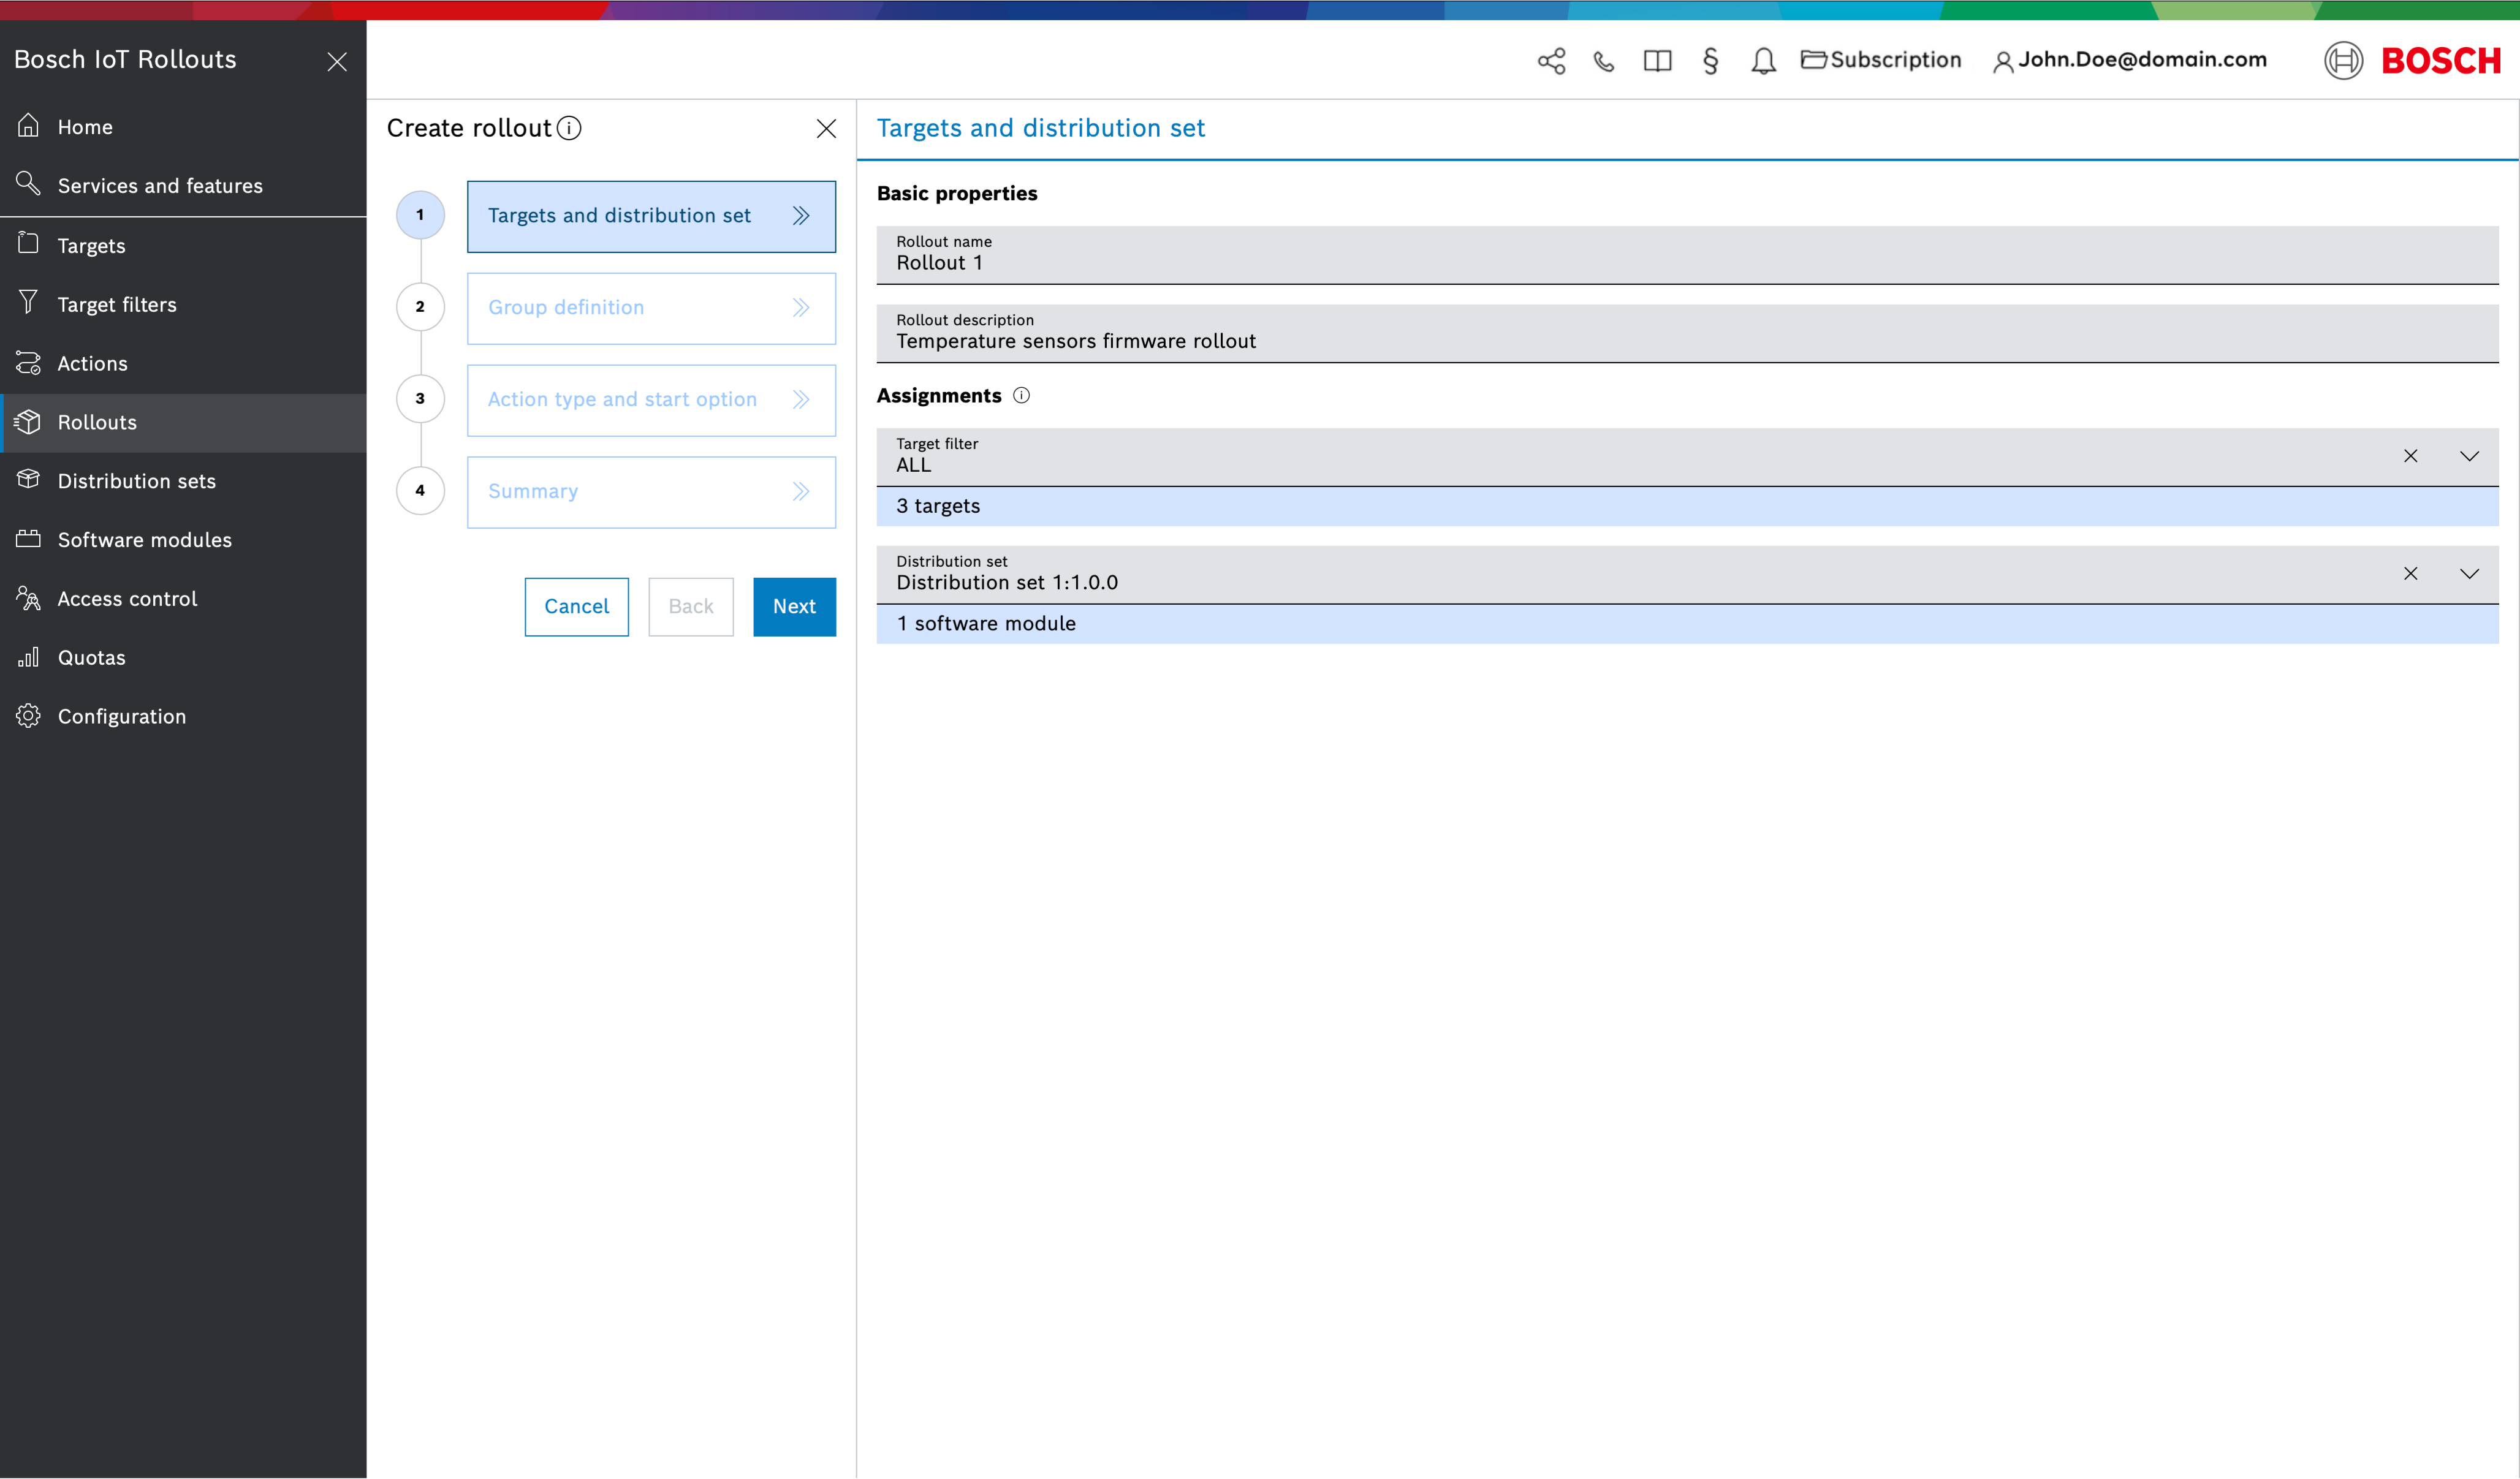
Targets and Distribution Set
The first step is to specify the Target selection and Distribution Set to deploy:
- Basic properties
- Rollout name – enter a unique name for this rollout.
- Rollout description – optionally, enter a description for the rollout campaign.
Assignments
- Target filter – choose an existing target filter or search for one by typing in the field. The number of targets matching the selected filter will be automatically displayed under the field. Prior to this step, you should have at least one target that matches the target filter to continue with the Static Rollout creation, if the filter doesn't match any targets, only Dynamic Rollout creation is available
- Distribution set – select an existing distribution set to deploy, or search for it by name . Only complete distribution sets (containing all required software module types) can be selected. For instance, an OS with app(s) type distribution set must include an OS module and one or more App modules . The number of software modules in the chosen distribution set is displayed below the selection field.
- Target filter – choose an existing target filter or search for one by typing in the field. The number of targets matching the selected filter will be automatically displayed under the field.
Continue by clicking Next to proceed to the next step.
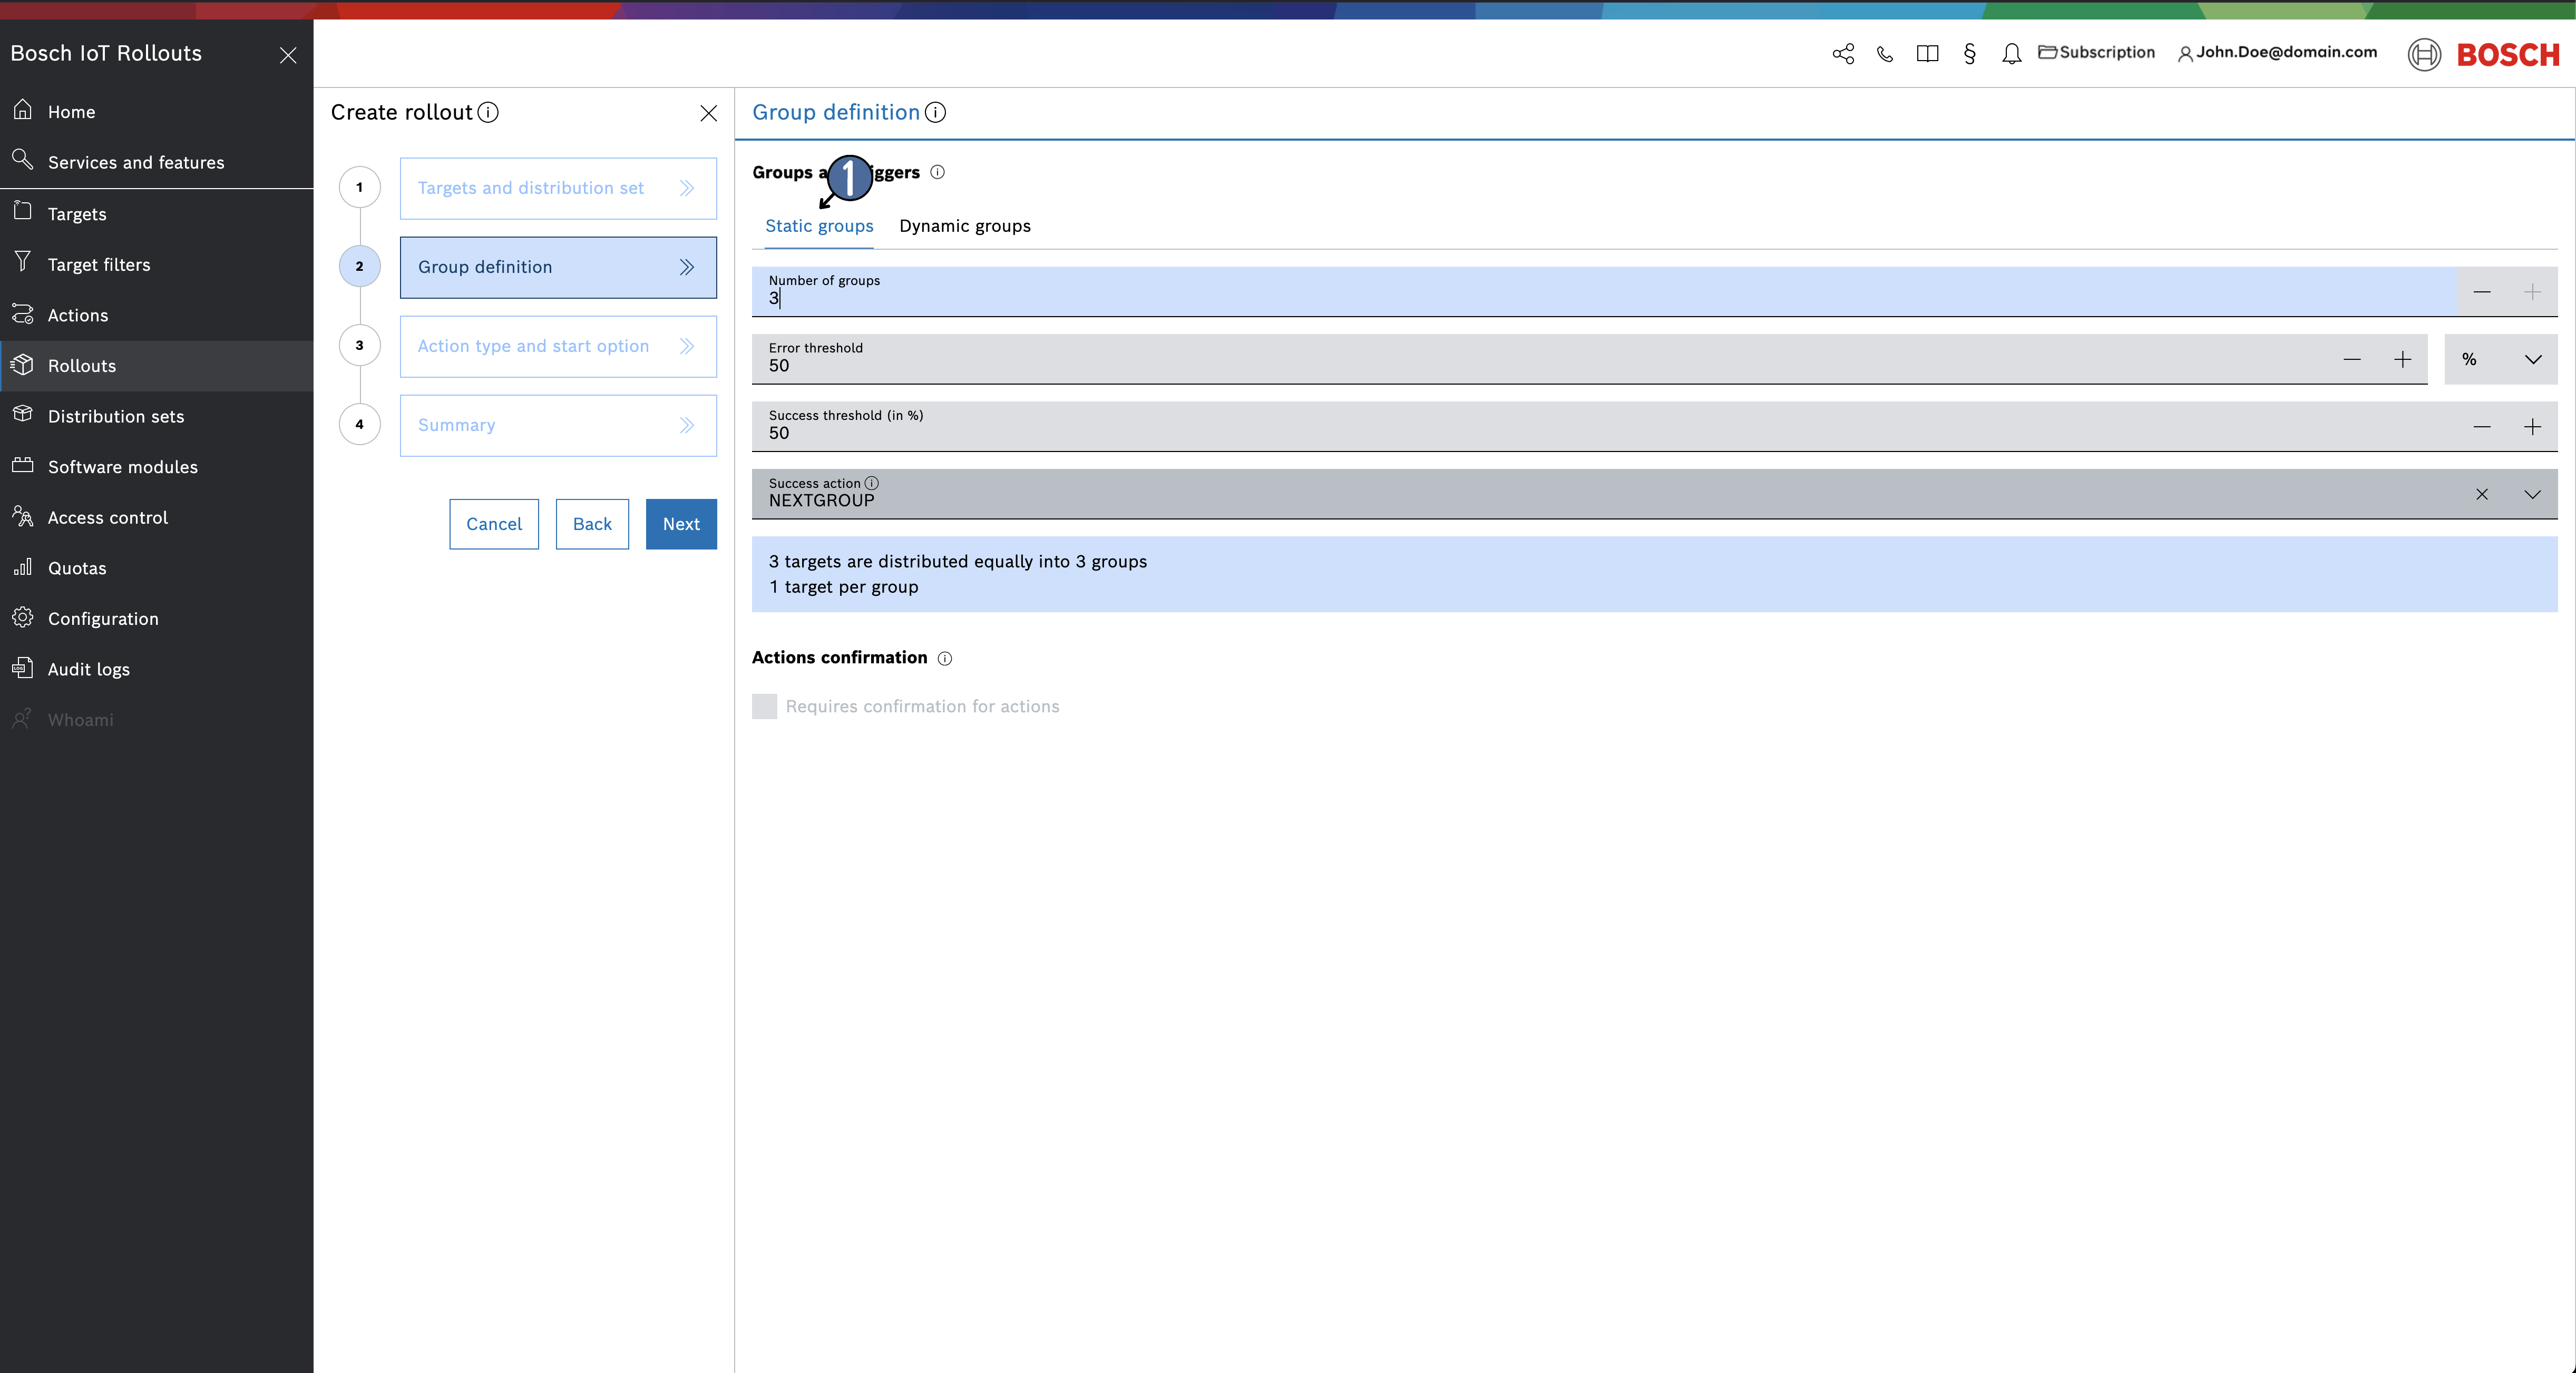
Group Definition
On the second dialog of the wizard, you define how the rollout will be grouped. There are two options for grouping: Static groups (the default) or Dynamic groups. For a Static Rollout, ensure Static groups are selected.
By default, Static groups are selected. When you create a static rollout, all existing targets that meet the filter criteria at rollout creation time are divided into a specified number of static deployment groups. Once the rollout is created, no new targets will be added to it (i.e., targets that register or meet the criteria later will not be included)
- Number of groups - the number of deployment groups to split the targets into.
- Error threshold - the allowable failure rate (percentage or absolute number of targets) in a group before the entire rollout is emergency-stopped.
- Success threshold - the percentage of targets in a group that must successfully complete the update, which will trigger Success Action.
- Success Action - Defines what happens when the success threshold is reached for a rollout group. Two options are currently available NEXTGROUP or PAUSE.
- NEXTGROUP triggers the next group of the rollout
- PAUSE pauses the whole Rollout and awaits manual Resume in order to start the next group
- Action Confirmation - check the box if the end user of a device needs to be asked for consent before the update can be installed (requires enabling the User Consent mechanism)
For details, see User consent flow.
After you configure these settings, the wizard will display a preview (in the blue highlighted area) of how the targets will be distributed across the specified number of groups.
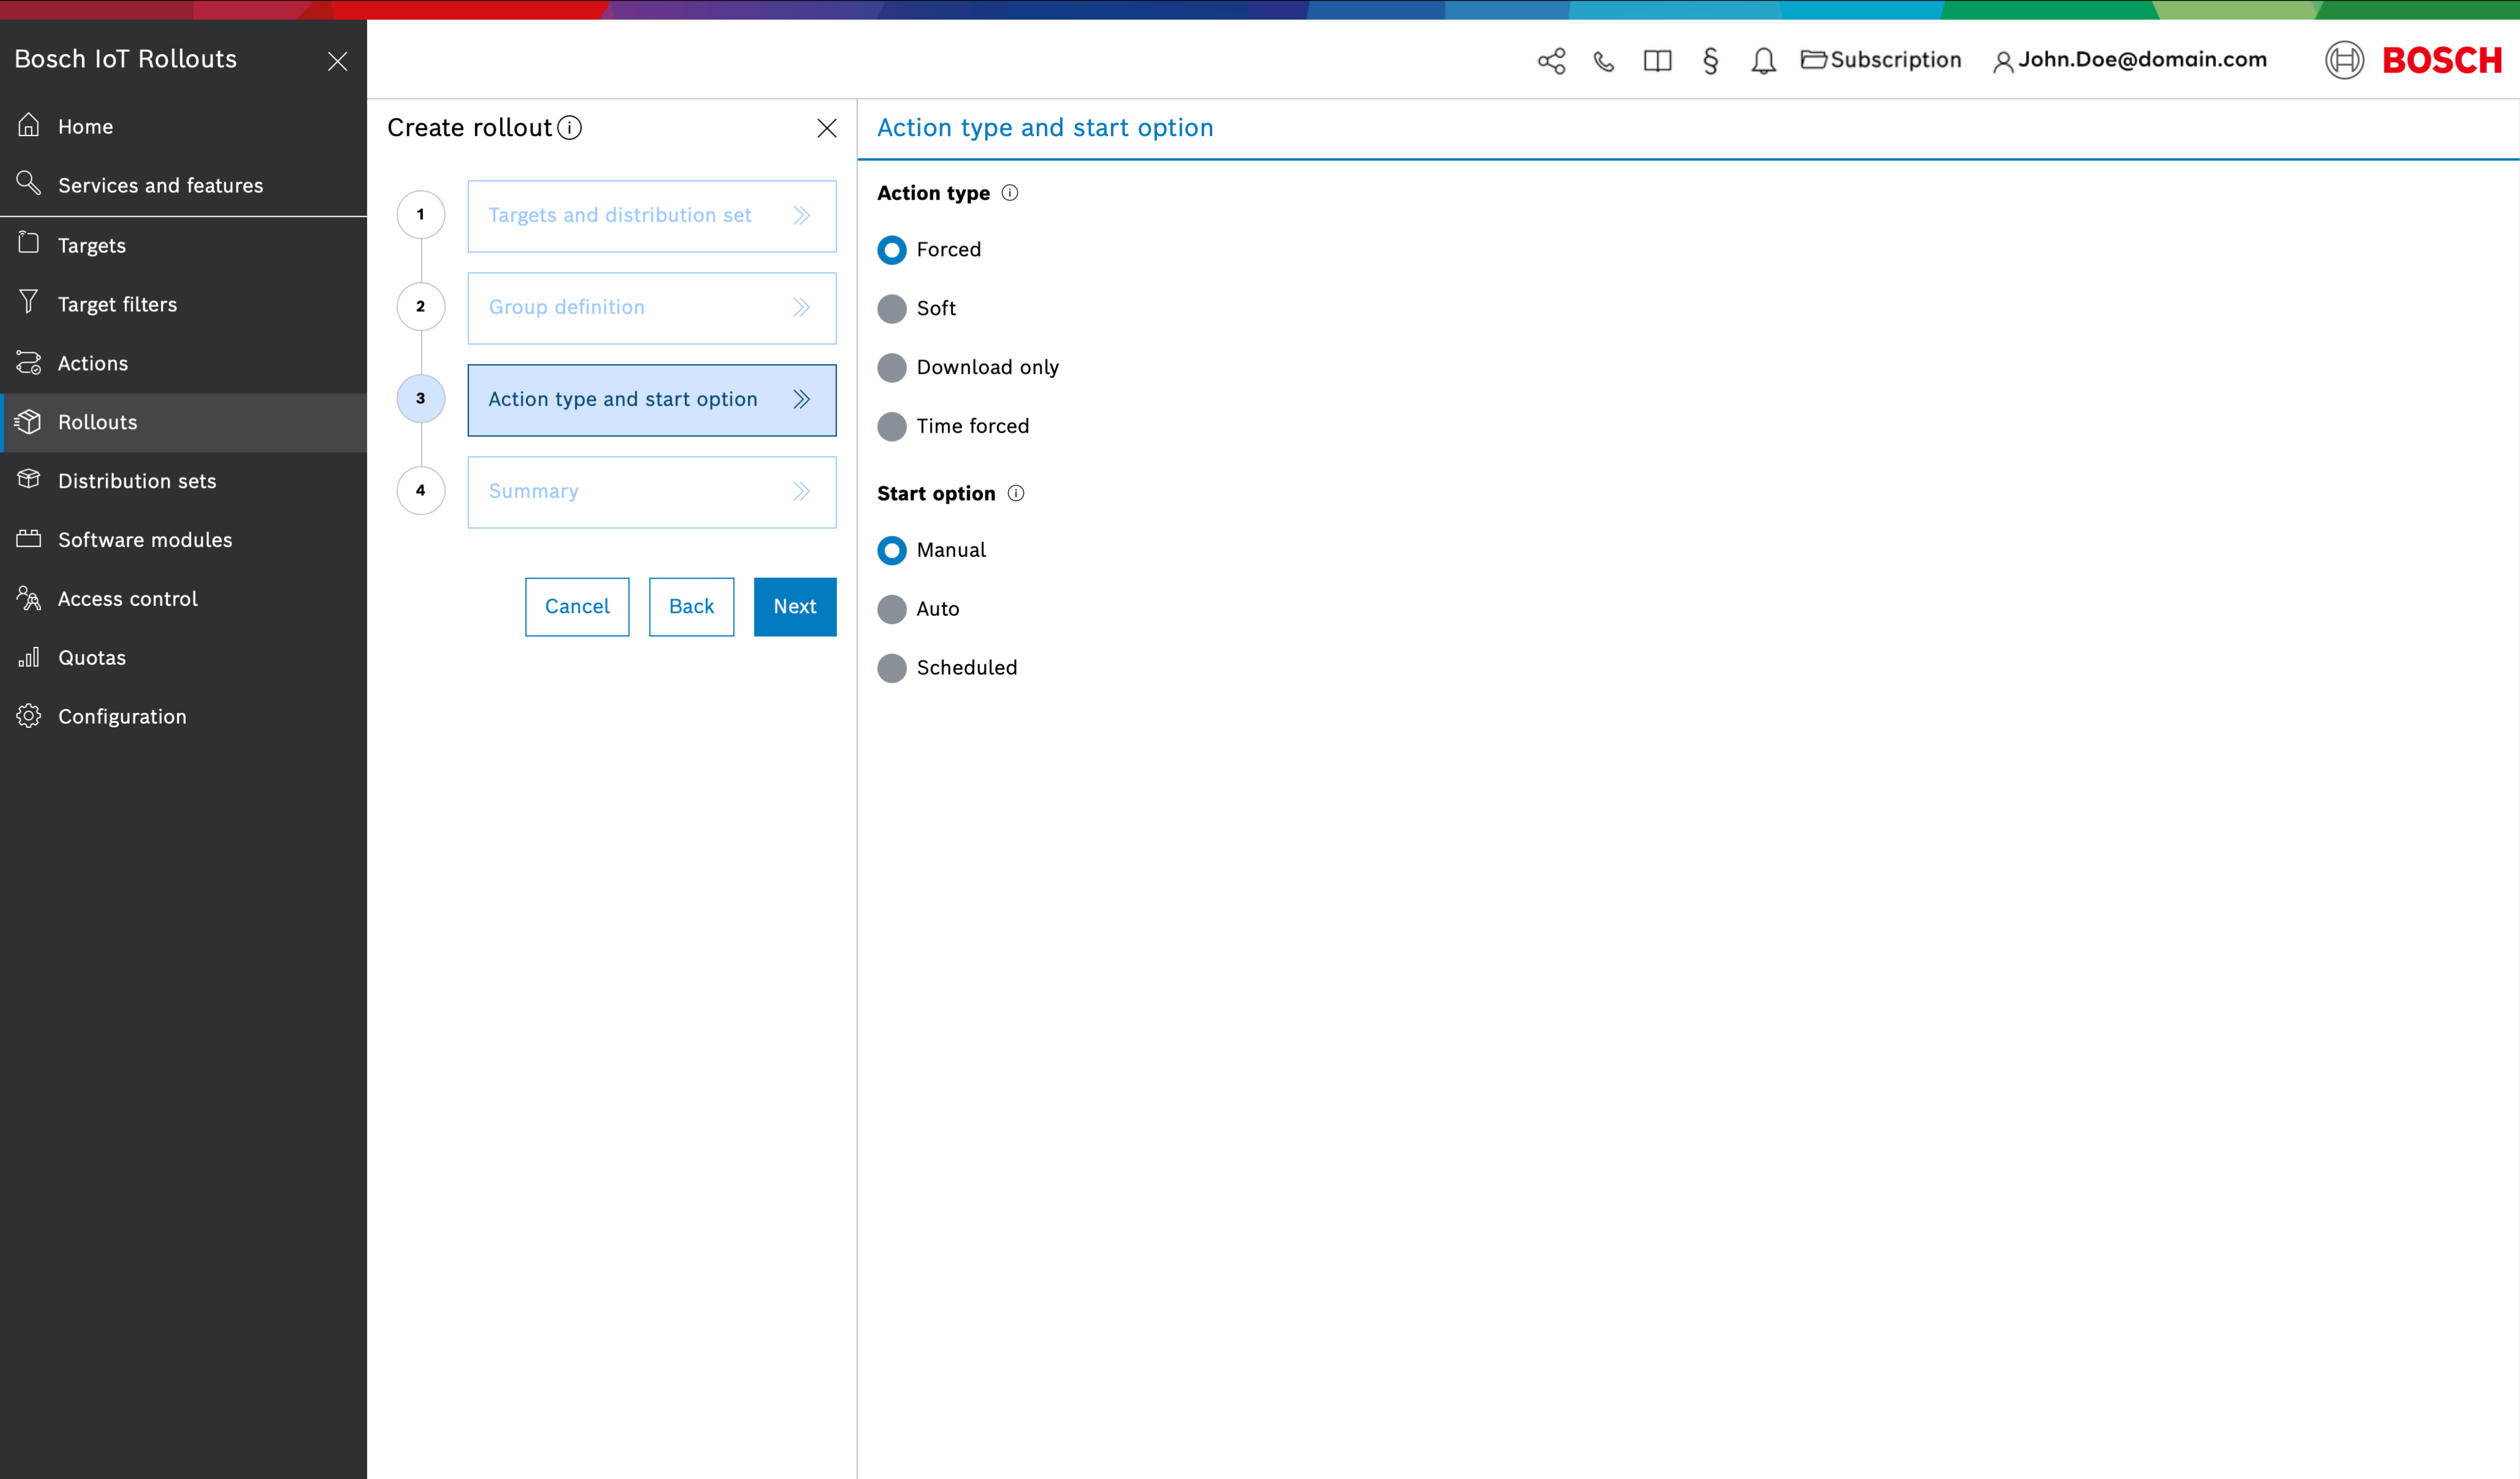
Action Type and Start Option
Next, choose the Action Type and Start Option for the Static Rollout:
- Action Type: This setting controls how the device receives and applies updates. The options are:
- Forced – the device must install the update immediately.
Soft – the device can install the update at its convenience (e.g., with user approval or on a schedule).
Download only – the update is only downloaded to the device, not installed.
Time forced – the update starts as Soft, but will automatically switch to Forced at a specified time if not completed earlier.
Manual – the rollout will wait for a manual start trigger by a user.
Auto – the rollout will automatically start as soon as it’s created.
Scheduled – the rollout will start automatically at a predetermined date/time once it’s ready.
- Start Option: This defines when the rollout execution begins.
Summary
In the final step, review all details of your new rollout. If everything is correct, click Create to finish creating the rollout (or click Back to make changes). Once created, the new rollout will appear in the Rollouts list.
If you chose a Manual start option, note that the rollout will not begin executing on its own. You or another user will need to start it from the Rollouts list (e.g. via the Start button in the rollout’s detail view).
After creating one or more rollouts, you can also use the Copy Rollout feature to base a new rollout on the configuration of an existing one.
Rollout Override Precedence