The Access control UI feature provides all necessary settings and configurations for managing users, roles, and OAuth2 clients.
In this page, you will learn how to work with the Users view.
View the list of users
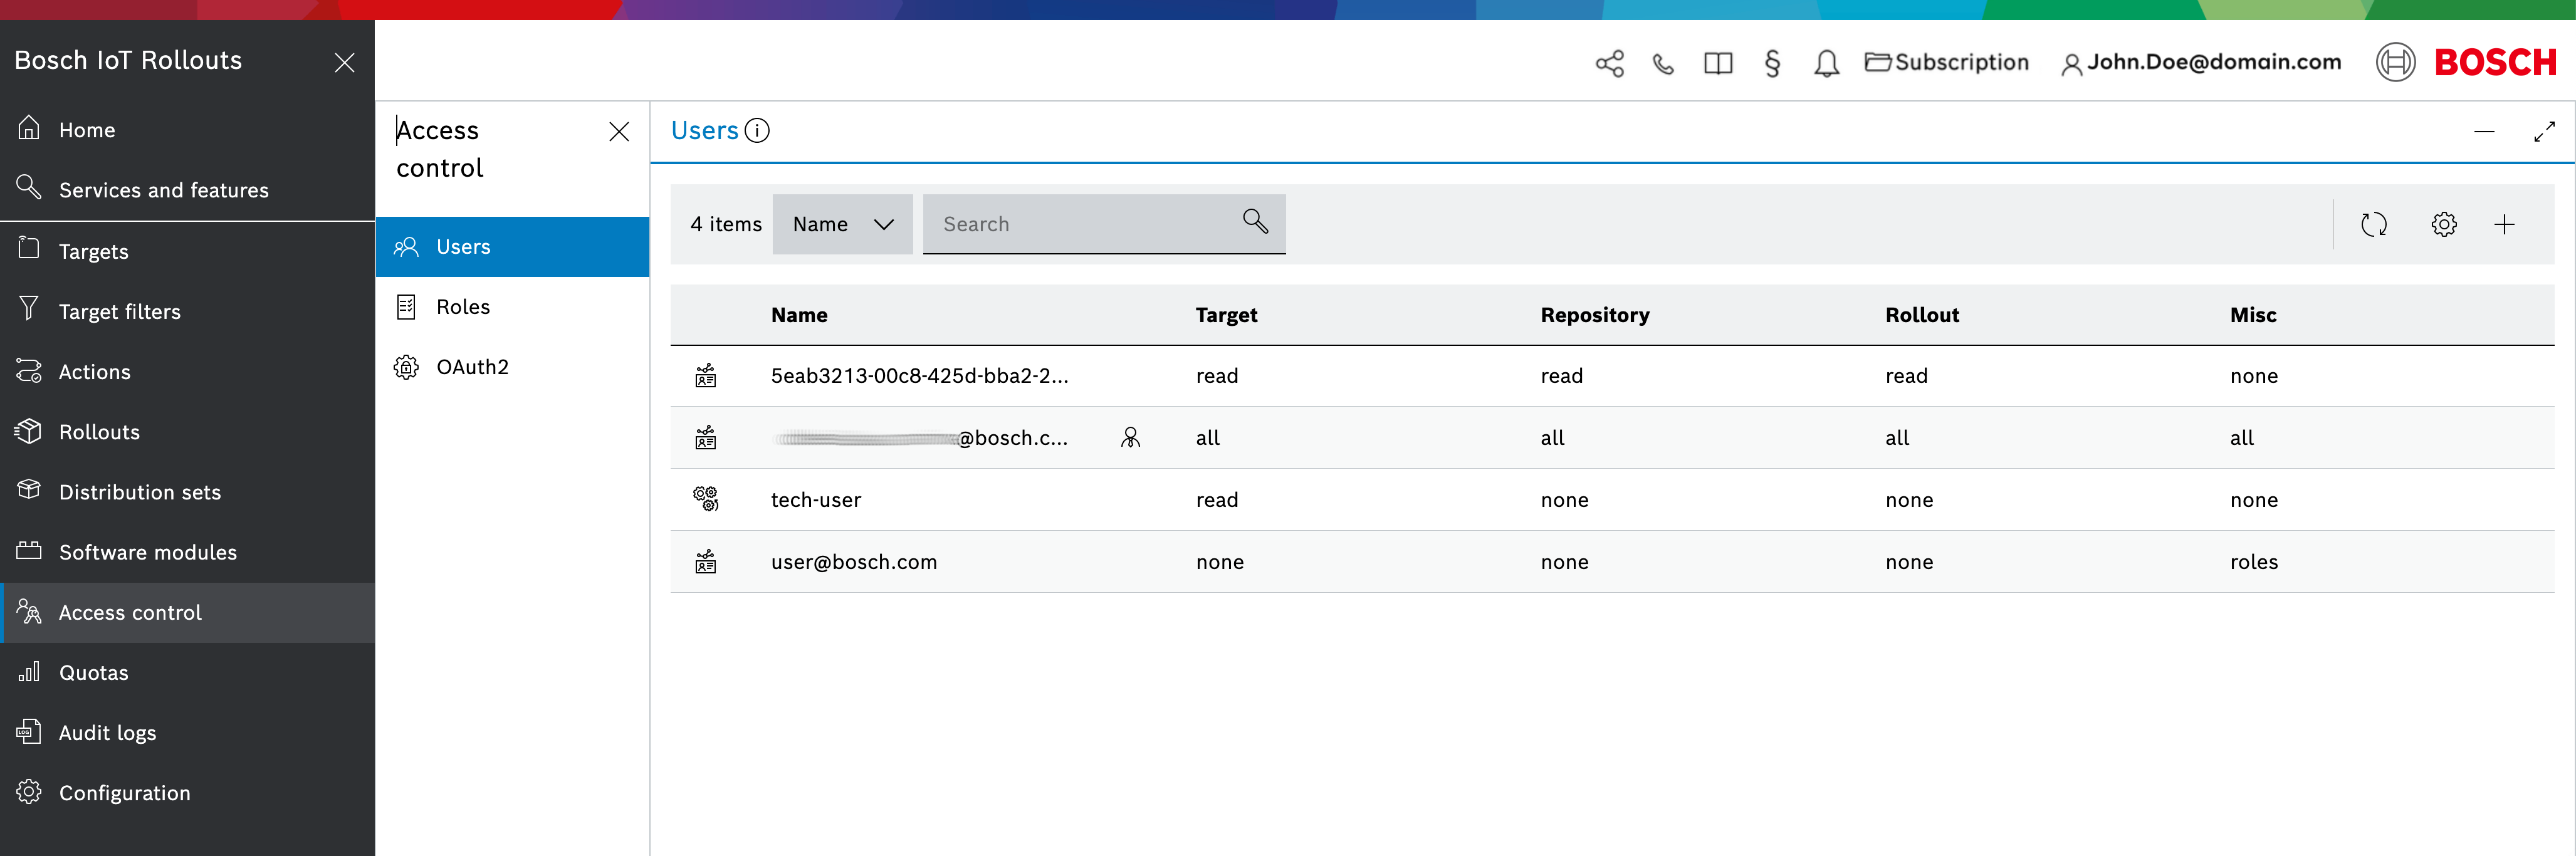
When you select Access control from the main navigation, you will enter the Access control view. Select Users from the menu.
It provides a list of all tenant-related users, both people and technical clients.
Each user is listed with their name and user type.
The type is indicated by the icon in the Type column and can be System or Open ID.
The related permissions of each user are organized by resource and displayed in the following columns:
- Target
- Repository
- Rollout
- Cryptographic keys
- Certificates
- Misc
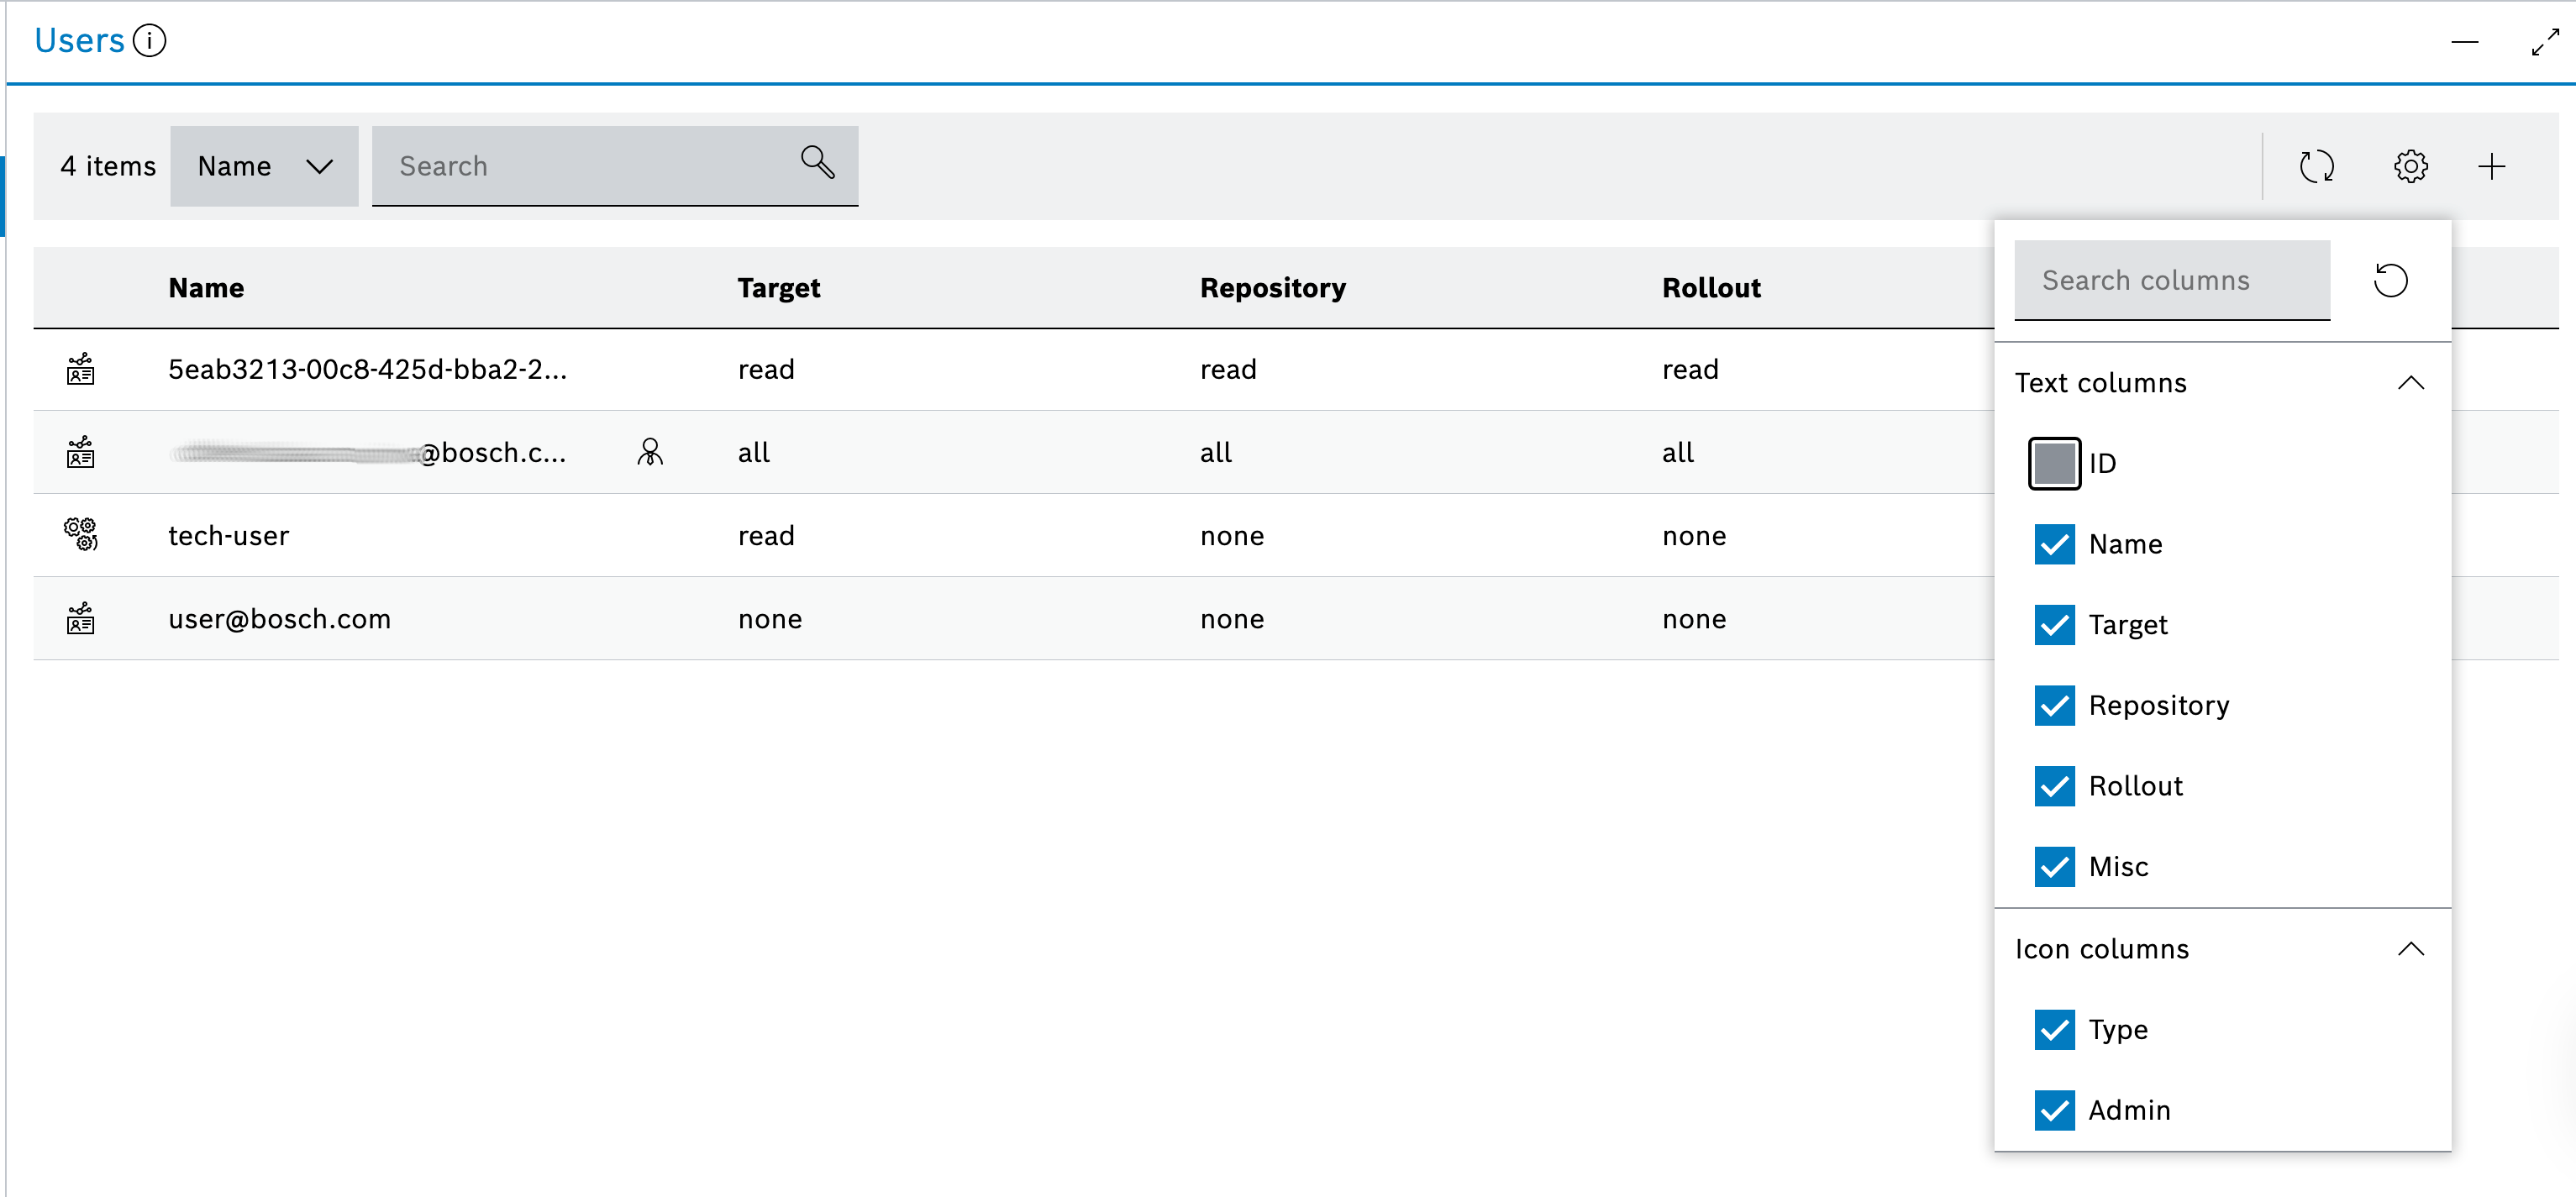
As in other UI features, you can configure the table columns. In the Users view, columns are visible by default, but you can remove some if preferred.
You can also trigger a refresh via the respective button.
View user details
You can view each user's details by selecting the user from the list. This will open the User view.
In the User view, you will see the user ID, name, type, and permissions. You can copy the user name by clicking the Copy to clipboard icon on its right.
Under the Permissions, you will find a detailed view of the user's permissions grouped by purpose.
If All permissions were selected upon user creation, all checkboxes will be selected.
If a more fine-tuned approach is chosen, only the checkboxes for the provided permissions (All, Create, Read, Update, and Delete) will be ticked for each resource, e.g., Target, Repository, Rollout, and Misc.
